Pico C review: Making homebrew beer easy for beginners
Nearly hassle-free brewing comes with a huge trade-off.


PicoBrew has made a name for itself with a range of beer-making appliances that promise a "set it and forget it" experience. The company covers the gamut of brewing levels, from the Zymatic (now Z Series) for pros to the Pico Pro and Pico C for intermediate folks and beginners, respectively. While PicoBrew's entire product line offers WiFi connectivity for remote monitoring of the process, its PicoPaks make the whole process even easier by bundling all the ingredients into a simple, self-contained pod. However, as I found with the $499 Pico C, that simplicity has one big trade-off.


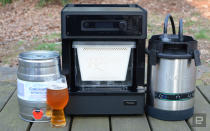
If you're not familiar with PicoBrew's gear, every model works more or less the same. The devices are the size of kitchen appliances (think Instant Pot for the smaller C and large convection oven for the Zymatic) and have a clear drawer that holds all the ingredients and works as a mash tun to create your wort. Each connects to a keg that serves as both boil kettle and fermentation tank. Once you put in your ingredients and add the proper amount of water, you select the recipe and hit start -- the machine does the rest. And a couple hours later (when your wort has cooled), you add your yeast and start turning that sugar water into beer through the magic of fermentation. It's this type of all-in-one setup that makes PicoBrew's line of products a compelling option -- at least for those who don't like tending to a brew kettle during the whole process.
The Pico C's all-black exterior won't look too out of place if you leave it on your kitchen counter all the time. I actually prefer it to the silver/chrome combo on the Pico Pro, but I have black appliances, so it fits right in. The only real issue with leaving it out is that it takes up quite a bit of counter space: It's 16 x 12 x 14 inches (H x W x D). However, it did fit under my cabinets, so that means you can tuck it in a corner between brew sessions. You'll likely want to store the kegs and other gear elsewhere.
Setup
Once you unpack everything, setting up for your first brew takes about 15 minutes. You'll have to connect to your home WiFi and register the unit before you do anything else. Then you run a 10-minute rinse cycle with distilled water and a brew keg. When it's complete, drain the water from the reservoir on top of the Pico C, dump it and rinse both the clear drawer (Step Filter) and brew keg. The system is now ready.
PicoPaks
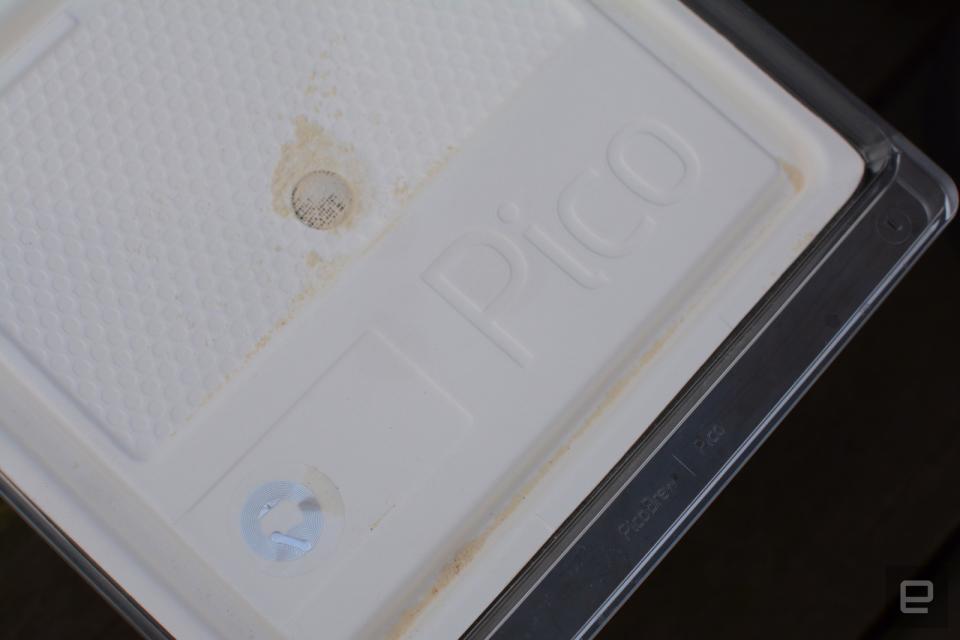
In order to make beer with the Pico C, you'll need a PicoPak. These prepackaged-ingredient containers debuted on the Pico Pro, and they make the process super easy for someone just wading into homebrewing. However, they can be incredibly limiting for someone with a bit of experience like myself. Yes, they are super convenient, but you have to order them from PicoBrew or a licensed retailer and wait for them to arrive. Depending on your shipping method, this could take about a week. That may not sound like a long wait, but it does mean you can't have a spur-of-the-moment brew day.
Since the Pico C doesn't work with loose grains and hops, you can't just run out to your local homebrew shop on a Saturday morning. PicoBrew says "a limited number" of physical locations stock PicoPaks, but unless your local Best Buy has them on the shelf, you're out of luck. A few other retailers -- Bed, Bath & Beyond, Home Depot and more -- sell the PicoPaks online, but if you're having them shipped, you might as well order direct from the source.
Basically brewing with the Pico C requires you to plan ahead -- something I'm not good at.
If you're ordering from PicoBrew's website, you can choose from a selection of more than 100 packs based on recipes from professionals and homebrewers. There are versions of commercially available beers like Rogue's Dead Guy Ale and 21st Amendment's Brew Free or Die IPA, just to name a couple. You can also use a recipe of your own to create a so-called Freestyle PicoPak. Or if you need a jumping-off point, you can pick a base beer and adjust the hops and grains as you see fit. For example, if you wanted to make a single-hop IPA with Citra, you could start with the American IPA base and tweak the hops before ordering.
There are some constraints though. I'm a big fan of Mosaic hops, so I initially wanted to use that base IPA recipe to make a single-hop beer when I hit a snag: PicoBrew doesn't offer Mosaic for the Freestyle option. In fact, there are only eight hop varieties available for those going the DIY route. I understand not being able to stock every type of hops, but the lack of popular ones like Chinook and Mosaic is disappointing. The company says it is constantly adding new recipes and will add to the Freestyle option as well. New brewers will eventually want to experiment, though, so expanding those DIY packs will be key.
Brewing

When you're ready to brew, all you have to do is turn the machine on and place your PicoPak in the Step Filter (the clear drawer). The Pico C automatically recognizes the Pak and pulls in the proper times and temperatures for that recipe. PicoBrew's instructions are clear and easy, but the device itself will walk you through the steps on the digital display, just in case. It'll even guide you through the cleanup process.
Once everything is in place, simply hit start. The display will keep you updated on which step it's on and how much time is left. You can also track the process on PicoBrew's web-based BrewHouse interface. It isn't quite as handy as a mobile app, but it works just fine. The company says it's working on a dedicated app, but the software is currently in the testing phase, so there's no word on a release date yet.
One thing you need to be aware of when brewing with the Pico C is how loud it is. During the brewing process, the machine is about twice as loud as my dishwasher. This means if I'm watching Electric Dreams in the next room while brewing in the kitchen, I have to really crank the volume on the TV. It's certainly not a dealbreaker, but it's something you should know before investing in the device. Once the brewing is complete and you've pitched your yeast, the fermentation process and the wait begin.
Fermentation and the PicoFerm

The PicoFerm is an optional $59 WiFi sensor that attaches to the top of a brew keg so that you can monitor progress remotely. You don't need this to make beer with a Pico (it's only available for pre-order right now), but it does allow you to track temperature and air pressure (attenuation) in your keg using the web app. The site will also tell you how many days are left in the fermentation process, though since it doesn't monitor gravity, there's some room for error.
I used the PicoFerm on two of the three batches I made. If you don't use the sensor, you lose some of the guidance of the PicoBrew system -- and a big part of its appeal. You can still hit "ferment" on the website and it will estimate when the process is complete, but it's not actually monitoring anything. For some, that peace of mind is worth the extra cost. I will say that the PicoFerm worked well for me, consistently sending data while the beer was fermenting. The only time I had an issue was when I forgot to reconnect to WiFi after a couple weeks between batches, but that was pure user error.
Kegging and bottling
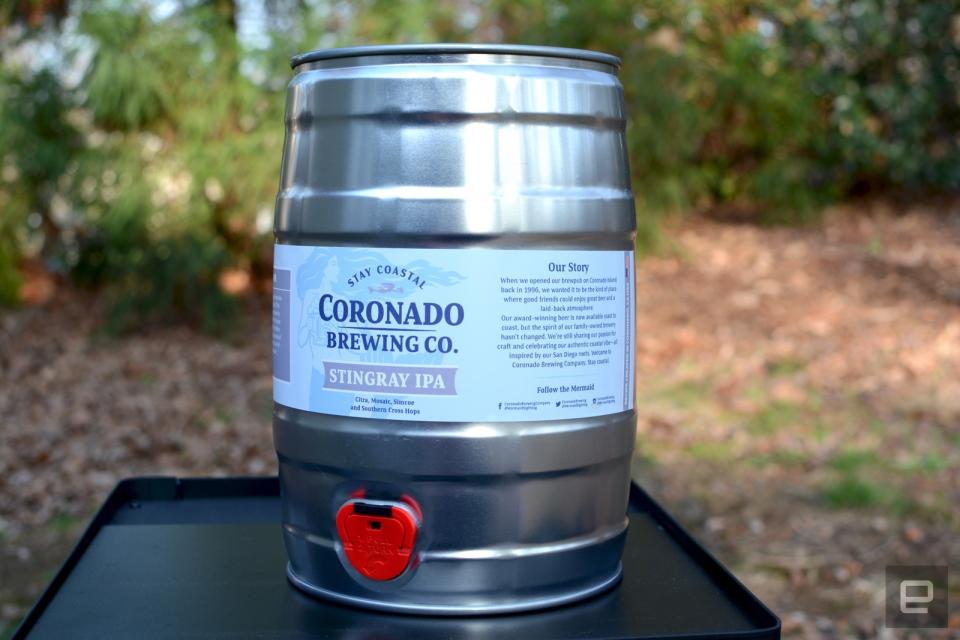
When the beer is finished, which takes about 7 to 14 days depending on the recipe, it's time to keg or bottle. The Pico C comes with a three-liter serving keg that makes packaging your brew super easy. Just select the correct mode in the menu and the device will pump your beer into the mini keg or bottles for you with the included tools. If you've homebrewed before and used a racking cane and bottling wand, this is similar but a lot less messy.
There's a force-carbonation kit that you can use to infuse your beer with CO2 in about 36 hours, or you can go old school and use priming sugar to condition your beer naturally over the course of about two weeks. Carbonation can be fickle, and even after a few batches, I wasn't able to dial in the levels I wanted. Both methods worked okay but weren't precise. That's not necessarily a knock against PicoBrew; sometimes these things just need to be fine-tuned over time, especially when you're using a new package size and brewing system.
I'll admit I was skeptical of what the Pico C could produce in terms of overall quality, but I was pleasantly surprised when I tasted the results. Each batch was pretty solid, but the batch based on Tallgrass Brewing's Buffalo Sweat Oatmeal Cream Stout and my Freestyle PicoPak single-hop Citra IPA were the standouts. The Pico C makes brewing easy, but most importantly it makes good beer.
Competition

The Pico C is limited, though, and the initial $499 investment is pretty steep. For as little as $60 you can put together a beginner's brewing kit of your own or buy a prepackaged one. Yes, it's a bit more labor intensive to brew in your kitchen or on a burner in the garage, but you could certainly use that extra money to buy more ingredients or expand your system to make more beer or higher-quality beer. Of course, if you'd rather not futz around with it, there are plenty of semiautomated options.
If you have a draft setup, consider splurging for the $799 Pico Pro. Instead of a proprietary Pico Keg, the Pro uses the more standard cornelius kegs (ships with two). But it brews the same amount per batch as the C and still requires you to use PicoPaks.
If you'd rather not bother with the PicoPaks, the Zymatic (which will soon be replaced by the Z Series) will cost you. The Zymatic is priced at $1,999, and the modular Z Series will start at $2,500 (discounted to $1,499 during the pre-order phase). Both options whip up 2.5-gallon batches, but the Z Series can scale up to 10 gallons total in 2.5-gallon increments.
If you're a little more serious about brewing but still want some automation, there's the Grainfather. You'll have to supply your own fermenter, but glass carboys are cheap and even a bucket from Home Depot will do in a pinch. But otherwise the Grainfather is an all-in-one setup where you can mash, boil and cool your wort with precise temperature control. You can make batches up to 25 liters (6.6 gallons) and control everything from an app. You can even set a timer: Fill it up with water before bed and wake up in the morning ready to start brewing. But at $1,000, it's definitely targeted at experienced homebrewers. Brewie is another automated all-grain option that lets you use whatever ingredients you like, but it too is very expensive ($1,900), so it's made for serious homebrewers as well.
Wrap-up
PicoBrew set out to make a Keurig-like device for brewing beer, and it has largely succeeded. The Pico C is an easy-to-use machine that makes good beer on your kitchen counter while you watch TV or work on other things. Beginners will definitely appreciate the simplicity and hand-holding, but if you get the urge to experiment, the C could get frustrating. Currently, the PicoPaks have a very limited selection of ingredients, especially hops. Plus you have to really plan ahead. If you're good at that, then you won't have too many headaches. I, however, am not, so relying on PicoPaks is a major inconvenience. Even though the machine works great and it consistently made good beer, I just couldn't get past that limitation.
