Using Pages to print Christmas card labels

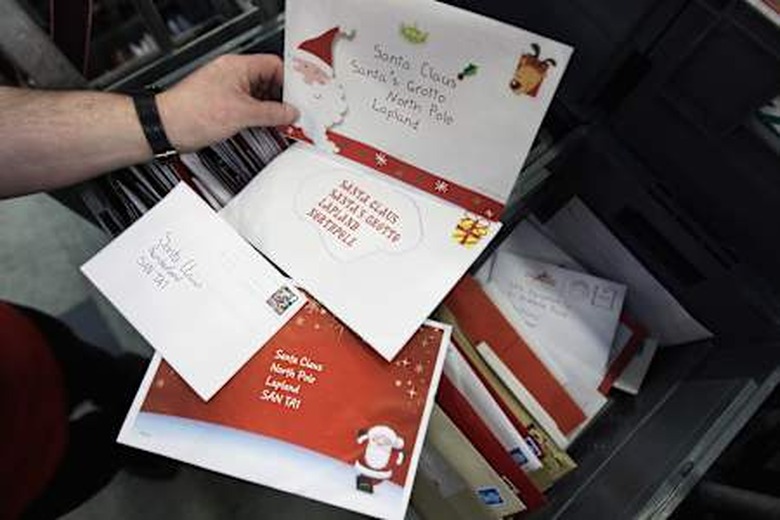
Unless you just have a handful of people that you send Christmas cards to — or you're lucky enough to have friends and relatives who are happy with receiving a phone call or email for the holidays — you may have the annual task of sending out a pile of cards. Before computers came along, my wife and I used to hand-write the address onto every envelope...
To make life easier, I eventually created a set of labels in Microsoft Word that would print out onto Avery labels, and I just update that list every year to print out another set. This year, I wanted to do it with Pages as I'd love to eventually be able to just grab my iPad, load the printer with the Avery sticky labels, and have 'em done in a few minutes. Here's a how-to on printing creating labels in Pages for OS X — and once you've created them on a Mac, you can open up that document on your iPad or iPhone.
1) Find a label format you like.
Here, I suggest going out to the Avery website and using their Label Selector wizard. You can specify the type of label, the number you want to print per page, the type of printer (laser or inkjet) and other factors, at which point it gives you an idea of the labels to buy. You can pick 'em up at your local Office Max/Office Depot/Staples, as they usually have a good selection of the label stock on hand. I personally like the Avery 8160 labels, which come in a pack of 750. Others might select the 5660 laser labels, which are clear.
You might wonder why I wouldn't just use the Avery label templates. Well, all of them are in Microsoft Word format, and when opened in Pages, you get some odd results ... like two pages of misaligned labels. The process described here really doesn't take too long, and you'll be an expert with the table tool in Pages when you're done.
2) Take some measurements
Once you've purchased your labels, measure the following dimensions:
- Margin on left, right, top and bottom of page
- Spacing between labels (horizontally; there's usually no space between the labels vertically)
- The height and width of the labels
3) Launch Pages for OS X
First thing we need to do is select a document type. I chose a "Blank" document (it's in portrait orientation). Select that from the Choose a Template dialog, then click Choose.
4) Set Document Margins
Choose View > Inspector > Document Setup from the menu. Uncheck header and footer, and set the document margins to the dimensions you measured in Step 2. For my labels, those measurements were .18" on the left and right sides of the labels, and .5" at the top and bottom.
5) Add a table
We're going to use a table to hold the text for the labels. Click the Table button on the toolbar and select a format. Don't worry about the shading; we'll get rid of it later. By default, Pages added a table that was 4 columns across and 5 rows high. We need to match the labels — three across with two spaces or five columns total, and 10 rows. Add another column by right-clicking on any one of the column headers and selecting either Add Column Before or Add Column After (see below). In this example, I now have five columns.

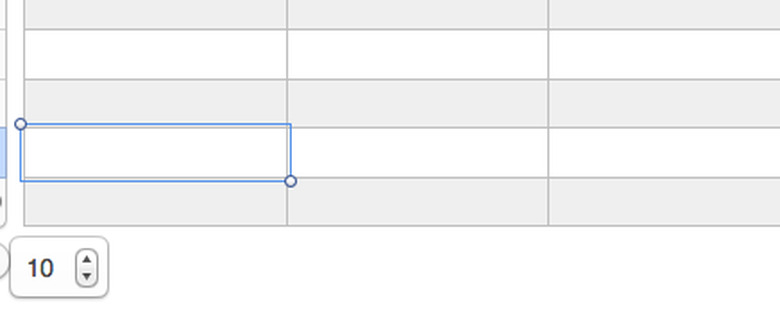
To add rows, I click on any cell in the table to see the column and row headers, then click on the button below the last row (it looks like a circle with an equal sign in it). A number picker appears (see below), and I click the "up arrow" until the number of rows is 10.
6) Change the table cell dimensions
The first thing we need to do is make columns B and D — which will be the horizontal spaces between the labels — .16" wide. Click on the header for column B, then Command-Click the header of column D. Move the cursor to the right side of the header for column B until it turns into a double-sided arrow, then click and drag the column border to the left until the dimension is .16". Your other selected column, D, will also become smaller.
Now we need to make the columns A, C and E the same width as our labels; in this case, that's 2.6". I click on the header for column A, then Command-Click on the header of columns C and E. Next, I move my cursor to the right side of the header for column A until it turns into a double-sided arrow. At this point, I can click and drag the column border to the right until the dimension figure is 2.6". Note that my other selected columns, C and E, will also expand.
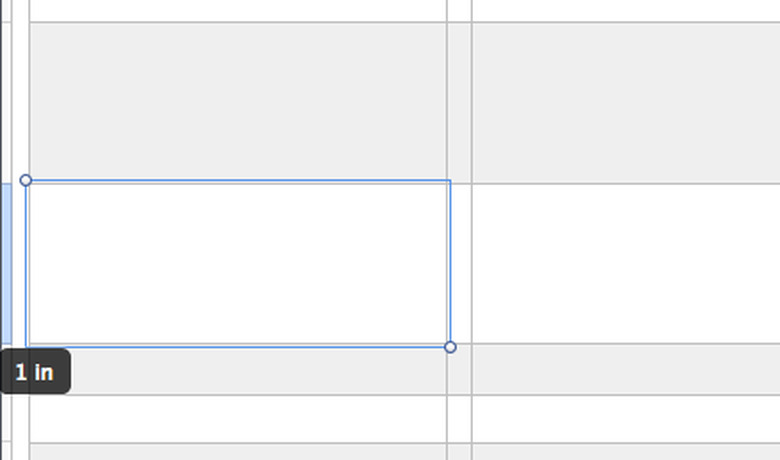
Lastly, we need to increase the height of the rows to match our label height — in this case, 1.0". To do this, I click on a cell in the first row to show the column and row headers, then I hover my cursor over the both of the Row 1 header until it turns into a double-ended arrow, this time pointing up and down. Drag the row border down until the vertical dimension is 1.0" (see below). Unfortunately, you need to do this separately to each row.
7) Get rid of the cell shading
Select View > Inspector > Format from the menu, when you see the sidebar appear, click on Table, then uncheck Alternating Row Color (see below). This should give you an "all white" label with a thin black border.

8) Save the document
At this point, save this document — either onto your Mac or onto iCloud — so you don't lose your work.
9) Add more pages of labels
Unless you have a lot of friends and relatives who are happy to exchange Christmas greetings electronically, you may need more than one page for your labels — including a page for return address labels. Adding more labels is as simple as clicking in one cell, choosing Edit > Select All from the menu, then choosing Copy (Command-C), clicking outside of the table at the very bottom of the page, and then doing a Paste (Command-V). The second batch of labels is pasted onto a new page, although with the wrong column widths and placement — you'll need to move them around a bit and check the column widths and row heights until you get your labels just right. Then repeat to add even more pages of labels to your document.
For a friend of mine who needs a lot of labels, I created an empty document that had ten pages — that's 300 — labels. Me? I don't have that many friends. :-(
10) Add addresses
Before you start adding addresses, let's do one more thing: go into the sidebar in Pages and uncheck "Resize rows to fit cell contents". This insures that if you accidentally put too much information into a cell or increase the text size too much, you won't accidentally knock your labels out of whack.
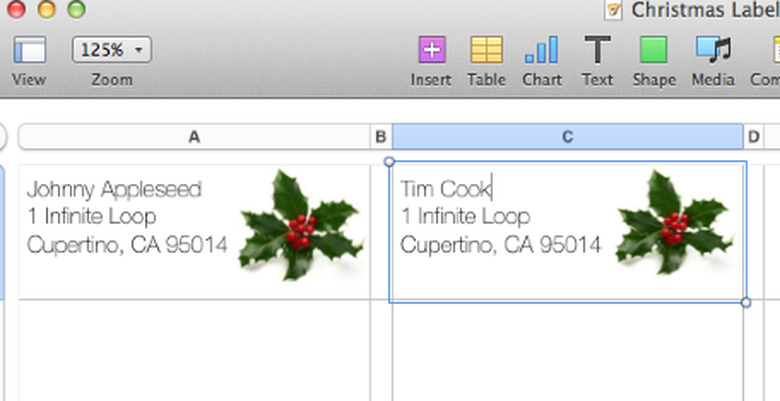
Now just start typing into the cells. You can click "Text" in the sidebar to change fonts, sizes, styles. You can even paste in some little graphics if you'd like. I found a nice holly PNG file with a quick Google search, and inserted it into my cells (below).
11) Remove grid lines prior to printing
OK, now it's time to do one last thing — get rid of those grid lines on the tables. To do this, select one cell on each page and then click the "Grid Lines" buttons in the sidebar (Table) to make the grid lines go away.
12) Test printing
Before you waste some of those expensive labels, be sure to make a test print. Print your completed document on paper, and then put it behind the labels to make sure that things line up. You may find that addresses are too close to the borders, in which case you can consider using the text indentation tools in the sidebar to move text to the right.
That's it. You still have some time to get your labels typed in and printed out, so you have no excuse for not sending out those holiday greetings. Get to work!