How to install Yosemite on a USB 3.0 flash drive


OS X Yosemite has a lot of people excited, and for some good reasons — a new, more iOS 7-like UI, AirDrop that works with iOS, calling from Mac, and a host of other really useful and fun new features. Developers are already testing the new OS, and the general public can begin testing soon in an open consumer beta. But you should never, ever install a beta operating system on a production machine — otherwise known as "my only Mac" or "the Mac they gave me at work". Instead, you can easily install Yosemite on a USB 3.0 flash drive and have your development/testing operating system available in your pocket just a reboot away. Here's how to do it:
- Download the Yosemite beta installer, also known as "Install OS X 10.10 Developer Preview". For developers, this is simple — just log into the Dev Center with your credentials, click the OS X Yosemite Developer Preview button to open the tab for Yosemite, and then scroll down and click the button to redeem your code to download the installer from the Mac App Store. Once you've logged into the App Store, the download begins and you just need to wait for it to complete.
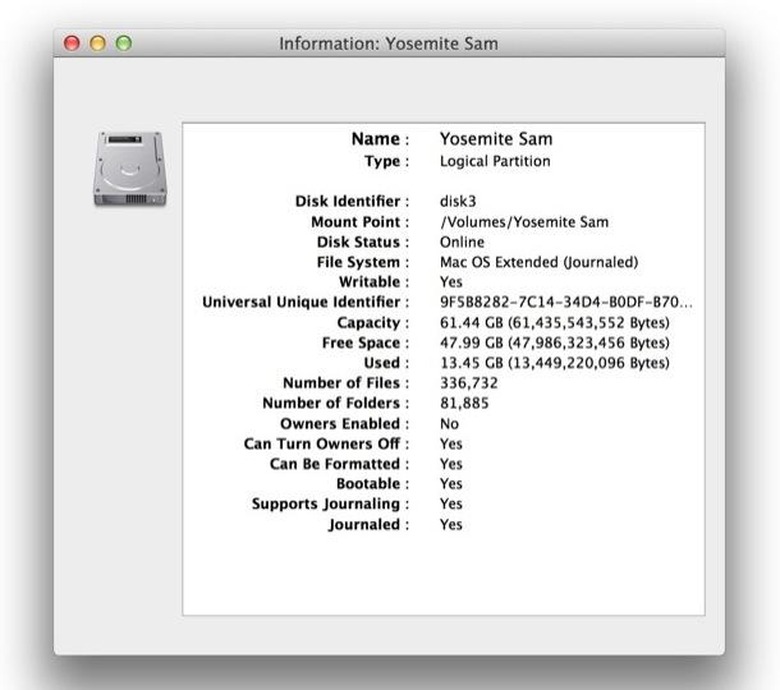
- Now, while all this is going on, get your USB 3.0 flash drive ready to roll. I picked up a PNY 64 GB USB 3.0 drive from Amazon for US$26; perfect for installing Yosemite, Xcode 6, or other apps that you'd like to test with OS X 10.10. You just need to make sure that it's properly formatted and partitioned. My flash drive came with some oddball DOS-based format; I erased it in Disk Utility, then created one full-sized partition set up as Mac OS Extended (Journaled). Once complete, I checked the logical partition to make sure that it was indeed bootable (see image below), and then it was off to the races.
- Note that you might want to create several partitions. Shawn "Doc Rock" Boyd set up a similar drive with legacy operating system installers and Yosemite, which he uses not only to try out the new OS, but to work with his consulting clients.
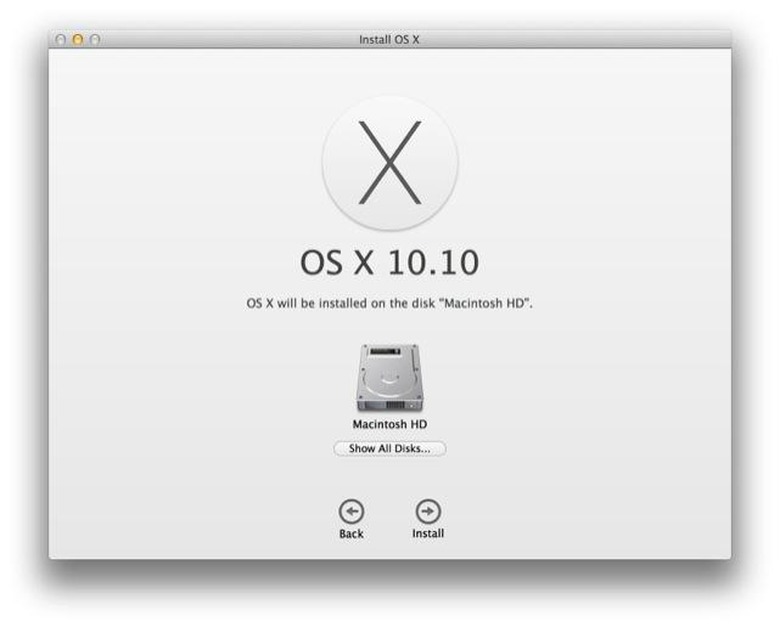
- The rest of the installation is actually quite simple. Launch the installer and it will display a splash screen. Click Continue, and the following screen is displayed. Click the "Show All Disks" button.
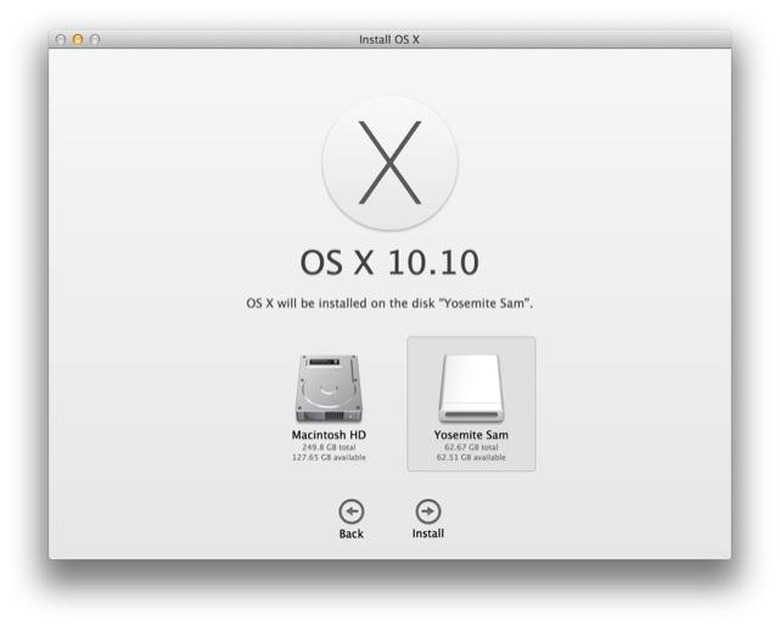
- Select your flash drive, in this case "Yosemite Sam" (see image below). Click the Install button, accept terms and conditions, and then you're on your way.
- Once the installation is complete, you'll be asked to go through the OS X Yosemite Setup Assistant to add information like your iCloud account and password. In the future, if you wish to boot from your previous OS version, just restart, holding down the Option key. You'll be greeted with a display showing the available drives; select your hard drive by double-clicking on it. Likewise, if you're back in Mavericks-land and want to play with Yosemite, select your flash drive by double-clicking on it.
A few caveats about this method of running the beta. First, even though USB 3.0 is pretty speedy, it's still going to take a while to boot up Yosemite. Second, this is a beta operating system, and at least with the first developer beta, it's pretty pokey in terms of a lot of operations. Third, you'll also have to put up with things like Spotlight indexing all of the files on your Mac, Mail doing whatever it does with your existing Mail the first time, etc...
If speed is a real concern to you, my suggestion is to purchase a Thunderbolt drive to install Yosemite onto. For me, though, cost was the major criteria and $26 seemed about right. And even though it's rather slow, being able to see the clean new UI of Yosemite in all of its glory on my Retina MacBook Pro is worth the wait: