The best ergonomic keyboards for 2026
Fully split, Alice, mechanical, ortholinear keyboards — we tested them all.
We may receive a commission on purchases made from links.
If you experience discomfort after long hours behind a desk, simply slapping an ergonomic mouse and keyboard on your desk won't solve the problem. First, you have to address the root issue of sitting still for too long by standing up and walking around each hour or so. But after that, it's worth considering your workstation ergonomics. An ergonomic keyboard can prevent the hunching, twisting and contorting that leads to discomfort. With split, tilt and angled keys, these boards help keep your shoulders and chest more open and your forearms and wrists more aligned. One ergonomic board won't work for everyone, so I tested out 15 different models. I found my personal favorite and hope this guide will help you find the best ergonomic keyboard for you, too.
Best ergonomic keyboards for 2026
Best wireless ergonomic keyboard
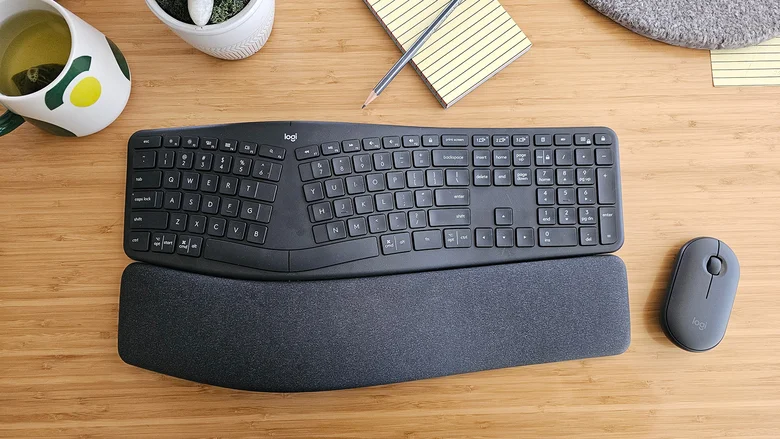
Logitech Ergo K860 Wireless Split
Ergonomic features: Alice split, center tenting, optional negative tilt, wrist rest | Host connection: Bluetooth or USB receiver | Switch type: Scissor | Hotkey compatibility: Mac and Windows | Ten key: Yes | RGB lighting: No | Programing interface: Logi Options+ (app) | Language/Layout: QWERTY
The Ergo K860 from Logitech closely resembles standard, full-size keyboard designs, so there's not much of a learning curve. But subtle changes like the Alice layout, tented middle and optional negative tilt make typing noticeably more comfortable. I could keep my elbows comfortably away from my ribs, my wrists were straight and my palms could rotate naturally inward.
The board connects quickly and reliably via Bluetooth, the build is solid and the price of $150 isn't outrageous. It's Mac, Windows, Chrome and Linux compatible (though you'll need software for non-basic key functions for the latter two). Buttons allow you to swap between three previously connected devices, which worked great for me, even between a MacBook and a PC. Function keys like volume and brightness and the Option/Start and Command/Alt combo keys worked correctly on each machine.
My only qualms are that the palm rest is not removable (though it's springy and firm). The arrow keys and a numeric keypad on the right side adds length to that side of the board, which forces your mouse farther out. The scissor switch keys can feel mushy if you're coming from a mechanical board, but they're responsive enough to make this one of the best wireless ergonomic keyboards.
- Rotated keys and palm rest make for comfortable typing
- Wirelessly connects quickly to three devices
- Hotkeys work with MacOS and Windows
- Takes up a large footprint
- Wrist rest is not removable
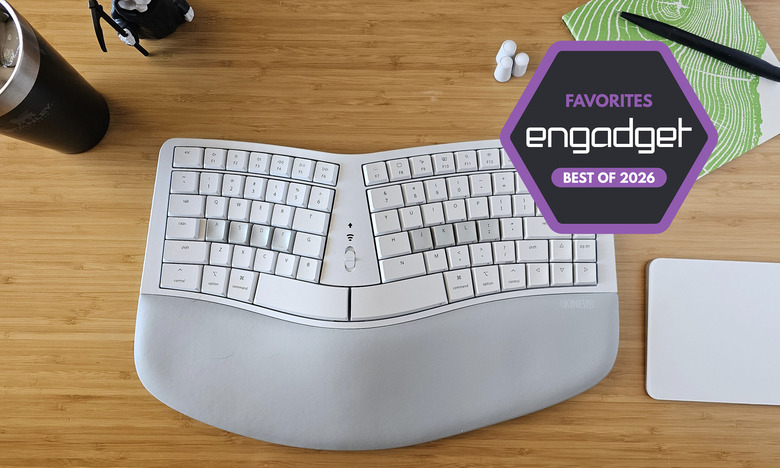
Ergonomic features: Alice split, center tenting, optional negative tilt, wrist rest | Host connection: Bluetooth or USB-C | Switch type: Mechanical Gateron low-profile Brown | Hotkey compatibility: Mac or Windows (two models) | Ten key: Yes (with layers) | RGB lighting: No, just backlighting | Programing interface: Kinesis Clique (browser) | Language/Layout: QWERTY (programmable)
The mWave from Kinesis has very similar ergonomics to our top pick from Logitech. A unibody, tented, Alice-split design that makes typing more comfortable while not being difficult to learn. But this adds mechanical keys, a tenkeyless design and programmable layers — plus it's about $30 cheaper. You also get three magnetic feet to create an optional negative tilt.
The missing number pad lets right handed folk put their mouse closer but you can still use tenkey input using the layers function. In fact, all keys are programmable using Kenisis' browser-based Clique software. It's not the simplest programming software and there aren't a ton of extra or blank keys for you to mod, so if you want a lot of programmability, you'll likely rely on layers. The mWave should also appeal to people who just want a plug-and-play option. It comes in two models, a white board with macOS function keys and a black PC version.
The latest model of the mWave fixed my two complaints. The original Gateron Brown switches were springy and responsive but produced a loud, hollow clunk as I typed. It was distracting in my quiet office. The board also came with a USB-C to A cable, which was a little dated for Mac users. Now both of those issues have been put to rest. You now have the option of quiet Gateron Red switches and now the typing sounds in my office are subtle and soft. Plus there's a generously long USB-C to C cable in the box. The newer model costs $10 more, so if noise and outdated cables don't bother you, you can save with the tactile version.
And for those of you looking for a replacement for the now-discontinued Microsoft Sculpt, this is it. The Kinesis rep confirmed the mWave was designed as a replacement for that fan-favorite board — but with a few upgrades like mechanical keys, no dongle, and programmability.
- Springy mechanical key switches
- Plug and play versions for Mac or PC
- Tenkeyless design is more compact, but layers offer an integrated keypad
- Fully programmable
- Wrist rest not removable
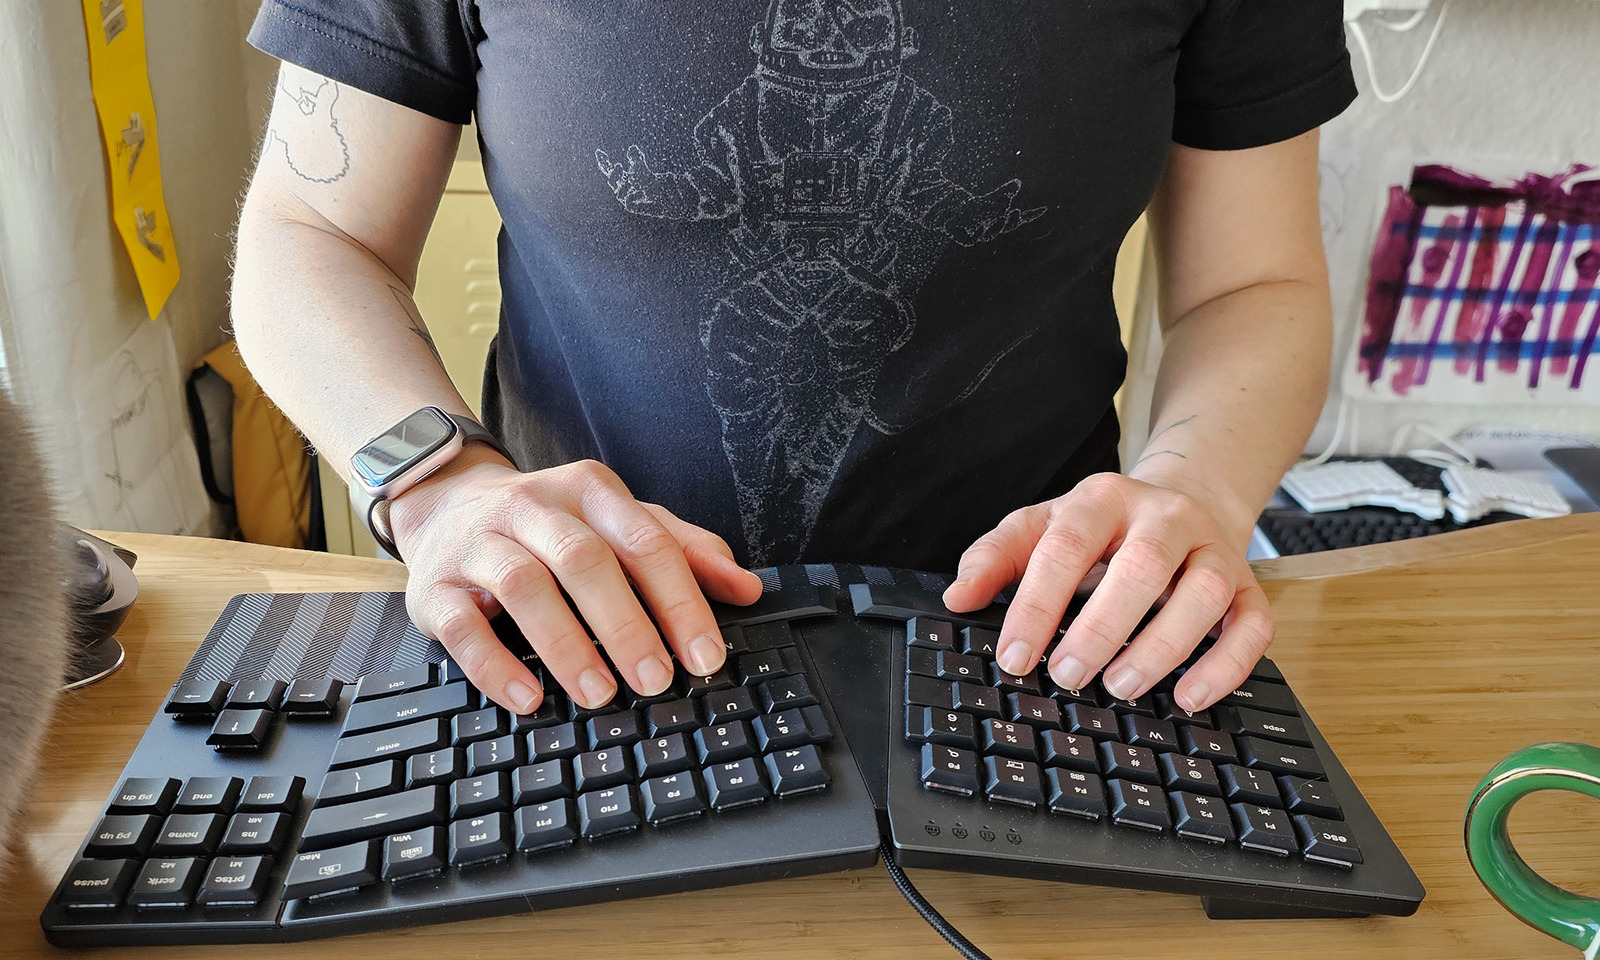
Best split ergonomic keyboard
Keychron Q11
Ergonomic features: Fully split | Host connection: USB-C port | Switch type: Mechanical (tactile or linear) | Hotkey compatibility: Mac and Windows | Ten key: No | RGB lighting: Yes | Programing interface: QMK/VIA (browser) | Language/Layout: QWERTY
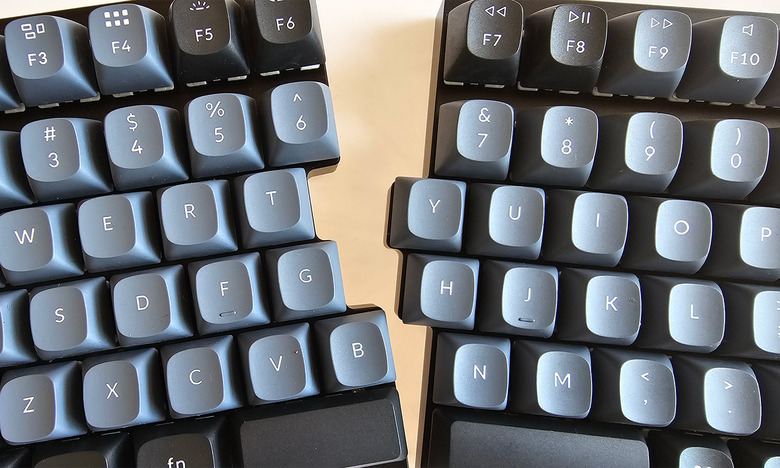
If you (expertly) sawed a mechanical keyboard in two, it would look like the Keychron Q11. You can even push the two halves back together to make it look like a standard, 75 percent mechanical board.
Keychron dominates our mechanical keyboard guide because the company makes such great boards. I tested a model with Gateron G Pro Red linear mechanical switches which were smooth and not too clacky. The PBT keycaps are luxurious and the machined aluminum body feels substantial. It's honestly dreamy to type on.
A switch at the top of the board toggles between Mac and Windows, and there are two customizable knobs at the top corners as well as five macro keys to the left of the board. Those and the rest of the board can be programmed with open source keyboard firmware QMK and VIA, which may take a little effort for someone new to keyboard programming — but once you get the hang of it, it's powerful and effective software.
The fully split board lets me sit nice and upright, without hunching, though I wish the provided cable that links the halves were a touch longer. I'd also like the option of getting some center tenting to keep my palms from having to rotate downwards. But if those things aren't dealbreakers for you, this is a lovely ergonomic keyboard.
- High quality build
- Smooth and buttery mechanical keys
- Fully split keys keep your hands at a comfortable distance apart
- Easily toggle between Mac and Windows systems
- No center tenting
- Short bridge cable included
Best budget ergonomic keyboard
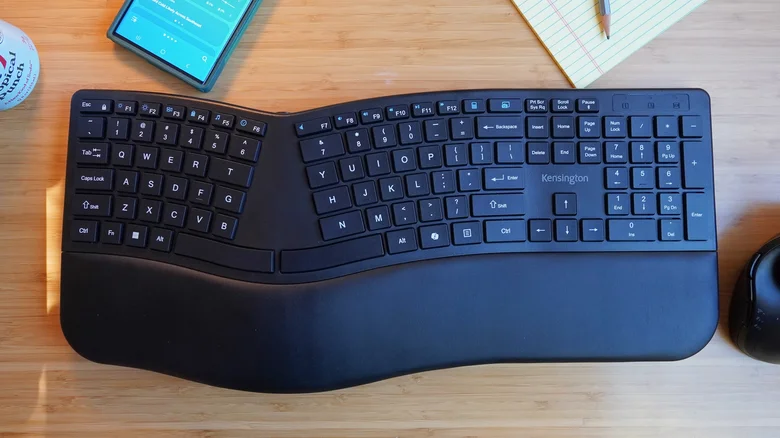
Kensington Pro Fit Ergo KB680
Ergonomic features: Alice split, center tenting, optional negative tilt, wrist rest | Host connection: Bluetooth x2 or USB receiver | Switch type: Membrane | Hotkey compatibility: Windows | Ten key: Yes | RGB lighting: No | Programing interface: Kensington Konnect | Language/layout: QWERTY
If you're just looking for a keyboard with good ergonomics at a decent price, the Kensington Pro Fit Ergo KB680 hits the spot. It doesn't feel cheap like some budget boards — you shouldn't expect the buttery clack of mechanical keys or the cool texture of PBT keycaps — but the membrane switches are springy and the low profile keycaps make typing extra quick.
Ergonomic features include an Alice split and optional negative tilt that's just enough to make the integrated wrist rest hit right at the heel of my hand, instead of pressing against my wrists. Of course, larger or smaller hands will have a different experience, but my men's medium/women's large mitts were comfortable.
Unlike some budget boards, the wireless connection is strong and quick to reestablish after the computer goes to sleep. There's nothing worse than being ready to type out genius thoughts but your keyboard is taking its sweet time waking up. It's rechargeable via USB-C, and Kensington says a charge will last around four months. I didn't use it that long, but I've used other rechargeable Kensington keyboards with the same 500mAh battery and it lasted for months.
There's a built-in Copilot AI key and the keycaps are all coded for Windows use. It worked fine with my Mac for all basic functions, but only a few of the function keys worked as labeled. Kensington's Konnect software allows you to remap some of the keys, but again, I've never had much luck getting it to work with my MacBook. That said, this isn't the board to buy if reprogrammability is important. This is just a solid way to bring some basic ergonomics to your setup, making it one of the best ergonomic keyboards for under $100.
One last thing to note is that most ergonomic keyboards don't have a tenkeypad, but this one does. True, the extra width on the righthand side forces the mouse outwards by quite a bit for us righties, but if you input numerical data regularly, it's a must-have. For a ten-keyless option, I also like Kensington's Pro Fit Ergo KB675. It's also a solid board that's similarly priced with just the right amount of ergonomics.
- Feels more premium than the price would suggest
- Comfortable low-profile keys
- Responsive typing experience for membrane switches
- Tenkey makes it rather long on the right
- Programming software has trouble with Macs
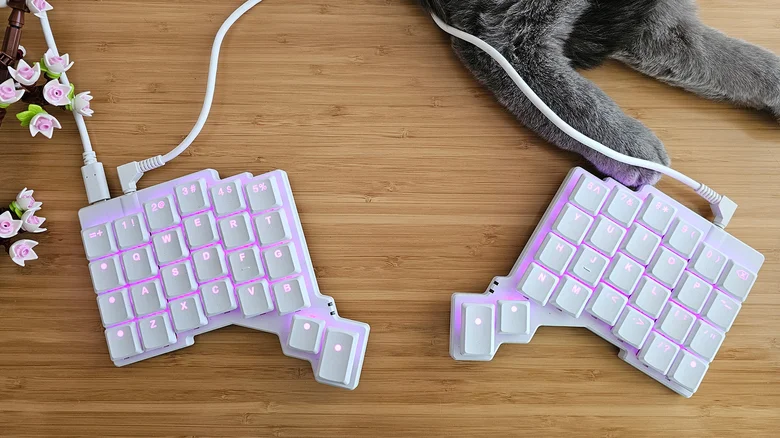
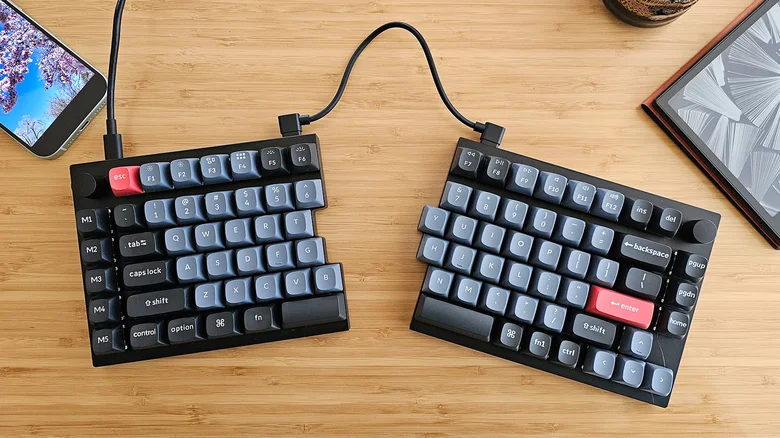
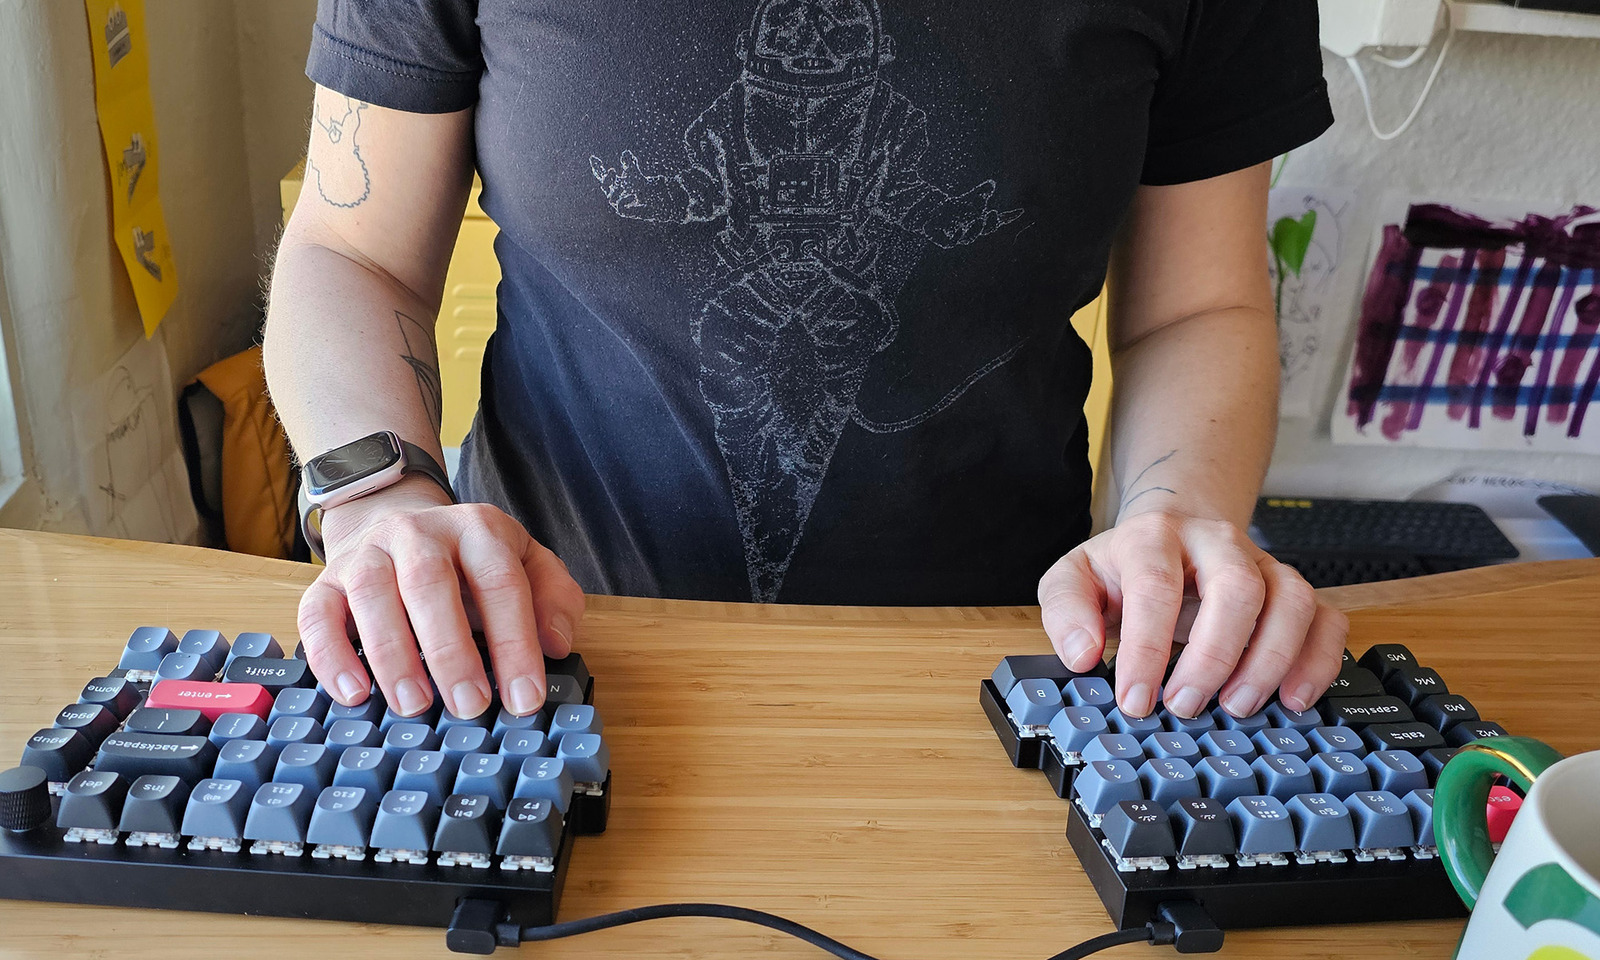
Ergonomic features: Fully split, center tenting, thumb cluster | Host connection: USB-C port | Switch type: Mechanical (tactile, clicky, linear) | Hotkey compatibility: Mac and Windows | Ten key: No | RGB lighting: Yes | Programing interface: Oryx (browser) | Language/Layout: QWERTY (programmable)
A rep I spoke with at ZSA warned me about the Voyager, saying the board has an effect "like a brain injury: A moment ago you knew how to type, and now you don't." That's exactly how I felt after plugging in the impossibly compact accessory. For one, the columnar layout puts keys (particularly those on the bottom row) in spots you don't intuitively reach for. Then there's a thumb cluster where you'll find not just the space bar, but other important keys like return. Finally, the board uses layers, giving each key up to three functions.
I actually had to interrupt testing at one point and plug in another keyboard because I felt I was trying to type with oven mitts on. But now it's my daily driver and I get bummed when I have to go back to normal boards.
Those thumb clusters and layers save serious accumulated time, putting keys like return, control, space and delete under your very dextrous thumbs and turning letter keys into arrows and number pads. You will very likely want to program the board away from the defaults and you can do so with the browser-based Oryx configurator or Zsa's Keymapp app. It's pretty intuitive to program the board, but it did take me about a week of use before I got every key to my liking.
The low profile keys are easy to type on and the switches are responsive with a quick springback. The split allows for a wide, open posture and the optional magnetic legs give it a subtle but effective center tenting. The time it takes to get used to the board is the only real drawback. It takes a few weeks of practice and extra time to program. But in the end, this really does maximize your output while minimizing your movements.
- Fully split board
- Center tenting for a natural hand position
- Thumb cluster lets your thumb do more work
- Compact size and clever key mapping keep your hands in the home position
- Difficult to relearn ortholinear layout
- Takes time to program and learn the right key functions

Ergonomic features: Fully split, columnar keys, thumb cluster, wrist rest, optional tenting and negative tilt (additional cost) | Host connection: Wired or Bluetooth and USB receiver (wireless costs extra) | Switch type: Mechanical (tactile, linear or clicky) | Hotkey compatibility: Mac, Windows, Linux, iOS & Android | Ten key: Programmable | RGB lighting: Yes | Programing interface: Bazecor | Language/layout: QWERTY (but programmable to any layout)
Like the Zsa Voyager, the Dygma Defy is another fully split, columnar board with thumb clusters and keys and layers that are per-key programmable. But this adds full sized keycaps, built-in (detachable) wrist rests and twenty more keys, including eight keys in each thumb cluster. (Zsa has a similar model, the Moonlander.)
The Bazecor programming software is one of the simplest to figure out. The keys are a delight to type on with springy and responsive mechanical switches. The board itself is well-made and deluxe, especially with the add-ons. You can add an LED underglow, extreme tenting mechanisms and wireless capabilities (Bluetooth and RF) but each add-on increases the price by $70, $80 and $90, respectively. That brought the fully kitted-out version I tested to $609. Without those, it'll run you $369.
I prefer the minimalism of the Voyager, but this one is likely the best ergonomic keyboard for programmers and for those who prefer a more maximalist work setup.
- Premium build
- 16 thumb cluster keys
- Programming software is easy to use
- Expensive, especially with optional features
- High learning curve
Best ergonomic gaming keyboard
Kinesis Freestyle Edge RGB Plus
Ergonomic features: Fully split, center tenting, removable wrist rest | Host connection: USB-A cable | Switch type: Gateron Pro (linear, tactile) | Hotkey compatibility: Mac and Windows | Ten key: No | RGB lighting: Yes | Programing interface: SmartSet (app) | Language/Layout: QWERTY (default, programmable)
PC gamers who also work at a desk all day may be particularly interested in a keyboard with ergonomic perks. The upgraded Kinesis Gaming Freestyle Edge Plus is a fully split, staggered keyboard with removable wrist rests and center tenting that can raise zero, ten or 15 degrees with the included tent kit. The Plus model came out in October 2025 and now uses Gateron Pro switches, includes four Mac modifier keys and the lift kit (which used to be separate purchases). A key cluster to the left of the board has eight programmable keys, which you can designate in the Kinesis's SmartSet app or with built-in keys.
Since it comes in two pieces, those who play using WASD keys can park the right half elsewhere and bring their mouse front and center. The extra cluster of keys are ideal for macros, letting you execute repetitive tasks and combos with a single stroke. With nine different profiles, you can easily program a work layout and a few different game setups, as the entire board is remappable. Unfortunately, I found the app to be rather finicky so I preferred programming keys using the Macro and Remap keys on the board itself. (You can find the steps to use those keys in the included quick start guide.)
The board feels premium and the optional center tenting is sturdy and creates just enough lift to be comfortable. You get per-key programmability for the RGB lighting and there are plenty of wave, pulse and other effects to apply using the software. The Gateron Pro keys are responsive and issue a satisfying clack. I found the wrist rests comfortable, but they're also removable — just note you won't be able to use the lift kit without the wrist rests installed.
I can only nitpick the Freestyle Edge Plus, really. The attached cable is still USB-A, but a USB-C adapter is included — seems a modern board would switch that, offering the older connection as an adapter. It's also a beast. Some will no doubt like the maximalism look of the board, particularly after they program their preferred lighting effects, but I personally like something a little more compact.
- Fully split means you can just use the left half
- High degree of optional tenting
- Additional programmable shortcut keys
- Built-in cables is still USB Type A
- Somewhat bulky
- SmartSet programming app is dicey
What to look for in an ergonomic keyboard
You might be looking into ergonomic accessories to help with a specific problem, such as carpal tunnel or tendonitis. Or maybe you're simply looking for a way to make long hours at your desk more comfortable. It can help to know some of the terminology and reasons behind various features, which we explain below. Just keep in mind that new equipment alone won't solve the problem. Changing positions, doing regular stretches and taking walk breaks will all go a long way towards making you feel better while you work.
Alice vs split
Most ergonomic keyboard layouts fall into two categories: unibody (or Alice) and split. The former is a single board with the two halves of the keys rotated about 30 degrees apart at the bottom. The separation forms an A-shaped space between the keys — which has nothing to do with why it's called an Alice layout, it's just a happy coincidence. This subtle tweak pushes your elbows away from your ribs while keeping a straight line from your forearm to your middle knuckle. Using one, I pretty instantly felt more open along the front side of my body. This layout more closely resembles a traditional keyboard, so it should be easier for most folks to get used to than a fully split option.
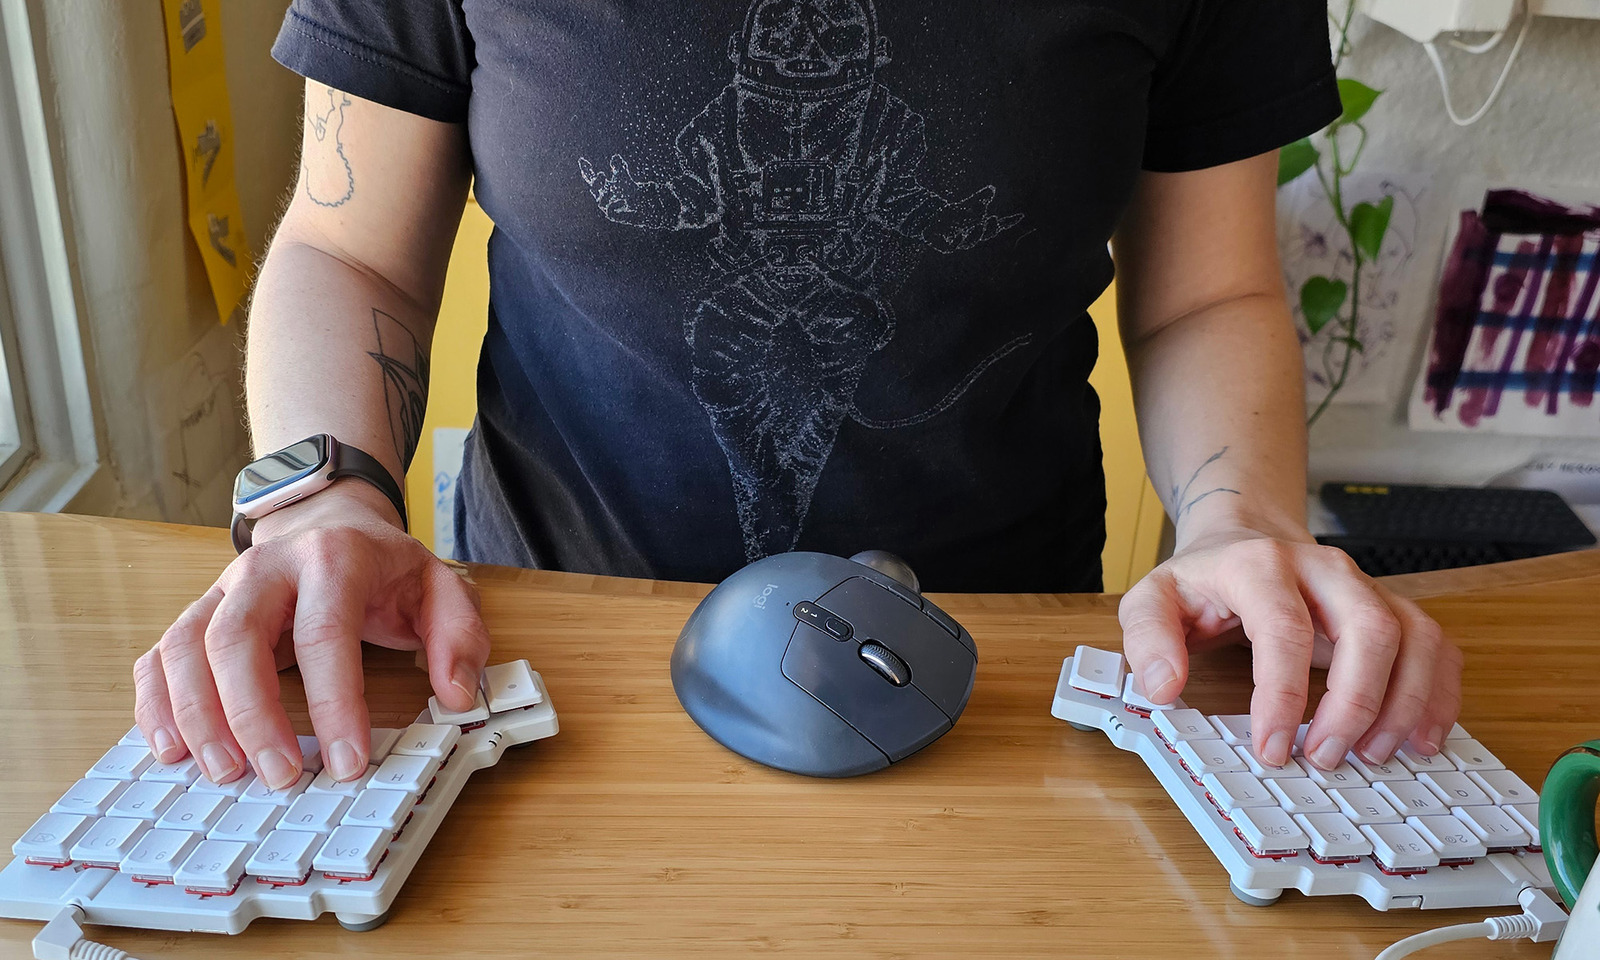
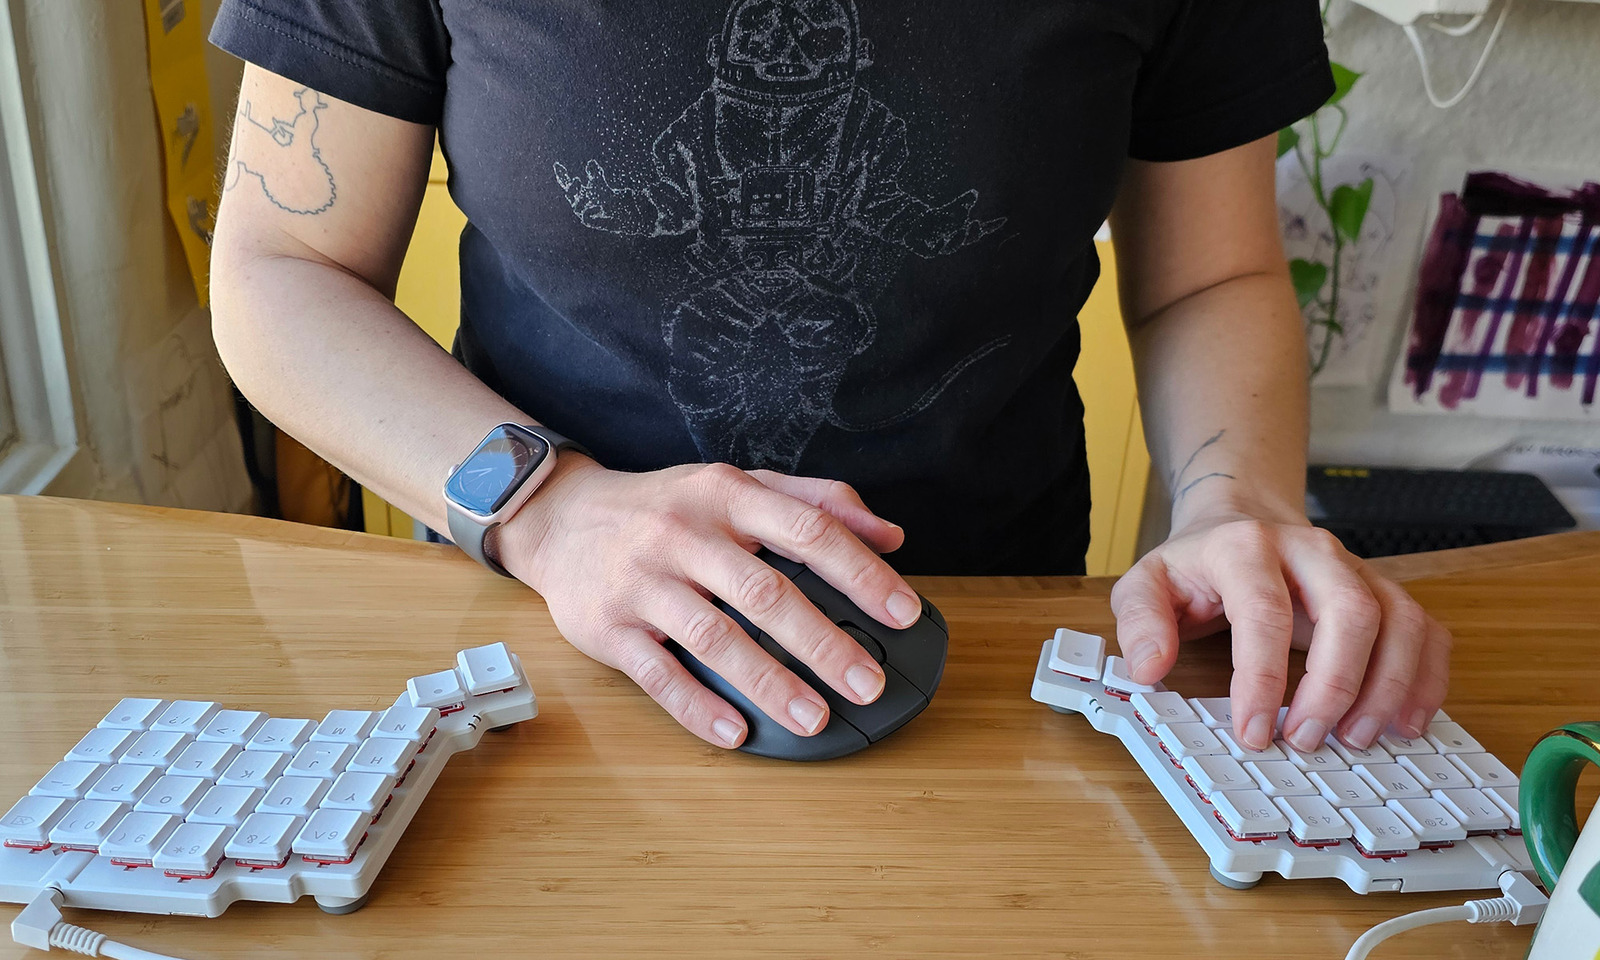
Speaking of, split boards break the keys into two separate parts you can position individually. You can put them shoulder distance apart, bring them closer together or angle them as much as feels comfortable. You can also put your mouse between the halves, which may feel like an easier trip for your cursor hand and could potentially help with conditions like repetitive strain injuries (RSI). Personally, I like being able to put my current snack between the two parts. I've also found that pairing a split keyboard with a good ergonomic mouse has helped me even more, particularly a vertical mouse.
Tenkeyless
You can find ergonomic keyboards with and without number pads. Not having those number keys on the right hand side lets you keep your mouse closer in, minimizing overall reach. But if you work with numbers a lot, you'll likely want that pad included. Some programmable boards allow for the use of layers, which temporarily repurpose keys and can provide you with a ten-key option through clever remapping of letter keys.
Tenting and negative tilt
Tenting raises the middle of the keyboard up, so your hands move closer to a "handshake" position. Alice keyboards usually angle up towards the middle and always to a fixed degree, since the two sides are connected. Split boards often let you adjust the degree of tenting, going from flat to subtle to extreme lift.
You may have encountered keyboards with an optional lift at the back of the board, raising the top keys higher than the space bar. Every set of hands is different, but for most people, pulling the backs of the hands towards the forearms increases strain. Negative tilt has the opposite effect by sloping in the other direction, lowering the top number keys while raising the edge with the spacebar. Many Alice and some split keyboards offer an optional negative tilt. I found it was more comfortable to enable that feature when I'm standing, and I preferred to have the keys flat when sat at my desk.
Staggered vs columnar
This decision seems to be one of the more hotly-contested among ergo enthusiasts. A conventional keyboard has staggered keys, with each row slightly offset to the rows above and below it — so the A key is about halfway between the Q and W above it. This is a holdover from vintage mechanical typewriters, in which each press activated a hammer that smashed ink onto paper in the shape of a letter. To fit the hammers as close together as possible, while still allowing for finger pads, the keys were staggered.
Columnar or ortholinear keyboards stack the keys in orderly columns, often with rows that are not linear. Proponents claim this makes the keys easier to reach. Whether that's true will be up to your fingers to decide, but I can say for certain that if you learned to type on a staggered keyboard, switching to a columnar layout is tough. It will take days, possibly weeks before you instinctively hit the C key. The N, M and B keys don't fare much better.
Programmable keys
With a few exceptions, most ergonomic keyboards will work with PCs or Macs as a standard typing input, but the use of function and hot keys may require some remapping. It can be as easy as an onboard switch to toggle between Mac and PC layouts, or as involved as downloading software to change up the keys. Some boards even include (or let you buy) extra keycaps to change, say, the Mac's Command and Option keys to PC's Start and Alt buttons. Those are what's called hot-swappable keys, meaning you just pull the old key off (usually with a provided key puller) and stick the new one on, no soldering required.
For some boards, remapping or programming keys using software is a crucial feature. Gaming peripherals have extra keys that you can set to execute a series of keystrokes with the push of a single button, and we cover the best gaming keyboards in a separate guide. Keyboards that work with layers, in which a single button can perform several functions, typically allow you to change what those are. Some ergo keyboards have non-standard layouts, like thumb clusters with multiple keys near the space bar that you operate with your thumb. You'll also be able to program those.
Other considerations
Ergonomic keyboards come in mechanical, membrane, and scissor switch versions. Which works best for you is, again, up to your preference. I won't get too deep into the particulars here, as we have an entire guide devoted to the best mechanical boards, but the short of it is that membrane and scissor switches are less customizable than mechanical and typically cheaper. Typing on them tends to be quieter and softer. Mechanical switches are more customizable, offer a more responsive typing experience and are usually pricier.
You'll also have the option of wired or wireless ergonomic boards. All other things being equal, wired models are less expensive. Competitive gamers who rely on split-second responses may prefer the zero-lag of wired keyboards. Wired models also never run out of battery life and have fewer connectivity issues. But wireless keyboards keep your desk less cluttered.
Some ergonomic keyboards come with permanent or removable wrist or palm rests, which can be cushioned or hard. This is another area where opinions diverge: proponents claim they help you maintain a neutral hand position, while detractors say they put pressure on the tendons and can cause wrist pain or even exacerbate conditions like carpal tunnel. Ideally, your palms should be resting, not your wrists, and you might find you like having that support or you may find the pressure uncomfortable.
How we tested ergonomic keyboards
All our guides begin with extensive research to figure out what's out there and what's worth testing. We consider brands with good reputations that we've heard good things about from colleagues and look at keyboard reviews in forums and other trusted publications. For this guide, I looked for keyboards with ergonomic features like tenting, split keys, palm support and so on. I also zeroed in on boards that didn't require a deep amount of familiarity with the vast and exhaustive world of custom keyboards.
Once I settled on ten boards, I acquired them and used each one for anywhere from a few days to a few weeks. I tried out the remapping and macros software and considered the comfort, design, price and durability of each model before arriving at picks I think will work best for the most people out there. For subsequent updates to this guide, I have continued to acquire and test out new keyboards as they come on the market, adding and replacing the top picks as warranted. If and when Microsoft ergonomic keyboards, like the Sculpt, come back on the market, as a collaboration with Incase has promised, I'll try those models, too.
Other ergonomic keyboards we tested
Naya Create
I first tried out the Naya Create during CES 2025 and was immediately smitten with the design. It's a deliriously well-made fully-split keyboard with built-in modules at each thumb. You can swap in a trackball, dial, trackpad and the Float module — a dial/joystick combo for manipulating 3D imagery.
Each half of the board hinges in two places for minutely customizable center tenting. It has low profile keys with responsive yet quiet mechanical switches. It works wirelessly or corded, has thumb cluster keys and, of course, it's all fully programmable. It's lovely to type on and the thumb clusters and modules make it easy to keep your fingers in the home position to minimize repetitive travel.
I'm still in the process of testing the board, and working with Naya's co-founder to get the modules customized to my liking. At $500 to $700, it's not cheap. It's also a still very new device from a small company, so I'm waiting to give it a proper assessment until the board is fully set up properly. In the meantime, batches of the Naya Create keep selling out, so it's apparent I'm not the only one who sees this board's potential.
Kinesis Advantage 360
If you want something fully split with thumb clusters and a columnar layout but that's a little less minimal than the Zsa Voyager— and wireless to boot — the Advantage 360 from Kinesis, makers of the popular Advantage 2 is a good one to check out. It looks like it comes from an '80s-era IBM office, but is somehow also from the future. The tenting goes from low to intense and the key well curves concavely to meet your fingers where they naturally land. The 360 is per-key programmable, works with layers and has four macros keys.
Periboard 835
For a mechanical Alice keyboard with both wireless and wired capabilities, the Periboard 835 is a good pick. The Mac and Windows-compatible board has a solid build, low profile switches, RGB lighting, comfortable tenting and a few extra programmable keys.
Goldtouch Elite Adjustable
I remember wondering if something like the Goldtouch Elite Adjustable existed when I first started testing ergonomic keyboards. It didn't at the time, as far as I could tell, but now a connected yet adjustable split board is indeed a product you can buy. It's a solidly-built board and the ball joint connecting the two halves feels like it will put up with a lot of use. A squeeze of the lever at the top of the keys lets you set the board just how you like, adjusting both the vertical tenting and the angle between the two halves. There's no programming to speak of, just the ability to swap a few function keys like print screen and home.
Unfortunately, the tenting doesn't work for me. Because of the extra keys at the outer edges, raising the middle edges upwards lifts the center keys considerably, which brings my wrists and forearms off the desk instead of letting them rest. Holding them like that created extra neck and shoulder strain on my part, which is sort of the opposite of the goal. But if you're not into tenting anyway and want a flat, Alice-split board with an adjustable splay, this works quite well.
Kinesis Form Split Touchpad Keyboard
The idea behind the Kinesis Form Split Touchpad Keyboard is pretty ergonomic: put the trackpad between the two halves and minimize travel for your mouse hand. The distance between the two puts your elbows at a comfortable distance and keeps your wrist nearly in-line with your forearms. The build is excellent, with low profile mechanical switches that feel smooth and just the right amount of clacky. The trackpad is responsive, but gestures only work with Windows computers. Even dragging and dropping doesn't work on a Mac here, so I don't see Apple users getting much use out of the board. I also found myself wishing for the slightest rotation of the keys — though they're a good distance apart, a slight angle would keep my wrists fully unbent. There's no tenting or negative tilt either, both of which could help a bit more, ergonomically speaking.
Logitech Wave Keys
While it's a perfectly fine and affordable Bluetooth keyboard, the Logitech Wave has minimal ergonomics. The keys rise up slightly in the middle and there's a comfortable wrist rest attached, but the layout is the same as any other keyboard, with no splitting of the keys to open up your arms or keep your wrists straight.
Ergonomic keyboard FAQs
What kinds of ergonomic keyboard styles are there?
Most ergonomic keyboards fall into two categories: fully split which separates the board into two pieces, and unibody split, also known as an Alice design, which angles the keys outward at the bottom. When the keys are rotated outward or split into two halves, it allows for a wider spread between your elbows for a more relaxed typing position. Other ergonomic features, such as thumb clusters, center tenting and negative tilting are sometimes added to either type of board.
Which keyboard layout is the most ergonomic?
Since every person is different, there's no one best ergonomic keyboard layout. The standard QWERTY layout is what most people are used to. The Dvorak, Colemak and Workman layouts rearrange the board to put the more commonly used letters closer to the home-key position. All three are intended to minimize your finger movements. That may indeed feel more comfortable and less fatiguing, but people used to the QWERTY layout will likely need to relearn how to type.
When do I need a split keyboard?
You might feel some relief with a fully split keyboard if you find yourself tensing up at the shoulders as you type on a standard board. Putting some distance between your hands may allow your chest to stay more open, which for some is an easier position to maintain. You may also appreciate being able to place your mouse or trackpad between the two halves of the board to minimize the distance your cursor hand needs to travel.
How long does it take to adjust to an ergonomic keyboard?
That depends on the type of keyboard. Since the Alice-split design simply rotates the keys apart, typing on it feels fairly similar to the regular keyboards you're already used to. A fully split board will take a little more adjustment, particularly if it uses thumb clusters. The enter, shift and control buttons may now be operated by your thumbs instead of your other fingers and that can be tough to get used to. It took me a full month to get completely comfortable with a fully split keyboard with thumb clusters. But now, I prefer it to typing on regular boards.