How to use Personal Voice on iPhone with iOS 17
Save a copy of your voice for future use on iPhone, iPad, Apple Watch or Mac.
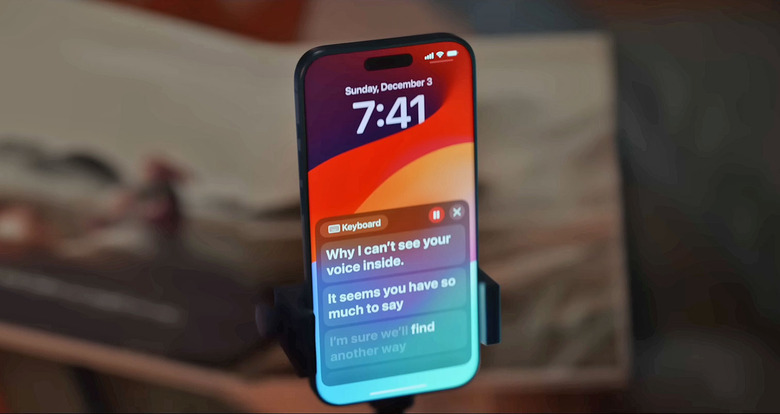
Ahead of the International Day of Persons with Disabilities last Sunday, Apple released a short film that showcased its Personal Voice accessibility feature, which debuted earlier this year in iOS 17. Personal Voice allows users to create digital versions of their voice to use on calls, supported apps and Apple's own Live Speech tool.
For those who are at risk of permanently losing their voice due to conditions like Parkinson's disease, multiple sclerosis, ALS and vocal cord paralysis, not sounding like yourself can be yet another form of identity loss. Being able to create a copy of your voice while you're still able might help alleviate the feeling that you'll never feel like yourself again, or that your loved ones won't know what you sound like.
All iOS 17, iPadOS 17 and macOS Sonoma users can create a personal voice in case you need it in the future — whether temporarily or for long-term use. I found the process (on my iPhone 14 Pro) pretty straightforward and was surprisingly satisfied with my voice. Here's how you can set up your own Personal Voice, as long as you've upgraded to iOS 17, iPadOS 17 or macOS Sonoma (on Macs with Apple Silicon).
Before you start the process, make sure you have a window of about 30 minutes. You'll be asked to record 150 sentences, and depending on how quickly you speak, it could take some time. Of course, you can stop midway through the process and come back later, which is helpful for those with disabilities that make spending that long on a task difficult. You should also find a quiet place with minimal background sound and get comfortable. It might be worth having a cup of water nearby and making sure your phone has at least 30 percent of battery.
How to set up Personal Voice on iPhone
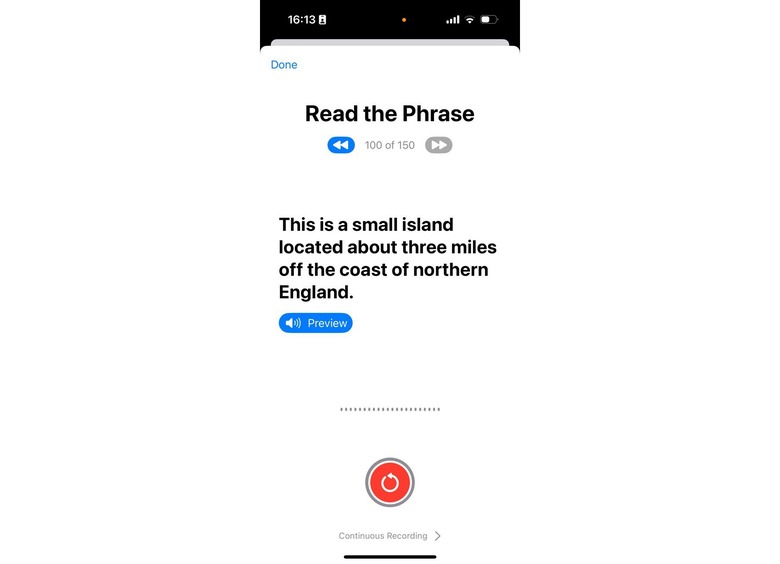
When you're ready, go to the Personal Voice menu by opening Settings and finding Accessibility > Personal Voice (under Speech). Select Create A Personal Voice, and Apple will give you a summary of what to expect. Hit Continue, and you'll see instructions like "Find a quiet place" and "Take your time."
Importantly, one of the tips is to "Speak naturally." Apple encourages users to "read aloud at a consistent volume, as if you're having a conversation." After you tap Continue on this page, there is one final step where your phone uses its microphone to analyze the level of background noise, before you can finally start reading prompts.
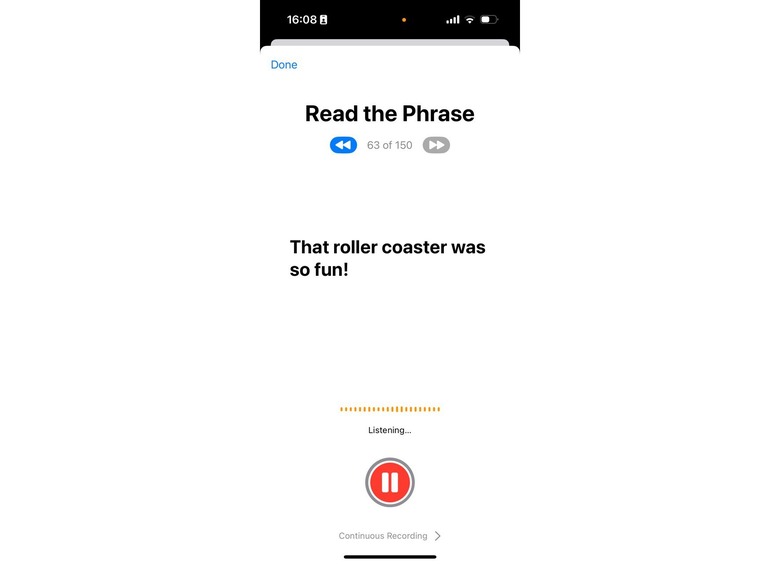
The layout for the recording process is fairly intuitive. Hit the big red record button at the bottom, and read out the words in the middle of the page. Below the record button, you can choose from "Continuous Recording" or "Stop at each phrase."
In the latter mode, you'll have to tap a button each time you've recorded a phrase, while Continuous is a more hands-free experience that relies on the phone to know when you're done talking. For those with speech impairments or who read slowly, the continuous mode could feel too stressful. Though it happened just once for me, the fact that the iPhone tried to skip ahead to the next phrase before I was ready was enough for me to feel like I needed to be quick with my reactions.
Personal Voice on iOS 17: First impressions
Still, for the most part the system was accurate at recognizing when I was done talking, and offered enough of a pause that I could tap the redo button before moving to the next sentence. Plus, if you're getting tired, you can press pause, leave the setup and come back later. The prompts mostly consisted of historical and geographical information, with the occasional expressive exclamation thrown in. There's a fairly diverse selection of phrases, ranging from simple questions like "Can you ask them if they're using that chair?" to forceful statements like "Come back inside right now!" or "Ouch! That is really hot!"
I found myself trying to be more exaggerated when reading those particular sentences, since I didn't want my resulting personal voice to be too robotic. But it was exactly when I was doing that when I realized the problem inherent to the process. No matter how well I performed or acted, there would always be an element of artifice in the recordings. Even when I did my best to pretend like something was really hot and hurt me, it still wasn't a genuine reaction. And there's definitely a difference between how I sound when narrating sentences and having a chat with my friends.
That's not a ding on Apple or Personal Voice, but simply an observation to say that there is a limit to how well my verbal self can be replicated. When you're done with all 150 sentences, Apple explains that the process "may need to complete overnight." It recommends that you charge and lock your iPhone, and your Personal Voice "will be generated only while iPhone is charging and locked" and that you'll be alerted when it's ready to use. It's worth noting that in this time, Apple is training neural networks fully on the device to generate text-to-speech models and not in the cloud.
In my testing, after 20 minutes of putting down my iPhone, only 4 percent of progress was made. Twenty more minutes later, the Personal Voice was only 6 percent done. So this is definitely something you'll need to allocate hours, if not a whole night, for. If you're not ready to abandon your device for that long, you can still use your phone — just know that it will delay the process.
When your Personal Voice is ready, you'll get a notification and can then head to settings to try it out. On the same page where you started the creation process, you'll see options to share your voice across devices, as well as to allow apps to request to use it. The former stores a copy of your voice in iCloud for use in your other devices. Your data will be end-to-end encrypted in the transfer, and the recordings you made will only be stored on the phone you used to create it, but you can export your clips in case you want to keep a copy elsewhere.
How to listen to and use Personal Voice
You can name your Personal Voice and create another if you prefer (you can generate up to three). To listen to the voice you've created, go back to the Speech part of the accessibility settings, and select Live Speech. Turn it on, choose your new creation under Voices and triple click your power button. Type something into the box and hit Send. You can decide if you like what you hear and whether you need to make a new Personal Voice.
At first, I didn't think mine sounded expressive enough, when I tried things like "How is the weather today?" But after a few days, I started entering phrases like "Terrence is a monster" and it definitely felt a little more like me. Still robotic, but it felt like there was just enough Cherlynn in the voice that my manager would know it was me calling him names.
With concerns around deepfakes and AI-generated content at an all-time high this year, perhaps a bit of artifice in a computer-generated voice isn't such a bad thing. I certainly wouldn't want someone to grab my phone and record my digital voice saying things I would never utter in real life. Thankfully, there are some measures in place to prevent that, like having to unlock your phone with Face ID, Touch ID or passcode before you can use your Personal Voice. You can't create one if your device doesn't have a passcode.
Finding a way to give people a sense of self and improve accessibility while working with all the limits and caveats that currently exist around identity and technology is a delicate balance, and one that I'm heartened to see Apple at least attempt with Personal Voice.
Update, December 8 2023, 11:39AM ET: This story was updated to add details around the security measures to prevent misuse of your Personal Voice, as well as to clarify that you can pause the setup process when you need.