How to autoimport your iPhone photos using OS X's Image Capture

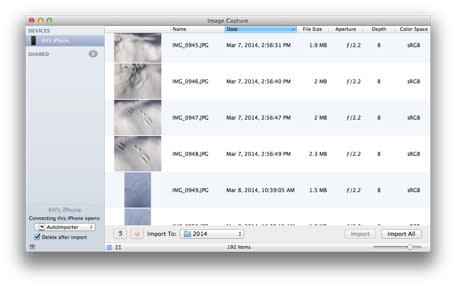
Image Capture for OS X has been around for a long time, but many new Mac users are not aware of the photo importing tool. The handy utility sits in the "Other" folder in Launch Pad or in the Applications folder and can be used to import your iPhone photos. It bypasses other photo apps like Aperture or iPhoto and can be used to manually copy photos from your iPhone to a folder on your Mac's hard drive.

By default, Image Capture will open and prompt you to choose the photos and the folder location for that session. If you want to automate the process, you can change the import options for Image Capture. This is useful for folks who want a minimal effort way to backup their iPhone photos.
Connect your iPhone to your Mac via USB
Make sure the iPhone is selected in Image Capture
On the bottom left corner of Image Capture, there is a drop down list with the label "Connecting this iPhone opens:"
Select this list and choose "Autoimporter" from the list of applications
Close Image Capture and disconnect your iPhone

The next time you connect your iPhone, the Image Capture app will send your files immediately to a folder within "/Pictures" on your Mac. You then can use Finder to sort those images and move them to their final destination.
