Boinx FotoMagico 4.4 up close and personal

When you need a photo presentation combined with music, video and special effects, FotoMagico from Boinx Software in Germany is a great choice. Recently updated to version 4.4, it now works with Lightroom 5 libraries. This November update is more about adding finesse to the product than new features. Among the new enhancements are 64bit and Mavericks compatibility, faster export, smoother transitions, and better color accuracy. In addition Boinx has opted to join Apple's transition from QuickTime to AV Foundation, which means you will have to convert your legacy movie files or use FotoMagico to convert them. The ability to clip video files with no transition has proved a very useful feature, as you can see in my sample video at the end of this review.
Some of the features I write about below were added in updates previous to Version 4.4. It can be a challenge to keep up with what was added when because Boinx Software never just sits on its laurels, it updates FotoMagico frequently with bug fixes and user generated feature requests. Since the update from Version 3 to Version 4 in October 2012, Boinx has generated 12 updates! The most recent update is Version 4.4.2, released on February 5, 2014. I've worked with the last three versions on a 3.4 GHz Intel Core i7 iMac with 16 GB RAM and an NVIDIA GeForce GTX 680MX graphics card.
Previously, you could create an interesting slide show with different transitions, zoom, text, and music. Now, you can add more transition types and masks to the mix and show up to six images (Layers) on one screen, with text, image, or even a video within a static image. Masking your individual layers lets you do some interesting things, such as move a route line along a map as shown in one of their demos or show only part of a video or photo and use custom backgrounds.
I last used FotoMagico when it was at version 2, at which time I made several family slide shows and the app made it quick and easy. After years of slide scanning, ripping video and audio recordings, I decided to revisit some of my slideshows. To save myself the hunt for photos I first tried to import my slide show from version 2 (circa 2008), but that didn't work because the FotoMagico file type was changed in Version 4.3. A call to customer support revealed that I could open my slideshow in FotoMagico 3.x, resave it and open it in version 4. I wanted to change a number of things, so I imported the folder of photos I used previously and added new ones.
Create your Masterpiece
You can drag in photos or graphics from Aperture, Lightroom, iPhoto or any folder on an internal or external drive. The preferences let you set which ones you want.
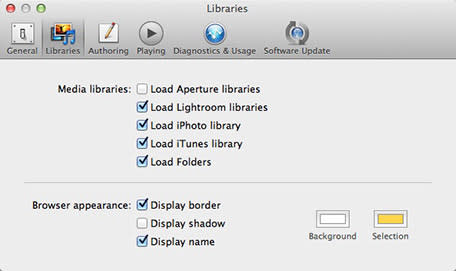
FotoMagico Preferences
Each type of media (image, sound, or video) and the transitions you choose present different enhancements you can tweak in the Options tab. The storyboard and timeline views make it easy to switch between mangeable horizontal scrolling through your story. There are some advanced display features in the program, but it's up to you as to how complicated you want to get in making your slide show. When I got stuck on how to finesse a feature, I usually found the answer to my problem in the support forums.
For example, I wasn't able to wrestle music to the length I wanted, but tech support informed me that a simple click and drag at the end of a song to where I wanted it to stop, did just that. I was able to add a fade-out through the Audio sidebar tab and its options. While the instructions say you can drag the yellow fade-out slider to adjust the audio, I could not select the little slider consistently. Whether you make your edits in the Timeline view, as seen below, or in the Storyboard view, you can precisely set the timing for everything you see on screen.
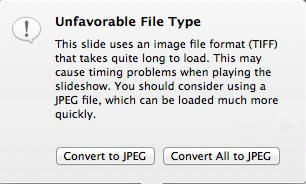
The updated FotoMagico is still fairly easy to figure out, but I did have some frustrating moments. Most of my imported photos displayed with a warning icon on them. First, it didn't like the size of many shots. I had used the regular TV 4:3 aspect ratio previously and this new slide show I set at 16:9 aspect ratio. Thankfully, FotoMagico offered to resize the shots for me. This operation does not affect your original files and the size edits can be removed, if needed. The other warning message I received is that FotoMagico does not like TIFF files, even though the documentation says it supports most common media types. The program converted the files to JPG for me.
In FotoMagico 4 you can now see the slides in a Timeline view to help fine tune the transitions and music. This is a visual representation of the time the slide displays on screen by width of individual slides, whereas in Storyboard view, each photo displays as the same size image. The Timeline view also made it easy to mark the audio where I wanted the music to fade out.
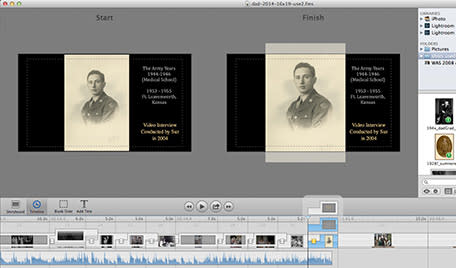
FotoMagico 4 Timeline View with Layers Showing
FotoMagico 4.2 added a copy geometry feature which lets you copy the orientation (size, tilt, etc.) from one slide to another. The Geometry command is a lifesaver. It let me match where the photos, text or masks reside on screen and animation of the images so that everything looks consistent. I didn't miss fighting with where or how the photos appeared at all.
When you have a vertical image, it gives you a black background behind the image, so when you zoom or change the orientation, the edges of the photo also zooms and rotates. You can apply a mask and mask out the edges so that only the photo moves, but the border stays put. I tried this with a couple of shots and it adds a touch of class to the presentation.
When you apply a mask a third control appears on the stage area to edit only that mask.
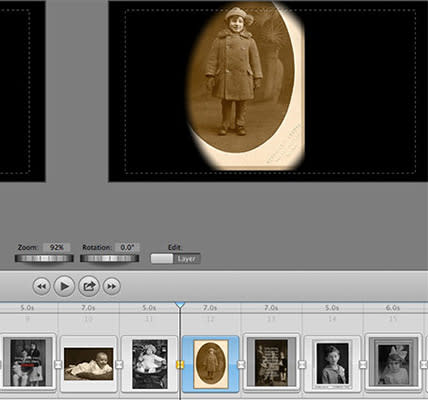
FotoMagico 4 Mask and Controls
FotoMagico is now 64-bit so that you can make larger slide shows and experience less lag when creating your slideshow. I had no problem with lag or slow updates when adding media. As mentioned above, Boinx reworked their video support to be compatible with with Apple's changes to support iOS device resolution, which is where that update to AV Foundation comes into play. Older interlaced video may not play well, so you have to convert those videos to progressive scan H.264. You can download a Preset to use in the free HandBrake program to convert your video or use Final Cut Pro or Apple Compressor, if you own those programs. I had some trouble with this. My two-minute .MP4 video became one-and-a-half minutes when I imported it into my slide show. After much frustration, I imported the video into iMovie and exported it to a .m4v and it imported into FotoMagico fine.
Bumps in the Road
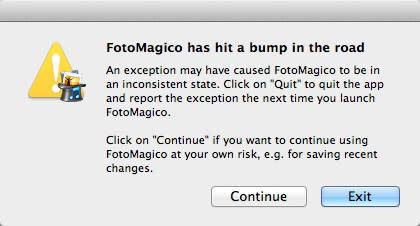
At one point I hit the title tab by mistake and when I tried to delete it FotoMagico got flustered and refused to go any further. I got the dialog box below and had to quit the app.
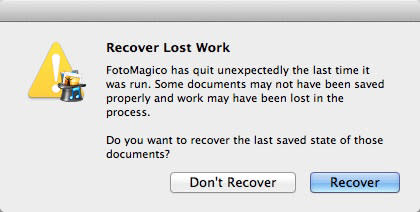
Thankfully, I'd saved prior to adding the wrong slide. Unfortunately, the original presentation I created was corrupted and FotoMagico offered to recover my saved version, a feature added in version 4.3. It opened as a 4:3 aspect ration instead of 16:9. I reported this problem to Boinx. The resulting file that FotoMagico makes includes "(recovered)" in the file name.
I copied everything to a whole new presentation to get back to my original ratio. The transitions and placement of the photos pasted in without any problems.
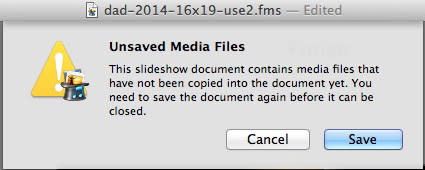
Even if you save your showpiece as you work, when you close the program down, it still prompts you to save it. I received this dialog every time I quit the program, even though I saved regularly and had Autosave chosen in the Preferences.
I put FotoMagico through the paces and according to Boinx Software's video expert, Bastian Wölfle, I wanted to add some non-standard edits. I had met him at a Macworld Expo and emailed him for help and he replied the next day with a customized tutorial video on mixing video and still shots, just for me! That's pretty special. There is a tutorial on the site now also that covers how to clip video and add photo overlays.
Clipping the video to add photographs to it was not quite as smooth as advertised. The first three times I attempted to clip my video, it stuttered badly at the clips, or repeated pieces of the video. I think the two-minute file taxed the cache and FotoMagico. I resolved the problem by closing everything down and reopening the file and worked only on the video, then saved and quit when I was done with the clip. I added the shots into the video first when I reopened the file and saved and quit, which avoided the previous problems.
File Export
You can save your project directly to YouTube, Vimeo, or create a variety of iOS sized files from the Share menu. When I exported my slideshow to one of the many options, I was met with varying success. The resulting .app did not work in Mavericks or Mountain Lion. The export to iPad format worked fine and took about 16 minutes, but I think my 2:18 video layered with photos, added to the processing time. FotoMagico needs twice as much space to export as the file is big. Most of the exports took little time to complete.
Boinx knows about the .app issue and released version 4.4.2 last week, which fixes the problem. I could no longer edit the length of time to view a slide in the Storyboard with this revision, but I could still edit it in the Options tab. My .app upload to Dropbox but would still not work when downloaded though. Bastian Wölfle replied to this problem: "Please compress FotoMagico players into a zip file before sharing them [in the Cloud]. OS X app bundles seem to be vulnerable litte puppies that want to be encapsulated and cuddled into a comfy zip archive."
My Bottom Line
While I worked on one project, I tested most of FotoMagico's features and spent many many hours wrangling with it. I ran into a number of issues, but I don't know whether some are bugs or cache/RAM issues. Yet, even with these issues, I still love the program, but at times felt like a beta tester.
FotoMagico can be a breeze to use to create basic photo presentations. The more advanced features are best learned through Boinx's video tutorials and may take some time to master. Boinx Software is very responsive when you have trouble, so if any of your edits do not work perfectly every time, check the support forum. The US $99 price tag may seem steep, but the feature set is so rich, I think the price is reasonable. You can purchase FotoMagico through the Apple App Store or through the Boinx FastSpring site. I just wish Boinx would employ more testers so that they didn't have to update the program so often with minor bug fixes.
My 94 photo project with three pieces of music and one video takes about 11 minutes to view and is still a work in progress. I don't believe there's another product on the market that would let me display my Dad's life the way I wanted. My eventual goal is to add more images and video, so that his great grandkids can know him long after he departed (2008).
Please leave a comment below if you have any suggestions for my masterpiece. The first part of the video includes text, so you may want to click the YouTube link to see the slideshow in a larger size.
For those who think locating family photos is a walk through the park, you can read about how I found mine in my blog on ilenesmachine.net.
