How to use Apple Pay on your iPhone for contactless payments
Learn to use Apple’s payment service in stores, online and for sending money to friends.
Apple Pay can make it more convenient to buy things while protecting your credit card info. Launched in 2014, the payment service supports tap-to-pay in physical retail stores, online apps and websites, and person-to-person payments with Apple Cash. Here's a step-by-step on how to use Apple Pay.
How to use Apple Pay on an iPhone or Apple Watch
Before using Apple Pay, you'll need to add at least one credit or debit card to Apple Wallet. You can visit Engadget's guide to setting up Apple Pay for detailed instructions.
The first thing to know about using Apple Pay in physical retail stores is only some vendors support it. For example, Walmart has long been a holdout, opting instead to push its (QR-code-based) Walmart Pay. Home Depot also doesn't support it, even as competitor Lowe's finally began accepting Apple Pay (in stores and its app) in late 2023.
If you aren't sure whether a store supports it, you can look for a tap-to-pay logo (radiating waves with a hand tapping a card onto it) or the Apple Pay icon. You can also ask Siri to show you nearby locations that accept the service.
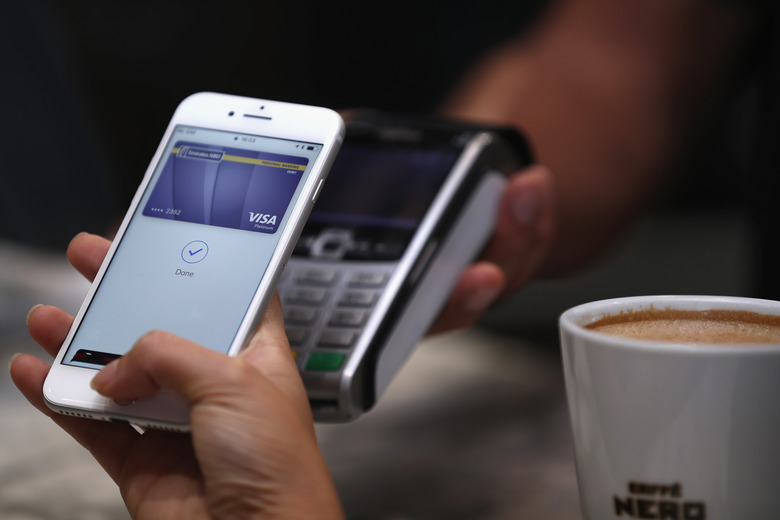
What you'll see on the screen when completing an Apple Pay transaction on an iPhone with Face ID
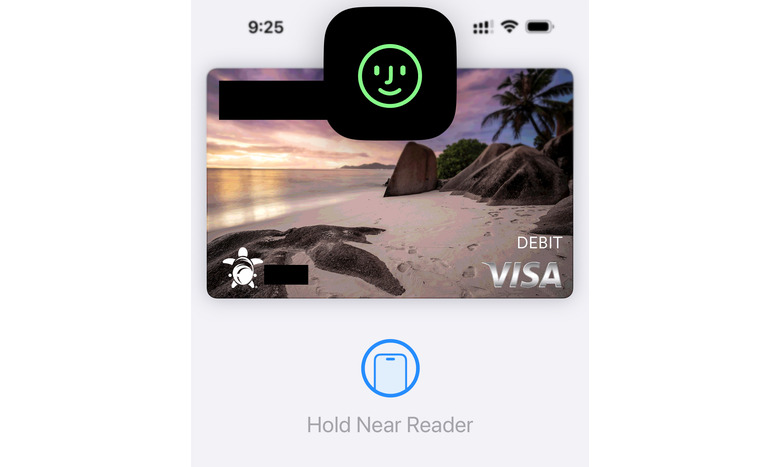
Once you're at an Apple Pay-friendly terminal, do the following on your iPhone:
-
Double-click the side button on the right side of your iPhone.
-
Look at your iPhone to authenticate with Face ID (or place your finger on the Touch ID sensor if it's an older model).
-
Tap the top of your phone to the card reader, usually near where you see a tap-to-pay logo. You'll see a checkmark and hear a ding when the payment reads successfully.
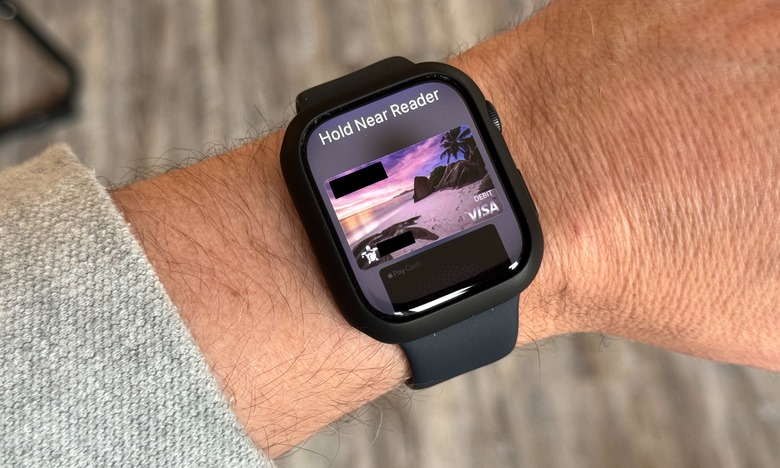
Follow these instructions if you're paying with an Apple Watch:
-
Double-click the side (lower right) button on your watch.
-
Tap the Apple Watch to the payment terminal near its tap-to-pay logo. You'll hear a ding and see a checkmark when the transaction goes through.
If it doesn't work, ensure the location accepts Apple Pay and that their systems are running. If so, ask someone working there about the best spot to tap on their payment terminal.
If you want to use Apple Pay with a card other than your default one, tap the onscreen card after double-clicking the device's side button (but before paying). You can swipe through your added cards and choose the one you want before tapping to confirm.
How to make online purchases with Apple Pay
Many websites and third-party apps accept Apple Pay. This not only prevents you from having to enter your credit card info, but it also adds extra security. Apple Pay uses an encrypted one-time "virtual token" instead of your actual credit card info. So if hackers ever breached the vendor's systems, they'd only see the encrypted token tied to your Apple Pay, which they couldn't use for additional transactions.
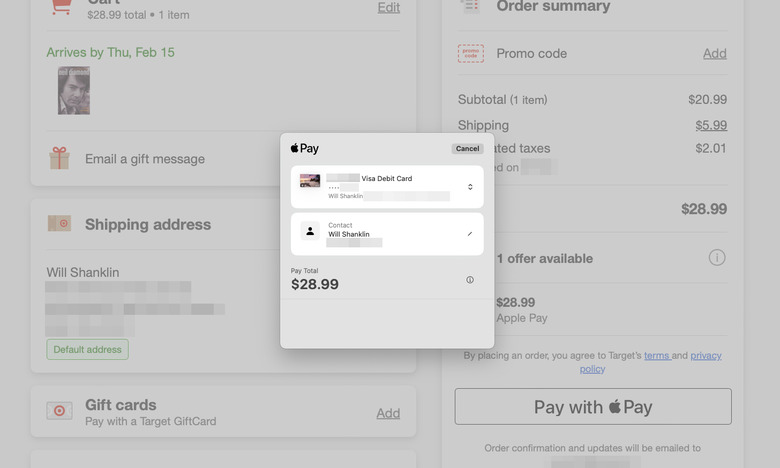
You can use Apple Pay for online (web and in-app) transactions on iPhone, iPad, Mac and Vision Pro:
-
When checking out, look for Apple Pay on a website or in an app. Choose that as your payment option in checkout.
-
When it prompts you for verification, use Face ID (newer iPhones and iPads), Touch ID (Mac and older iPhones and iPads) or Optic ID (Vision Pro) to approve the secure transaction. You'll hear a ding and see an approval animation when it accepts it.
Note that if you're using a MacBook (with its lid closed) connected to an external monitor, you can use Apple's Magic Keyboard with Touch ID rather than opening the laptop's lid to access its sensor.
How to use Apple Pay to send money
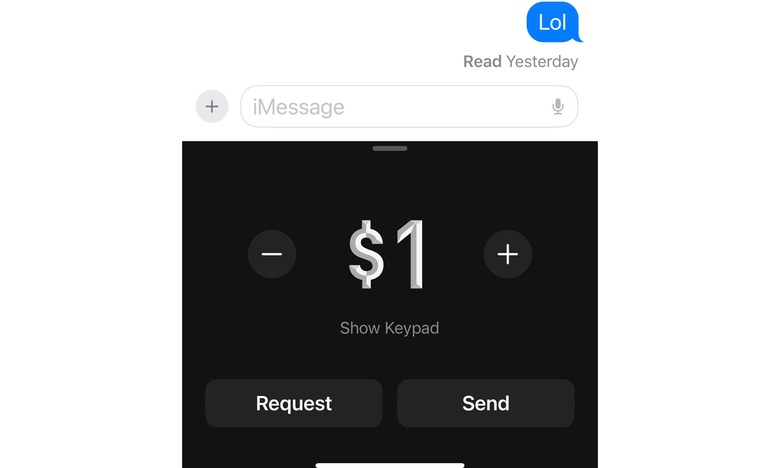
Apple Cash lets you send, receive and request money through the Messages app. It's designed as an alternative to services like Venmo and Cash App, allowing you to exchange funds with people you know and trust.
First, ensure you've set up Apple Cash. On iPhone, open the Wallet app and tap the Apple Cash card. If it prompts you, tap "Set up Apple Cash." On iPad, Apple Watch or Vision Pro, you'll instead head to Settings > Wallet & Apple Pay, then choose the Apple Cash card and follow the instructions to set it up.
Once you've activated Apple Cash, here's how to send money:
-
Open the Messages app and select the chat thread for the person you want to send money to.
-
Tap the plus button to the left of the text input box.
-
Select Apple Cash from the fan menu on the left.
-
Enter the amount you want to send.
-
Tap Send.
-
The Apple Cash symbol will appear in a drafted message. Tap the up arrow when you're ready to send.
-
Follow the security prompt to complete the transaction. That will mean Face ID, Touch ID or your passcode on iPhone or iPad. On the Apple Watch, you'll double-tap the side button. On Vision Pro, it will use Optic ID.
How to use Apple Pay on Amazon
Unfortunately, you can't currently use Apple Pay on Amazon's website or mobile app. The closest you'll get is vendors using Amazon Payment Services on their storefronts outside Amazon. The online retailer gives those sellers the option to accept Apple Pay.
If you run into a third-party site or app using Amazon Payment Services, the steps are the same as the "How to use Apple Pay online" steps above. Add the items you want to your cart, choose Apple Pay as your payment option and perform the security steps to verify and complete the transaction.