'Stiq Tips: Bravely Default Guide
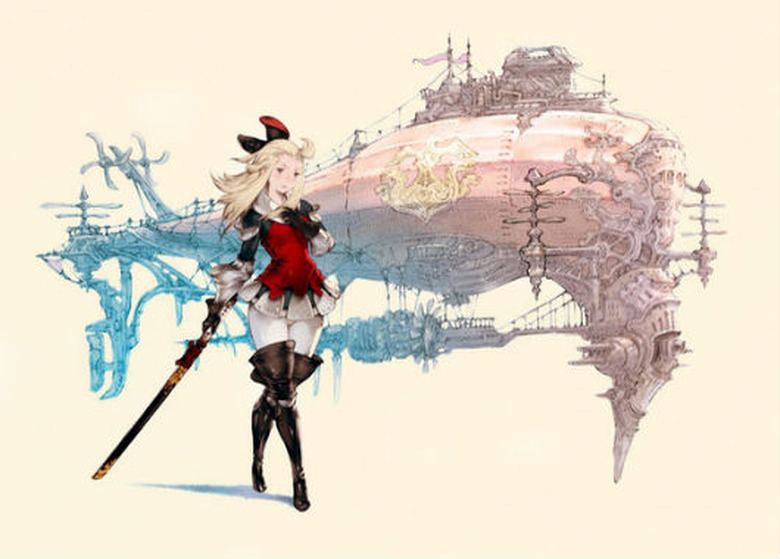

Bravely Default is one of the best Final Fantasy games I've played in a long while (and Joystiq agrees). Yeah, I said it! With a tale of heroes and crystals, an open-ended job system, and even an airship, this "technically not Final Fantasy" RPG evokes the most nostalgic feelings of Square's glory days. Of course, along with all of that old school charm comes a few pretty tough concepts, which I'll go over in detail to help you with your quest. There will be no spoilers at all until the very end of the guide, which will be appropriately marked – and even then, they're pretty mild.
Now that Bravely Default is officially available in North America, hopefully this guide will help you along your adventure!For starters, you'll want to do every single sidequest that pops up, whether it's the tutorial quests in the main menu, or the blue job quests that appear on the world map. The former are really easy to keep track of, as a "new" icon will adorn the side menu on the bottom screen every time you have a new quest. The latter is a bit trickier, as you'll sometimes need to go from area to area until you "unlock" the boss fight that will net you a new job. The reason these are so important is because you need to maintain a proper party balance (more on that later), and have as many tactics as possible to with which to strike back at your enemy. If a particular fight is too tough, come back later after upgrading your weapon once and earning a few levels.
Once you get the journal by way of the game's story, go to Encyclopedia, Combat Bonuses, then flip through to discover ways on how to maximize your rewards in battle – like the fact that you earn extra experience for completing a round in one turn. Also, if you come back to the game weeks from now and are lost, use the Event Viewer to see the entire story so far. If you need to change the time of day, simply walk around outside to shift from day to night, or vice versa. To turn off random encounters (or jack them up), go to the options menu, then Tactics, Config, and Difficulty. You'll want to switch off encounters in low level areas to avoid pointless battles, or when you're scouring dungeons. As a general rule, you won't need to go to any other menu unless you want to change your language in message settings, so don't feel overwhelmed, and mostly stick to the "difficulty" pane.
Once you make it to your first dungeon, start checking every nook, as most of them have at least one major upgrade. If a chest is around the corner, it'll pop up on the map – you can't miss it. To maximize your chest-clearing efficiency, you'll want to turn off random encounters while you're retreading areas and equip the divining rod ability from a Freelancer job to identify which floors still have chests. Don't worry about blue chests for now, as you'll need to get an item late in the story (post Chapter 5) to obtain those. Having said that, penciling in the locations or remembering where they are pays off later, as they contain some of the best items in the game. Simply locating them will keep them on your map forever, even if you can't unlock them at the moment.
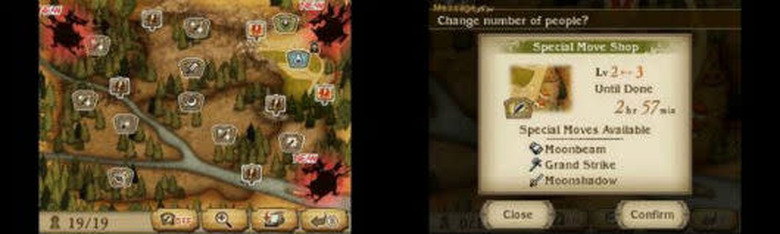
Very early in the game you'll unlock the ability to rebuild "Norende" – a town with social features that makes use of the 3DS' StreetPass functionality. Even though you may feel like blowing it off, you will want to build it up, as it will guarantee you massive in-game bonuses and items that will allow you to defeat some of the game's hardest foes. The most important thing to remember about Norende is that you can go to the Save menu, then "update data" to earn new villagers once per day, every day. This is for people who don't know anyone locally that has Bravely Default (which in turn earns you more villagers by StreetPassing), so don't forget that you can stock up new villagers daily. If you need to make a sticky note, do it! Or, just queue it up before you go to bed every night.

Every villager you assign to build something takes time off of that construction project. So for instance, early shops will only need an hour or so to build, but if you put more people on the job it can shrink down to 30 minutes or less. The clear-cut first shop you'll want to create is the Special Moves building, which allows you to use super attacks in fights – so build at least two levels' worth so you can utilize supers with most of your weapon types early on. The next order of business is the Accessory shop, which can yield powerful "egg" accessories at later levels that allow you to earn more gold and experience in combat – very useful for maxing out your characters and mastering jobs.
Outside of those two specific buildings, you'll want to spread out your workers and maximize your efficiency. If you know you're going to be able to check the game on your lunch break three hours later, try to set everything to finish building in three hours or so. That way, you can jump back in and rebuild your town at your own personal pace. It will get addicting to put your 3DS in sleep mode at all times, especially since you can earn extra "BP" to use in battle every eight hours (up to a maximum of three), which lets you stop time and perform an extra move. One last thing about Norende – occasionally, boss characters will pop up in town. If you're going to fight one, make sure you save first, because if you die, it goes straight to the "game over" screen.
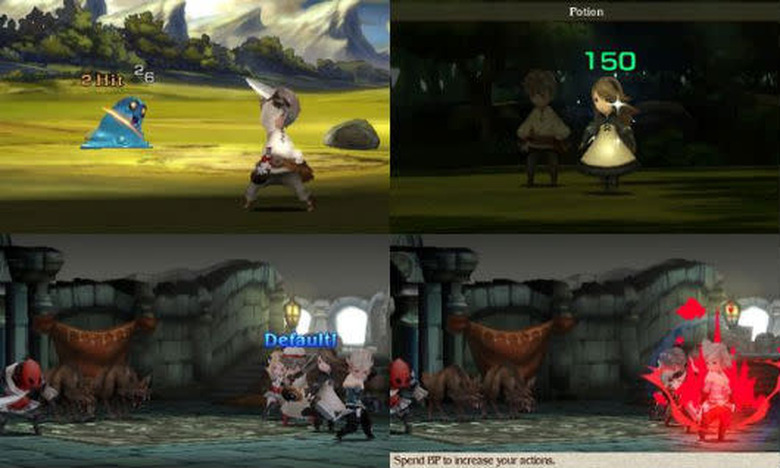
Bravely Default is named after the ability to "Brave" in combat (pay turns forward to attack multiple times), or "Default" ("skip" a turn to defend and stock one up). Combat follows the relatively familiar flow of "use Brave when fighting trash monsters," and "Default during boss fights." That's not a hard and fast rule, as you'll want to Brave during some boss encounters to drive their health down quickly, but generally, you will want to have at least one party member free at all times – usually your healer – because if everyone has Braved to their maximum you won't get to act until three more turns are up. Braves will be used in the order you queue them in, so you can revive a party member with a White Mage, then heal the party with a group cast (after the previously dead character is arisen) with your next Brave. Regarding defense, it's a good idea to Default on turn one with a healer if you're not putting a buff up first. If an enemy Defaults, they are likely to unleash an onslaught by Braving next turn, so consider Defaulting yourself to brace for the attack or put up some defensive spells.
Bravely Default allows you to have two jobs active at all times – a primary and a secondary. The primary job will not only change how your character looks, but it'll also get a "free" job power without having to spend a skill slot on it. So take a look at the class ability and see how it compliments your party before you decide on a primary. Bravely Default is pretty traditional in terms of party composition, as you'll want at least one healer (or another "off-healer" with a secondary healing job) along with damage dealers.
You don't necessarily "need" a Black Mage or a traditional spellcaster, as the Spell Fencer class can imbue their weapons to suit the needs of enemy weaknesses just fine. In fact, it's possible to get through most of the game with three melee classes with a backup Spell Fencer job. If you're looking for a good early game damage dealer, having at least one Hunter will get you out of many a jam. If you're stuck on a boss, grinding may not be the only issue – look into better equipment (sometimes the next tier can double your stats), and don't Brave as much.
Late game, look to the Spiritmaster to mitigate elemental damage, and consider pairing one of your characters with the Spiritmaster primary job (their innate job ability nets you free white magic MP reduction), with the White Mage backup. Having one of your characters as a Time Mage secondary is also key, as one of their final abilities is "Reraise," which preemptively revives you if you die. Having this character Brave to the maximum at the start and casting Reraise on every party member is a viable strategy. If the boss isn't aggressive out of the gate, you can use the Dancer to "gift" back some turns to said Time Mage with "One More For You." In other words, almost every job has some level of synergy between them, so experiment with each class at least up to level five to get a taste of what they can do.
This is the part where mild spoilers come in. I'll be going over how to obtain the "fake" and the "true" ending. But don't worry, I won't go into specifics regarding the story.
Once you get to Chapter 5, you'll essentially reach an invisible fork in the road. Here, you can choose to go down the "fake" path or the "true" path. Don't get too worked up – no matter what you choose, you'll have the opportunity to save after you've completed the game, and go back to Chapter 5 to try any ending you want indefinitely. If you want to go for the fake ending, simply mash X at the first crystal you find, and ignore Airy's warnings. Follow the quest markers and you'll embark upon the false ending.
If you want the true ending, go around to all the crystals and save them as normal four times over. Yes that's right, you'll need to keep doing it over and over until the story changes, at which point you'll start the true ending path, which will allow you to unlock the secret movie at the end. During this time, blue icons will pop up around the world map (if you're following the true path they will change every chapter), which indicate special bosses you can defeat. You can rinse and repeat the fake or true endings as many times as you want, maxing out your characters and Norende along the way. You can also unlock the two secret classes (hint: find the monoliths scattered about the world map after Chapter 5 starts) or tackle the final post-game dungeon. In short, you don't need to worry about "missing anything" no matter what ending you go for, as long as you follow through and finish it.
Those are the basics for Bravely Default. Just remember to build Norende constantly, keep your 3DS on sleep mode at all times, and experiment with job combinations until you find your style. Although the game ramps up considerably after Chapter 5, you should be able to handle it as long as you have a balanced party.