command line
Latest
One of Linux's most important commands had a glaring security flaw
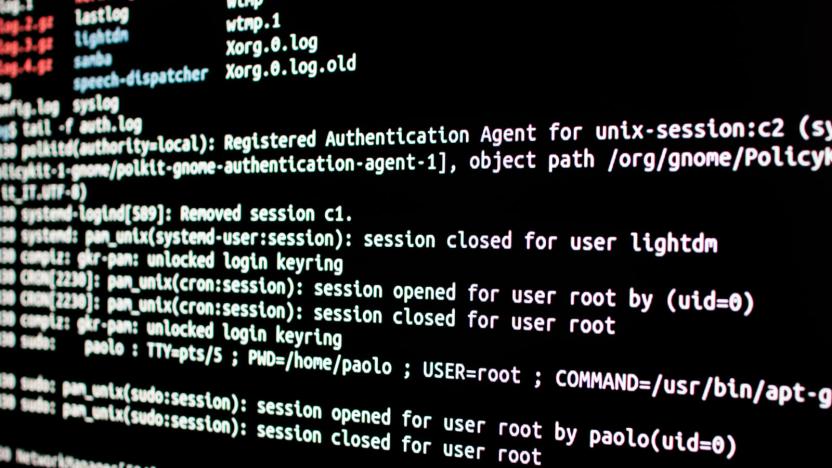
If you've used the command line in Linux or a Unix-based platform like macOS, you're probably familiar with the "sudo" command -- it lets you run tasks with different (usually elevated) permissions than you'd otherwise have. It's powerful, but it was apparently too powerful until now. Developers have fixed a flaw in sudo that let you claim root-level access even if the configuration explicitly forbids it. So long as an intruder had enough access to run sudo in the first place, they could perform any action they wanted on a given machine.

Windows 10's redesigned Terminal is available in preview
It's a good time to be a Windows power user. Microsoft has released a preview version of Windows 10's redesigned Terminal (known as just Windows Terminal) through its app store, giving you a considerably more powerful command line tool. You can run the Command Prompt, PowerShell and Linux features from one central place, complete with tabs, a hardware-accelerated text engine and extensive customization -- it's just what you've wanted if you thought the all-black background was a little too austere.

Google's Tenor slips GIFs into your command line interface
If you live in the command line, you probably like to give that otherwise plain interface your own distinctive touch, like ASCII art. But wouldn't it be nice if you could spice it up with a GIF? You can now. Google's Tenor team has released a GIFs for CLI tool that, as the name implies, turns short videos and GIFs (including those sourced from Tenor's search toolkit) into animated ASCII art you can use as a greeting when you open your terminal. The Deadpool 2 skydive you see above is in black and white, but you can include GIFs in glorious color.

I tried this one crazy trick for a translucent Mavericks dock and it worked
I love OS customization. Don't you? Ever since OS X Mavericks debuted, I've been complaining about the nearly solid dock. Finally, I stumbled across a system setting that enabled me to restore my dock to its pre-Mavericks more-translucent look. As with many tweaks, the solution depended on a Unix command-line directive to the defaults (that's Mac for "settings") system. You enter this at the Terminal (/Applications/Utilities/Terminal), specifically: defaults write com.apple.dock hide-mirror -bool true After updating the defaults database, you need to restart the Dock: killall Dock The screenshots on the right of this post show the results. Using the normal settings, you can barely see through the dock at all. Once you apply the mirror hiding override, the dock becomes far more translucent, enabling you to see more of the desktop below it.

Use tmutil to take control of Time Machine in Mountain Lion
Time Machine works best when you use it as it's designed: You simply let it run in the background and do its thing, only bothering it when you have to go back and get an old version of a document out. But if you ever want to do anything a little crazy with Time Machine ("adopting" a backup history on a migrated machine, for instance) it can be a little cranky. For those situations, says researcher Simon Heimlicher, there's a cool little Terminal command called "tmutil." The command, which was introduced in OS X 10.7 Lion, allows you to reconnect your computer to older backups if you swap hard drives or upgrade your Mac. While Lion and Mountain Lion will give you the option to inherit old backups when you migrate your machine, it's nice to be able to do it manually if you need to. It also allows for a few other functions, like combining and comparing backups, manually restoring items and adding or removing exclusions directly. Our buddy Cory Bohon points out a few more undocumented commands for checking your backup status. It should be noted that the improper use of "tmutil" could very easily munge your backups beyond salvaging, so be cautious. If you use Time Machine quite a bit, especially in those crazy ways it's not always meant to be used, it sounds like "tmutil" is well worth learning about.

Android 4.1 Jelly Bean proven carrying rough but working code for multi-user support (video)
If there's ever been a persistent gripe among families sharing mobile devices, it's been the absence of multiple user profiles -- hand that iPad or Nexus 7 to Junior and you may have to play a spot-the-differences game when it comes back. Some long overdue testing of previously found code references in Jelly Bean shows that Google, at least, has explored ending that anxiety over who uses the family gadgets. Command-line code in AOSP-based versions of Android 4.1 will let you create a separate guest profile, complete with its own lock screen security, home screen layout and limited settings. To say that the code is unpolished would be an understatement, however. Apps and even some notifications cross over from the main account, which could prove more than a little embarrassing if the hardware is left in the wrong hands. At least it's easy to revert back, as the instructions (and video after the break) show. The real challenge will be waiting to see when -- or really, if -- Google gets to finishing multi-user code and turns that Nexus 7 into the communal tablet we want it to be.

Mac 101: Encode media from Automator or the command line in Lion
There's an easy way in OS X 10.7 Lion to convert video or audio from one format to another, using a fixed suite of conversion settings. One approach uses Automator and can be launched from the Finder. The other uses the Terminal application and the afconvert (for audio) or avconvert (for video) command-line utilities. Behind the scenes, though, Automator is simply serving as a convenient front-end for the CLI tools. (You can also use the free Hoot app from the Mac App Store to do the same audio conversions.) The Automator method is the easiest to start with. Simply select the video or audio file you want to convert in the Finder. Under the Finder menu, choose the Services submenu, then "Encode Selected Video Files" or "Encode Selected Audio Files." You can also get to the Services submenu via the Finder's contextual menus; right-click the target file (or control-click, or on a trackpad, two-finger click) and the Services choices will be at the bottom of the pop-up menu. Finder menu / Services submenu Contextual pop-up menu Either approach will launch a dialog box where you can select your media conversion settings and the target file's destination. You can process one file at a time or, if you select multiple files, they'll be tackled in a batch conversion. The settings are slightly different for audio and video files, as appropriate to their media types -- you can experiment with the different settings to find the format that works for you. Video encoding settings Audio encoding settings For those of you more comfortable with the command line, you can use afconvert to encode an audio file from one format to another or avconvert to do the same with video. Type "afconvert -h" in Terminal to get a list of all the options you can use in the audio conversion. The avconvert tool is new in OS X Lion. Besides transcoding, it also lets you extract the audio or video track from a clip, change frame rates, add closed captioning and more. You read more about Automator video encoding and audio encoding at the Mac OS X Automation website. Additional information on the CLI commands can be found in Apple's Mac OS X Developer Library.

TUAW's Daily Mac App: DTerm
The Terminal is a Mac power-user's best friend. When you need to get something specific done, access the underlying system, modify files or change some settings, command line is often the best and only way to get it done. Instead of having to go to it, DTerm brings the command line to you. Working in the command line normally means stepping out of your current workflow and stepping into Terminal. Although it can affect anything on the system, and helps you get the job done, it's a very separate process. DTerm, which we covered back in 2008, makes Terminal access context-sensitive. From anywhere in any program you can invoke DTerm using a user-configurable global hotkey, from there you can run commands on the files you're currently working with. No need to manually go through and navigate to the correct file directory, DTerm takes your command line session right there, already set to your current working directory. You can even insert the currently selected documents directly into the command line making it quick and easy. You can run your commands as you normally would, right from the floating DTerm window and even copy them straight out of the prompt. Once you're done you can just hit escape, use the hotkey combo again or simply ignore DTerm and it'll automatically fade out. DTerm brings the command line to you, integrating it more effectively and quickly into your work flow. It's a free download from the Mac App Store and is compatible with Lion. If you ever find yourself in Terminal as part of your workflow, give DTerm a whirl and see whether it speeds up your command line sessions.

Terminal Tips: Unfreeze your Mac
Look, it's nothing to be ashamed of, it happens to everyone: your Mac has frozen up and won't respond. I know, I know, for years we Mac folks used to love poking fun at Windows because it freezes up. Apple even made a commercial about it. As someone who has used both, I will say that I have seen this far, far less frequently with Macs... but it happens. When apps freeze, it's generally pretty easy to deal with. Control-click (or "right" click for you crazy kids with your multi-button mice) the app icon in the dock, and if it says "Application Not Responding" it will offer a "Force Quit" option. Hopefully that will do it. But what if it doesn't? Read on for your options...

GoogleCL command line tool might be the nerdiest product Google has ever made
Command-line utilities are archaic little things that products like X, Windows, OS/2, Macintosh, and countless other GUIs over the last few decades were designed to kill -- yet here we are in the year 2010, and they're still alive and well. In fact, many power users (read: nerds (read: us)) find a good terminal window to be an invaluable part of their daily productivity routine, but the last thing we ever expected was for Google to randomly pony up a set of terminal-friendly commands for its most popular services. Collectively known as GoogleCL, you can now type your way to a Picasa upload, a YouTube encode, or a Contacts search without any pesky eye candy getting in your way. You need Python installed for GoogleCL to work, but if you've made it this far into the article, we're pretty sure you've already got it installed... right?

Rudix, a lightweight way to add new Unix utilities
Rudix offers a collection of Unix utilities which do not come with OS X by default. When setting up a new Mac I always install these Unix utilities: wget, ncftp, lynx with SSL support, and the GNU Core Utilities. I compile them manually whenever possible, despite options like MacPorts or Fink. I don't need everything that MacPorts and Fink offer, and installing them always felt like overkill -9 (that's a commandline joke, kids). Generally they try to mimic the commandline syntax of either Linux or FreeBSD, neither of which I have used extensively. Although Rudix offers a giant 361MB DMG with all of the packages includes, I recommend only installing what you need. You can find each program with its own OS X .pkg installer. These pkgs install to the traditional location of /usr/local/ (something both MacPorts and Fink avoid, a side effect of the volume of software they are designed to install, as well as a difference in approach).

Homebrew, the perfect gift for command line lovers
If you're an OS X user who spends as much time on the command line as you do in the GUI, you're probably familiar with the MacPorts and Fink package management projects, making open source software easier to compile and run on Mac OS X. You may also be well-aware of the shortcomings of these projects when it comes to future-proof package management. A new, open source project called Homebrew may be exactly what you've been looking for. If you're not a lover of all things CLI, send a link to Homebrew as a great (free) last-minute gift for the Terminal-lover in your life. My favorite thing about Homebrew is its ability to function perfectly well with /usr/local as its base directory, installing packages in their own folders but linking them to /usr/local/command. This makes them manageable with existing command line tools. Homebrew can work out of any directory you like, if /usr/local isn't your cup of tea. Installed packages are optimized and stripped based on your architecture, and makes great use of libraries you already have installed or that came with the system, reducing duplication and speeding up download, compile and install times significantly. Add in the zero-config installation, an already-extensive list of "formulas" (packages), a greatly-reduced need to sudo anything, and a Ruby-based framework for creating your own formulae and you've got a killer package for extending your command line toolset. Homebrew is available for free on GitHub, and the main page has complete instructions for various types of installation (and reasons why you'd pick each one). Check it out, and have a merry CLI-mas!

3.0 firmware release expected at 10am PT/1pm ET, quick Terminal tip to check
Hey, iPhone 3G owners: Please do not download the 2,1 firmware files listed below. They are for the 3G S and will not work on your phone. Read the whole post for details. The correct firmware for the 3G will start with "iPhone1,2" instead. If you were up all night waiting for the new iPhone OS to arrive, you're in good company -- we were too, until we began getting Twitter reports from users in Hong Kong and Sweden that the local carriers sent out SMS alerts to their customers suggesting when they could download 3.0. Those times both align with a 10 am PT/1 pm ET go time, and that's when we're calling it for now; Engadget concurs. That's why you're still seeing 2.2.1 as the most current version in iTunes; the new version hasn't been released yet. Those with a command-line bent and an inability to wait without doing something can launch Terminal and type in the following every few minutes to see whether 3.0 has launched, rather than repeatedly clicking the Check for Upgrade button in iTunes (note that the up-arrow in Terminal reloads the previous command): curl -s -L http://phobos.apple.com/version |\ grep -i restore |\ grep '_3.' | open -f The results will look something like URLs ending with this: iPhone2,1_3.0_7A341_Restore.ipswiPhone2,1_3.0_7A341_Restore.ipsw The model number indicates which unit has downloadable firmware. As of right now, only the iPhone 3G S firmware has been updated. That's the 2,1 iPhone model. Yes, the 1,2 iPhone 3G model was considered a revision of the first generation 1,1 iPhone as it only had moderate hardware changes. The two iPods are 1,1 and 2,1 for the first and second generation. (No, for those wondering in the comments, you cannot download the 2,1 firmware and install it on your iPhone or iPhone 3G -- it will only work with the 3G S.) To download, copy the URL and paste it into Safari's download window or use any other favorite method to retrieve the firmware. Then hold the Option key and click Update in iTunes. Navigate to the firmware (the ipsw file), select it, and 3.0's good to go. Of course, you can also download directly through iTunes as soon as the update is available.

Tweets (and whatever else you want) on the desktop with GeekTool
Mat posted a while back about the magic of GeekTool -- it's an app that allows you to run Unix scripts and show logs in a good-looking pane right there on your desktop. Mac OS X Tips recently did a post about how to put your iCal events up there using a script called iCalBuddy, but industrious reader Ben G. has taken this even a step further, and sent along a link to a similar script called twitterbuddy, which -- as you may have guessed -- will send your latest tweets to GeekTool.As a result, he's got the desktop you see above -- both tweets and iCal events sitting in a transparent pane on top of his desktop background. It will require a little Terminal tripping, but it's pretty easy to do. Just install and set up GeekTool the way you like it, and then make sure the buddy scripts are installed. From there, you can create a New Entry in GeekTool, and run whatever commands you want. It's incredibly flexible, too, because it'll put any Terminal commands you can throw at it right there on your desktop. If you're looking to fill in some of that unused Desktop space, give it a look.

LiveChat: Pwnage and Beyond
This weekend, the iPhone Dev Team delivered an iPhone 2.0 jailbreak. Today, TUAW invites you to chat about the jailbreak, about the new Cydia installer, and about the future of iPhone jailbreak development and use. Follow the jump to join in our discussion.

Mac 101: Get that "stuck" disc out of your Mac
Welcome to another Mac 101 here at TUAW. Mac 101 is our recurring feature where we point out some tips and tricks for folks new to the Mac. Remember, if you're a Mac expert this post isn't for you.Have you ever tried to unmount a disc in Mac OS X, but it simply wouldn't come out of your Mac's drive? Here are three ways of removing discs from your Mac's drive. If your Mac is currently using the disc you won't be able to eject it, so make sure that isn't the case first. If the disc isn't in use and you still can't eject it, give these a try.Step 1: Drag the disc to the trash canFind the disc on the desktop and drag its icon to the Mac OS X trash can. As you start dragging it towards the trash, the icon will change to an eject button, release the mouse button when the disc's icon is directly over the eject button. Step 2: Try some command line goodnessIf you have tried to eject the disc by dragging its icon over the trash bin, then why not try a simple Terminal command to eject the disc. Open Terminal.app (found in /Applications/Utilities/Terminal.app; or use Command + Shift + U to in any Finder window to move to the Utilities folder). Once you have Terminal opened, type (or copy/paste) the following command: drutil eject Step 3: Restart your Mac while holding mouse button downIf you've tried the other steps to no avail, then why not reboot your Mac while holding down the mouse button. Upon loading the Apple boot screen, your disc should be ejected. Please note that if you have a disc that is actually physically stuck in the drive, this will not help. Stuck discs may need the assistance of an Apple Genius or certified Apple repair professional.

Terminal Tip: Syncing your iPhone or iPod touch from the command line
This is one of those completely useless but cool things that one figures out when one is spending far too much time trying to do something else and not accomplishing it. In my case, I'm trying to figure out how to force an iPod touch or iPhone to load a backup set. (Do you know? Let me know in the comments!) What I accomplished though was figuring out how to sync the unit with a simple command-line utility. Here's how. Launch System Profiler. Choose Apple > About This Mac > More Info. Identify your iPod In System Profiler, go to Hardware > USB and locate the iPod or iPhone you're using. Look up the Manufacturer ID (0x05ac (Apple Computer, Inc.) and Product ID (0x1291 for my iPod touch) Launch Terminal. This requires shell access. Find the utility. Change directories to /System/Library/PrivateFrameworks/MobileDevice.framework/Versions/A/Resources/. Run reenumerate Give it one argument: the vendor id followed by a comma followed by the product id, e.g. ./reenumerate 0x05ac,0x1291 Wait. iTunes will reload your iPod or iPhone and sync it.
Yet even MORE evidence of upcoming iTunes rentals
Today's evidence comes to you courtesy of the Apple iPhone. iPhone Developer Pumpkin. He has discovered even more rental-specific information, this time in the iPhone's lockdown daemon file. Lockdown is responsible for authorizing your iPhone for services. For example the lockdown files are involved in authorizing phone service and is also responsible for communication between the device and the computer in generalA string search through the lockdownd executable in /usr/libexec produced the following hits when searched for "rental": pumpkin:~ pumpkin$ strings /usr/local/share/iphone-filesystem/usr/libexec/lockdownd | grep -i rental trigger_rental_bag_verification: Could not retrieve FairPlayID trigger_rental_bag_verification: Could not initialize FairPlay context trigger_rental_bag_verification: Could not verify the rental bag response: %d load_rental_bag_request: Could not retrieve FairPlayID load_rental_bag_request: Could not initialize FairPlay context load_rental_bag_request: Could not generate rental bag request load_rental_bag_request: Could not create mutable dictionary load_rental_bag_request: Could not create CFData from request message load_rental_bag_request: Could not create CFArray load_rental_bag_request: Could not create CFNumber from indice RentalBagResponse RentalBagRequest pumpkin:~ pumpkin$ As of last night, Apple still did not have a public rentalBag web objects interface the way it does for storeBag and secureBag, the two XML files it publishes on its Phobos server. Hopefully, once readers start occasionally pinging http://phobos.apple.com/rentalBag.xml.gz and http://phobos.apple.com/rentalBag.xml, you'll let us know via the Tip line if and when you see any life.Thanks PlanetBeing

Grab Clean Leopard Window Shots with CleanGrab
Ryan Irelan doesn't like the way Leopard grabs window shots. When you press Command-Shift-4/Spacebar, Leopard includes about 50 extra pixels of transparent background around your Windows. This extra space grabs the window's drop shadow along with the window itself. Enter CleanGrab. CleanGrab is Ryan's script for grabbing just the window, without the background pixels. He describes the script and offers a download link on his personal weblog. You'll either need to run the script directly or trigger it via a macro program like Quicksilver. The script essentially runs the command-line screencapture software using the -io flags. -i tells screencapture to run interactively. -o tells it to omit the window shadow. If you'd rather just use the terminal command-line, issue a screencapture -io command. I've posted about this handy utility a few times at least.

Play Audio URLs from the iPhone Command Line
You never know when instant karma is gonna getcha. Take my playaudio application. Yesterday, I was chatting with some developer buddies about maybe putting together an Internet radio application and discussing the fact that the Celestial iPhone framework is essentially QuickTime repackaged. While talking, I decided to try using my existing playaudio app with a URL rather than a local audio file. So I typed the following at the iPhone command line: playaudio http://steiner.math.nthu.edu.tw/ne01/tjy/music/06.I%20Just%20Called%20To%20Say%20I%20Love%20You.mp3 And...it worked. Just like that, the instrumental-only cover began to play back through my iPhone speakers. Apparently, Apple has merged the concept of "local file" and "URL" a lot more closely than I'd thought. I haven't had any luck connecting to .pls or any other live radio feed but if you'd like to play back Internet-based files, playaudio works just fine.


