The Mog Log: Final Fantasy XIV 2.5 dungeons

I mentioned a while back that it was kind of neat how the whole setup of Final Fantasy XIV had come full circle. At the start of the 2.0 patch cycle we were scurrying away from tonberries and bashing our heads against Demon Wall; in the final patch, we're back to both of those spots, along with the oft-seen and never-explored Keeper of the Lake in the midst of Mor Dhona's wreckage. It's a neat counterpoint.
Having played through all of the dungeons now, well, you get to rescue tonberries. That alone makes the last set of dungeons worthy.
As in every set of dungeons, there are winners and losers amidst the bosses, good points and bad ones. The dungeons as a whole are very reluctant to let you do much speeding through, with pulls being pretty aggressively gated. So let's talk mechanics, let's talk atmosphere, and let's carefully coach you through the process of kicking the crap out of your final expert roulette competitors.
The Keeper of the Lake
Once again, the new dungeon is linked to the storyline, although you don't have to do a lot of heavy lifting to get to this part. There are major storyline revelations to be had, mostly in the ending cutscene; you probably already know who the final boss is, but just to be on the safe side I'm blanking out the name.
Einhander: Now there's a reference I wouldn't have expected to see. (Could we get an American PSN release on this one, while I'm on it?)
Anyhow, Einhander's various AoEs aren't hard to avoid; the big thing to worry yourself over are the fuel pods being dropped into the arena. When hit by one of his attacks, they explode. Auxiliary tanks produce a small explosion around them, main tanks hit everything on the arena, and of course the explosions of tanks will set off other tanks. Also worth considering is that until they are ignited, you can knock the auxiliary tanks away with damage, much like the bombs at the end of Brayflox's Longstop (Hard).
The trick, then, is to have the tank take him near the edge and have ranged characters stand in a straight line away from any of the main tanks. Knock stuff away as needed. His AoEs always target players, not tanks, so if you can make sure that your ranged characters aren't near something dangerous or on a straight line between the boss and those big tanks, he's pretty simple.
Gunship: Padding boss! The ship will occasionally crosshair someone, fly to a random spot, and then fly in a straight line to (and past, if necessary) that person to create a line of fiery puddles. They hurt. Stay out of them, and if you're targeted, try to aim the boss so that it covers as little of the arena as possible. There are a few adds that spawn to DPS down quickly, too. Keep cool and it's not too hard; even if you get clipped by fire, a moderately competent healer can recover.
The final ascent: Worth noting is that the random gunship artillery strikes can be used to hurt the enemies you're fighting. If you're so inclined, scoop all of 'em up and cluster in hopes of letting Garlemald do most of your work.
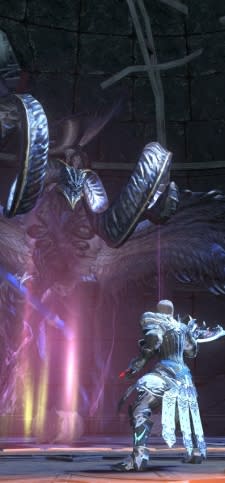
Final Boss: Despite the thematic thrust, the final boss isn't your target for most of the battle. He's there, but most of the time you'll be beating on the two satellite dragons he resurrects. And dodging AoEs. Dodging so many AoEs. It's insane.
Aside from "dodge like crazy" (both dragons have the usual dragon tricks, and the boss will lay out several AoEs of his own), there are two big things to observe. First, positioning. The first dragon resurrected takes less damage if close to the boss; the second takes less damage if far from the boss. Second, periodically one of Einhander's little satellite birds will show up carrying a shield device. Kill the add, click the shield device, and stand in the shield to avoid a big AoE that will kill you otherwise (shades of Halatali [Hard] there). It's a slow fight, but not a bad one.
Wanderer's Palace (Hard)
You get to rescue tonbabies. This is the best dungeon ever. It doesn't hurt that the boss mechanics are pretty darn fun and diverse, especially the second boss.
Frumious Koheel Ja: This guy's kind of boring. He'll throw spears into the ground, and those spears will burst over and over, applying a burn DoT to players that stacks. An individual stack lasts for five seconds and barely tickles; they stack up fast, though. Kill the spears quickly and the boss is basically just a very mild heal check.
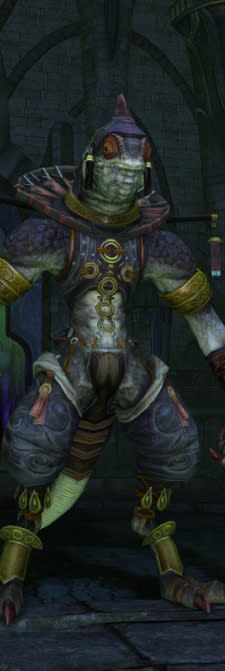
The totem pulls: Between the second and third bosses you have to deal with several Mamool Ja standing in glowing totem fields. You can rush in, kill the totem, and then kill them... but you can also just pull the enemies out of the totem field and then kill them while ignoring the totem. The choice is yours. There are a couple of casters in there that don't let you comfortably corner-pull, but there's plenty of space to pull, run back, then engage once they're out of totem range.
Slithy Zolool Ja: Shaman fight! No, really, it cannot be a coincidence that this guy drops four colors of totem clearly styled after World of Warcraft's class...
At any rate, the four colors of totem will drop with a field around them. Entering that field consumes the totem and applies an effect to you. There are four colors (red, purple, cyan, and green) and four effects (damage buff, heavy, fire resist down, and toad), but what each color does is randomly generated when you enter the instance. You want to pick up as many as you can, since the damage buffs apply to him and I believe he gets another benefit if you let the Heavy totems recall. Also, he'll randomly target people to cast Fire or Toad; the former isn't too bad unless you've got that fire resist down debuff, while the latter can be removed by jumping in one of the toad totems.
On his first drop, have a player run through all four totems to find out what all of the colors do, then call out at least which totems to pick up. Each subsequent drop, DPS should hoover up the damage buff and heavy totems, leaving the toad and fire resist totems alone. Once you get the pattern of the fight, it's not hard, but it's a fun pattern of grabbing totems and moving back to the boss.
Manxome Molaa Ja Ja: This is one of those bosses where there are just a whole lot of mechanics flying around and all of them need to be dealt with; fortunately, they're all pretty straightforward. First and foremost, they (the boss is technically two brothers fused as one) drop totems. The tank can pull them out of the effect field for most; if the totem is linked to them by a purple line, DPS needs to burn it down fast. A pair of adds will also show up late in the fight; DPS needs to deal with those.
The other two big mechanics are debuffs. First, the boss will apply Doom to a random target, which can be cleansed just by healing the target to full. (The timer is more generous than Siren's Charm.) Second, they'll mark a random target with Rot Lung. This is harmless until the boss uses the Rot Gas AoE, which is a small circle around the boss. Whoever has Rot Lung will also explode and hurt people nearby, so if you get it, make sure to be away from the rest of your party. Last but not least, the boss does an enormous conal AoE targeted at a random person, so even ranged classes may wish to stay close. It's a fight with a lot of running, but once you play it out, it's not so bad.
Amdapor Keep (Hard)
This place got super gross. That's great. I think this place might be the worst of the new bunch; it's no Sastasha (Hard) or Pharos at launch, but it has a couple of bosses who just break the edge into being annoying, and visually it's unnerving as heck with lots of stationary enemies that spawn waves of adds, too.
Anchag: There are four statues around the edge of the arena, and you want them to be unbroken. When you get a little red mark over your head, the boss is channeling something nasty into you, at which point you want to dart behind a statue, which would be a lot easier at least for me if it weren't nigh-impossible to see that red mark. It's not the usual crosshair/targeting arrow. Unpleasant. Other than that, you want to stay away from the statues, as he has other AoEs to damage them; don't be tempted to hide behind them when you get the straight-line charge mark that follows your movements, since he'll still hit you and destroy a statue in the process.
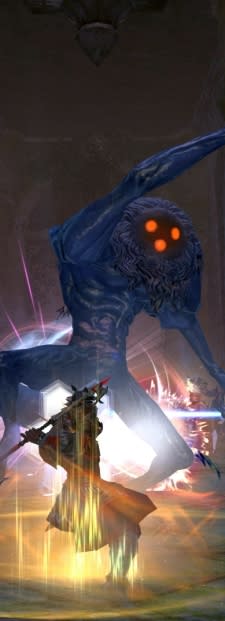
Boogyman: If you can get past the fact that looking at this boss is to stare into the yawning face of horror, it's a fun fight. He summons adds on occasion, but he has two main gimmicks. The first is that he'll turn invisible; the party should all go kill the little Luminous enemies that spawn, get a buff, and follow his barely visible body. When the buff expires, he gets knocked back and made visible again. Late in the fight, he'll split in two and turn invisible, so you have to kill both of his halves. It's not difficult, but it's atmospheric.
Demon Wall gauntlet: DPS check! You're trapped in a small ring and there are demon walls approaching from all four directions. You need to kill everything before you're crushed. First it's four little guys, then a Succubus and two imps, then two voidroga. Then there's a gargoyle, the two Bloodlappers from the original Demon Wall fight, and one last enemy to kill, which I don't recall. It's a real pain. Fortunately, if you die, you don't have to repeat the fight from the start; my first run cleared the first three waves, and the last part was easier.
Feridad: Do not touch the incubus.
Feridad drops lots of AoEs throughout the fight, chiefly arena-crossing spears in a simple grid pattern and rotating scythes that he drops without warning. If he targets you with a scythe, move out of it quickly, since there's no telegraph and it doesn't knock you back. Best option for a tank is to pull him to an edge of the arena to avoid his frontal cleave and make his two big attacks more obvious.
The first big attack is when he moves to the center, summons adds tethered to him, and starts channeling an AoE with him at the center. The longer his adds are up, the wider the range on that AoE becomes, so you need to damage those down quick. Early on they're little guys; later it's one big add. His other big attack is trapping someone in a slime and channeling a cone AoE targeting them. Again, you need to break people out of the slime, something that the trapped victim can usually help take care of.
Later in the fight, he'll summon his add and trap someone, making your life that much harder. If the trapped victim is a DPS, break him out and then kill his AoE-enhancing add; if the victim is the healer or the tank, kill the AoE add first and then break out the victim. It sounds more complex than it is; there's a bit of dodging and complexity, but once you see what he does, he's pretty straightforward.
As always, feedback is welcome in the comments or by mail to eliot@massively.com. Next time around, shall we discuss the World of Darkness?

From Eorzea to Vana'diel, there is a constant: the moogles. And for analysis and opinions about the online portions of the Final Fantasy series, there is also a constant: The Mog Log. Longtime series fan Eliot Lefebvre serves up a new installment of the log every other Monday, covering almost anything related to Square-Enix's vibrant online worlds.
