tips
Latest

Facebook's new tips for Places puts it in competition with Foursquare
If you've ever found yourself in a new restaurant or a trendy tourist spot, you might've looked up Yelp or Foursquare -- or, heaven forbid, used Google -- on your phone to find out where the best view is or whether or not you should order the shrimp. Now, you might not need to, as long as you have Facebook installed. That's because the company has just introduced something called "Place Tips," which, when enabled, essentially pops up relevant content about your location as long as you're there. Specifically, it'll show posts and photos about the place from your friends if they've also visited it. The feature sounds very similar to what Foursquare already does with its own Tips, but with a much more Facebook-centric bent.

How Apple Pay handles a canceled credit card [Updated]
Update: OP on Reddit adds that the cards was already registered. Womp womp. Apple Pay is easy, convenient, and instantly popular enough that its rivals are already trying to kill it through collusion. Of course that's when you're making purchases. How easy is it to deal with things like canceled credit cards? Apparently, very easy, thanks to this story from Reddit user aiken_. In a post on Reddit's Apple forum aiken_ described exactly what happened when a card on your Apple Pay account gets canceled. Apparently the card gets updated with its new number. This morning, I had three Citi cards in Apple Pay: two credit, one debit. This afternoon, I got the dreaded fraud detection call and confirmed that it was not, in fact, me that was simultaneously using the card at several Best Buys in several states thousands of miles away. On the phone, the Citi rep canceled the affected card and ordered a new one to be FedEx'd. So far so good. Immediately upon hanging up, my phone had a notification saying "Apple Pay: your default card has been switched to [non-stolen Citi credit card]." Pretty smooth, and really good attention to detail in the EMVco and/or Apple Pay design. Rather than make you enter the new card number, Apple Pay will be automatically updated to replace the lost, canceled, or stolen card number for you. It's stressful enough to have to replace a card, but in this case Apple Pay makes is so you can start using your new card, even before the physical version arrives at your house. Especially for travelers this is a feature that makes Apple Pay a killer app in the mobile payment field. No wonder their competitors are worried.

Keep personal photos out of collections with iOS 8's "hide photo" feature
Apple's Collections feature for photos in iOS is a wonderful way to keep track of your memories and easily present them when it's time to show off. Photos are automatically sorted into smart groups based on the time and location they were taken, making it a breeze to quickly find every picture you've taken in Florida or during December. Of course, there are certain pictures you probably don't want people to see. Let's be classy and just call them "personal" photos. Thankfully iOS 8 makes keeping your personal photos out of your Collections quick and easy. All it takes is two quick steps. Locate the photo you want hidden, select it, and hold down your finger on the image. When the "hide" option pops up press it, and confirm that you'd like to hide the image. Now the "hidden" image is left out of your Collections folder while still being viewable from the Albums portion of the Photos menu. You can rest easy when displaying your Collection over AirPlay during the Holidays. If you take care to hide the right (or wrong, depending on your perspective) images, your family never has to know what you really did in Vegas.

Kill no-close-em Safari pages with AppleScript
I hate those pop-ups that hijack Safari even when I've enabled Settings > Security > Block Pop-up windows. Sure, I've edited my hosts file with Someonewhocare's updates to avoid them in the first place but even so, bad pages still happen. With a simple web search, you'll find a variety of conventional solutions for these situations. I prefer to close them automatically without interacting with pop-ups directly or force-quitting Safari. Here's where a simple AppleScript application can help. I use AppleScript to tell Safari to "close window 1", i.e. the frontmost window. This dismisses the problematic window on my behalf. I have this script saved to an application (File > Export > File Format > Application) and have docked it for easy access. When bad windows open, my solution is just a click away. Got another fix or an improvement to this one? Drop a note in the comments and share.

YouTube now lets you tip your favorite video makers
If you've been itching to tip YouTube video producers, you'll be glad to know that you can finally reward those people for their hard work: the Fan Funding feature has launched in Australia, Japan, Mexico and the US. If a video host sets up a virtual tip jar, you can use your Google Wallet account (including any attached credit cards) to contribute right from a video page or the Android app. You can specify any amount you like, although YouTube will take a small cut to handle the deal; in the US, it's five percent of your donation plus another 21 cents. Support is coming to both other countries and iOS users soon, so don't despair if you can't contribute to your favorite channel just yet. [Image credit: Rego Korosi, Flickr]

Seven iPhone photography tricks take the basic camera to the next level
Lorenz Holder is a professional photographer and part of the Cooperative of Photography, a community-focused online photography magazine. The goal of the Cooperative is to recognize and promote exceptional visions within the photography community as well as support developing photographers. Holder and COOPH have just released a new video showcasing seven photography tricks for the basic iPhone 5s camera. A few of these tricks require some light-crafting skills, but each is a simple way to take normal snapshots to another level of creativity. For children who are interested in experimenting with photography, these tricks would be especially fun. You can view the video below, then head over to COOPH website for interviews, photographs, and contests for the co-op.

EVE Evolved: Four top tips for living in wormholes
One of the biggest goals you can reach for in many sandbox MMOs is building your own empire and controlling a small corner of the game world. For much of EVE Online's lifetime, that privilege was reserved for the powerful few leaders of the game's large territorial alliances, which carve up vast swathes of space between them. A handful of alliances still control the lawless nullsec regions today, but there are still opportunities for smaller corporations and even individuals to stake a claim in the chaotic world of wormhole space. Exploring and farming in wormholes is very profitable activity, but permanently moving in and setting up a starbase can be an intimidating prospect. One wrong decision might lead to pilots getting stranded in the void without bookmarks, your starbase coming under attack, or the whole expedition being robbed blind by a corporate infiltrator. The early days of wormhole exploration were rife with stories of hardship, heists, and devastating wars fought through shifting networks of wormholes. A lot has changed since the wormholes first opened in 2009, and today many of those problems have solutions. In this EVE Evolved opinion piece, I look at some of the ways wormhole life has improved since Apocrypha and give four of my favourite tips for anyone planning to colonise wormhole space.

Mac 101: How to disable that annoying volume noise
Apple's OS X has one little feature that makes me nuts. When you adjust the volume with the keyboard or Menu Bar slider, it makes a little "pip" sound as the volume increases or decreases. On one hand, it's a nice confirmation that you've successfully made a change; on the other hand, it's an annoying little pip. Fortunately, there are two ways to silence it. First, hold down the Shift key when adjusting the volume via the keyboard. Your other option is to have at it in System Preferences. Launch and click Sound, and then Sound Effects. Next, de-select "Play feedback when volume is changed." No more pip! Pro tip: once you've made that change in System Preferences, the Shift key trick works differently. Hold Shift while adjusting volume to hear the pip.

WildStar tips for every player
Do you know the fine points of dyeing gear in WildStar? Did you know that interrupting enemies grants you a damage bonus? Are you aware that you can get all the benefits of your gear while being absolutely naked? All of these things are true, and a new video by WOBO just past the break takes a few minutes to point out all of the tips, tricks, and other fine points that you might not have noticed while playing the game. Sure, some of these are probably familiar to players who have been in the game for a while, but some of them (like the bonus interrupt damage) might be new even to players who have been in since the earlier beta phases. Jump on past the break for the full video!

Mac 101: quickly change volume input, output
Many Mac users have several input and output devices for sound. For example, I have a mic, external speakers and a set of headphones connected to my MacBook Pro pretty much all the time. I also use Soundflower for capturing audio from my Mac. I can make any one of them active via the sound System Preference. Or, I could use this trick, which is much faster. Just Option-click on the volume icon in the Menu Bar and presto! A list of available input and output devices appears. Just click the one you want and you're all set. Nice and fast.

How to fix disappearing iMessages after switching from iPhone to Android
As mentioned in this morning's news roundup, a number of iPhone users who have since switched to Android are finding that they are unable to receive messages sent from iPhone users. The problem lies in the fact that some folks have phone numbers tied to iMessage even after leaving the iOS ecosystem. Lifehacker EIC Adam Pash recently experienced this problem and detailed it in a post aptly titled "iMessage purgatory." I recently switched from an iPhone to Android, and discovered shortly thereafter that my phone number was still associated with iMessage, meaning that any time someone with an iPhone tried texting me, I'd receive nothing, and they'd get a "Delivered" receipt in their Messages app as though everything were working as expected. While disassociating one's number from its associated Apple ID seems to fix the problem for some, Pash, and others, are still finding that texts sent from iPhone users aren't coming through. This isn't an entirely new problem as there are a number of support threads on the topic on Apple's website. Fix 1: The official response from Apple, naturally, is for users to deactivate iMessage. To deregister your phone number, tap Settings > Messages and turn iMessage off. Funny enough, Eric Schmidt's guide on converting to Android from iPhone even mentions this. An in-depth guide for deactivating iMessage can be found here on OS X Daily. Fix 2: Another recommendation via Apple's support forums reads: Go to: https://supportprofile.apple.com/MySupportProfile.do Log in if not already logged in. Click on "edit products" Click on the "x" to the right of the product. Click "unregister" Fix 3: Some commenters on Apple's discussion forums also recommend that users sign out of their App Store accounts if possible. While some users have found that texting the word "stop" to 48369 seems to alleviate the problem after about a 12 hour period, Apple's support document explicitly states that doing so "won't deregister iMessage." How to prevent this problem in the first place! To hopefully avoid this type of frustrating experience altogether, Apple reportedly recommends that users should deactivate iMessage before switching their phone number to a new device. If none of the above serve to fix the problem, or if you happen not to have access to your iPhone anymore, Apple recommends contacting Apple support at 1-800-My-Apple.

How to completely hide any app or folder on your iPhone or iPad
Keeping prying eyes from poking around in your more precious apps is always a concern, especially for those of us with nosey friends or kids. Until now, keeping apps private meant hiding them in a folder somewhere, but wouldn't it be ideal to be able to hide apps entirely? Thanks to a funky trick in iOS 7.1, you can. Here's how: Here's our starting screen. Make sure you have a full page of apps and a full dock. Now you need to create a folder with the apps we wish to hide. We'll call this folder "Folder 1" for simplicity. In this example I'll be hiding the Facebook and Starbucks apps, but you can do this with absolutely any app on your phone that can be placed in a folder, including those pesky stock apps that refuse to be deleted. Next you need to nest Folder 1 within another folder, which we'll call "Folder 2." If you're not familiar with how to do this, check out our iOS 7.1 nested folder tutorial here. Once you have Folder 1 nested, you must remove the apps you placed in Folder 2, leaving just Folder 1 within Folder 2. You should now have what appears to be a blank folder on your home screen. You should now have one open space on your Home screen, but we need to fill that, so drag any random app you have into that spot. Now, go into Folder 2 and highlight Folder 1 so you can move it. Drag Folder 1 out of Folder 2 and down into the dock area. This will cause Folder 2 to disappear after a second, and as soon as it does, release Folder 1 in the dock. Instead of finding a new home on your screen it will disappear completely. We have now hidden the Facebook and Starbucks apps. You won't find them anywhere, on any screen or within any folder. Yet, you still have full access to them via the iOS search feature. Touch the middle of your home screen and pull down, revealing the search bar. Type in the name of the hidden app you wish to use and you'll find it's still there and can be used just like normal. Regret the decision to hide an app? You can easily bring back all of your hidden apps by either restarting the device or by going into the iOS settings menu, clicking the "Nike + iPod" app and activating, and then deactivating it. Once you've done so, all hidden apps will pop back onto the Home screen. As I said above, you can use this trick to hide any apps or folders you want, and still have full access to the apps via the search bar. YouTuber Videosdebarraquito uses a similar trick to hide stock apps using the Newsstand on the iPhone 4/4s, but our tutorial should work for anyone running iOS 7.1. Now enjoy your newfound power of secrecy, and don't get into any mischief.

Report: This is what iOS 8 looks like, at least right now
Apple's next version of its mobile operating system, iOS 8, looks an awful lot like the iOS you've already got on your iDevice. At least that's according to screens leaked on Chinese microblog site Weibo and lent credence by veritable Apple site 9to5Mac, which show what is supposedly iOS 8 in action. Yes, square icons with rounded edges are back, but that design is wrapped around some new entrants in the app world: TextEdit, Preview and Tips. It's easy to guess what the first one might be (a potential replacement for the Notes app), but Preview? Given the icon's distinct resemblance to the application of the same name in OS X, we're guessing this serves a similar function: viewing documents and PDFs. As for Tips? Well, that's probably just a solution for introducing new users.

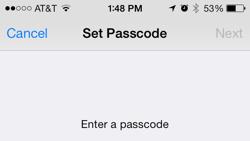
How to set up a complex passcode on your iOS device
Smartphones and tablets these days store an incredible amount of information, and with much of it sensitive and personal, many users like to keep their device somewhat private by limiting who has access. With the introduction of Touch ID on the iPhone 5s, Apple sought to make iOS devices more secure by making security as simple as a fingerprint. But with Touch ID currently an iPhone 5s-only feature, where does that leave all other iOS users? Thankfully, there's a solution. The default passcode setting in iOS 7 only allows for a 4-digit numeric string, otherwise known as a simple passcode. But when you're really serious about device security -- or just want to be extra sure no one finds out about your Taylor Swift app or questionable weekend photos -- iOS 7 offers more complex passcode protection. With a complex passcode, you can pick a passcode that includes letters, numbers, and special characters. What's more, a complex passcode can be much longer than just four characters. In iOS 6, the string limit was 37 characters long. But in iOS 7 I was able to enter in over 90 characters without receiving a warning about having too long of a passcode. This makes the task of guessing another's passcode exponentially more difficult. Time to get started. To set a passcode that can include numbers, letters, and special characters, go to Settings > General > Passcode Lock. If you've grown weary of Touch ID and would like to do this on an iPhone 5s, it's listed under Settings > General > Touch ID & Passcode. Next, simply toggle off the "Simple Passcode" setting. If you haven't set up a passcode at all yet, you'll first have to select the "Turn Passcode On" option located near the top of the settings pane. Upon doing so, you will be prompted to enter a complex passcode with the ability to choose from an array of numbers, letters, and special characters. You'll be prompted to enter the passcode twice, the first time you tap 'Next' to continue and the second time you tap 'Done.' While you can insert special characters like ñ or é in a complex passcode, you unfortunately cannot use emoji icons. Which is a damn shame because a passcode like this would be pretty cool. As is always the case, it's important to make sure that your passcode is hard for others to guess but easy for you to remember. After setting up a complex passcode, your new passcode lock screen will look like this, offering up a full text-and-number keyboard for your passcode entry. Is a Complex Passcode even necessary? With a 4-digit numeric passcode, there are potentially 10^4 (10,000) different passcode options. That sure seems like a lot, but a study on common iOS passwords reveals that many people still rely on passcodes that aren't terribly hard to guess. Some common passcodes to avoid include 1234, 0000, 2580, 1111, 5555 and 5683 (which spells out 'love'). Also try and avoid passcodes that represent (easy to guess) birth years such as 1949, 1985, and 1999. When using a complex passcode, however, the number of possible passcode combinations increases exponentially. With about 77 characters (numbers+letters+special characters) to choose from, and a passcode that can be as long as 50 characters (at least), that's already 77^50 possible permutations right there, making it effectively impossible for anyone to ever guess your passcode without peering over your shoulder. Even opting for a slightly longer 6 character passcode increases the number of possible passcode combinations from 10,000 to 208.4 billion (77^6). And with that, may your device always remain secure from prying eyes. As a final note, this comic strip about password strength from XKCD is on topic and worth sharing.
Use special characters for a more secure iPhone passcode
The iPhone's passcode feature offers front-line security to your device and its contents. If you're not using a passcode, you ought to seriously consider it. I know that typing it over and over is a pain, but I guarantee it's less painful than losing a phone that's wide open. There are two types of passcodes available: simple and complex. A simple passcode is restricted to four numbers, while a complex passcode can be longer and include letters. For a little extra security, use a special character. You can access special characters on your iPhone's keyboard by pressing and holding on certain keys. For example, tap and hold I, O, U, E or C for a pop-up menu of available special characters. To choose one, simply slide your finger over it and release. Now, here's how to use them with a passcode. Tap Settings, General and then Passcode Lock. Move the Simple Passcode slider to the Off position. Tap Turn Passcode On and create a passcode, using the special characters as described above. Now you've got a lengthy passcode that includes non-English characters. Well done!

EVE Evolved: Top five tips for new EVE players
I often hear people say that EVE Online is a lot more fun to read about than actually play, and I've even caught myself saying it jokingly to friends and writing it in articles. But the truth is that amazing stories like the recent world record-breaking Bloodbath of B-R5RB are a hell of a lot better when you're a part of the action or have the first-hand experience to put the event into a wider context. All of EVE was impacted by that battle, with its effects rippling through the in-game markets and reshaping the political landscape of New Eden. But to read about it, you'd think the carnage in B-R5RB ended when $310,000 US worth of titans went up in smoke. EVE has seen a huge influx of fresh faces since that colossal battle at the end of January, with thousands of new characters being created and the Rookie Help channel bursting at the seams. Whether you've always been a closet fan of EVE who has finally been convinced to take the plunge or you just want to join the ranks of the warring alliances you've read so much about, starting out can be a daunting experience. The sheer amount of information there is out there to absorb and sort through is overwhelming, and not all of it is up to date. CCP released a great new player guide recently to help newcomers assimilate, but I've still received several emails asking for advice on getting started. In this week's EVE Evolved, I delve into the new-player experience with a 14-day free trial and reveal my top tips for starting out on the road to creating your own sandbox story.

Titanfall tips trailer tells you how to trounce terrifying Titans
The Titanfall beta begins February 14; you ready? No? Well, don't worry. The clash of Titans may start tomorrow, but you can release the kraken! get a head-start today by checking out the tips and tricks video above, courtesy of developer Respawn Entertainment. Tips include: keeping your movement vertical, using your robo-power armor titan remotely, and not getting shot by guns the size of Volkswagens. Study it alongside the tips videos from Microsoft and our own experience with the Titanfall beta, and you'll be a regular Titan guru before you even set foot inside the cockpit. [Image: EA]
.jpg.cf.jpg)
Titanfall tips videos prepare you for beta battle
Microsoft dished out two videos that offer players some tips on Titanfall ahead of the game's beta, which starts tomorrow. The first video glosses over the game's basic mech-like Titan functions and elaborate on ways players can use the Titans effectively within combat. Additionally, it provides a few pointers for the parkour-like locomotion elements in the game, such as hanging on walls by holding the left trigger. The second video, found after the break, tours the game's three modes and their rules. Titanfall is set to launch March 11 on Xbox One and PC with the Xbox 360 version following on March 25. We got an extended look at the game ourselves, and had plenty to say about it in our video preview. [Image: Electronic Arts]

Here's a quick way to send a file to a screen-shared desktop
I've been doing a lot of Mac development recently. This means I often need to screen share to my headless OS X Mountain Lion system for testing. This morning, I was updating my folderol app to add features for folder tagging. I had to make sure that those Mavericks-only features wouldn't show up when the app was run on 10.8. Normally, I mount the headless system as a foreign disk drive and then copy/drag to the drive using finder. But for whatever reason today, I thoughtlessly dragged the app directly to the shared desktop. And I'll be gobsmacked, but it worked. The file just transferred, and a new File Transfer window opened to show me that the process was successful: I honestly have no idea how long this feature has been around. For all I know it goes back to the OS X stone ages. [It does go back quite a ways... drag and drop file transfers using Apple Remote Desktop were introduced in v3 back in late 2006. –Ed.] But I also know that if it was a pleasant surprise to me, some of you out there will appreciate knowing about it too.

Does your iPhone really charge faster in Airplane mode?
A widely circulated iPhone tip would have you believe that your device will charge must faster in Airplane Mode. On the surface, this makes a whole lot of sense. After all, with GPS lying dormant and all of the wireless radios inside the device rendered temporarily inactive, your phone can take a break from things like searching for a cellular signal and work on recharging. Intrigued, and perpetually in need of a charge, I decided to check out this oft-cited iPhone lifehack for myself. Here's what I found using an iPhone 5s as my testing device with all charging being done via a wall socket. With Airplane Mode turned off, I was able to charge from 1 percent to 25 percent charge in 21 minutes. Reaching a 50 percent charge took 45 minutes. Getting to a 95 percent charge took one hour and 32 minutes. Not too bad. Now it was time to try it with Airplane Mode enabled. Needless to say, my expectations where high. With Airplane Mode activated, I was able to get to a 25 percent charge in 18 minutes and a 50 percent charge in about 43 minutes. I was able to get a 95 percent charge in one hour 29 minutes. So does Airplane Mode help you charge faster? Technically, sure, but the difference isn't exactly earth-shattering. Still, if you're pressed for time and need to charge up as quickly as possible, you might want to resort to Airplane Mode just to ensure that your device doesn't begin updating apps in the background or processing, say, a video sent to you via iMessage. Was this the most scientific of testing environments? Not quite. There is an argument to be had for the iPhone's battery strength indicator not being 100 percent accurate. To that end, a test from a completely dead iPhone to fully charged might have been a tad more instructive, but this should still provide a rough framework for what to expect when charging in a hurry.


