howto
Latest
Easy capitalization using iOS 8's predictive typing
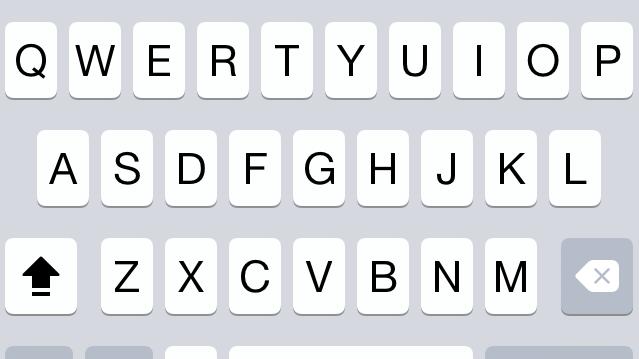
One of the features of iOS 8 that we weren't expecting to use on a day-to-day basis was predictive texting. Normally it's faster to just type out the words, but using predictive text -- especially with longer words -- is a simple joy we didn't know we needed until it was here. We've discovered a new little feature in the predictive texting function that some of you may find interesting: smart capitalization. Let's say that I forgot to capitalize the word "church" in the text below, and want to do that after the fact. To do this, I simply select the word in question by tapping it twice, tap the shift key, and select the proper spelling from the predictive typing menu. This replaces the normal cumbersome method to capitalize a word where you would need to hold down the cursor, move it until you can delete the first letter of the word, and then replace the letter with a capital letter you were looking for. Now say you want to make a word all upper case letters. The process of making a word all caps is just as simple as capitalizing only the first letter like I did earlier. Here, you simply tap shift twice once you've highlighted the word -- effectively activating the caps lock -- and predictive text offers up a number of fully-capitalized suggestions as a replacement. If you proofread and edit your texts after they're written, this trick could help you save some time in the long run. Enjoy.

How to create nested folders and completely hide apps in iOS 8
It's that time of the year again: Apple's latest mobile operating system is now available and there are already a couple of great ways to break it in the name of customization and productivity! Nested folders and hidden apps -- two of the most useful glitch-tweaks from iOS 7 -- are present and accounted for in iOS 8, and here's how to make them happen. Nested Folders Somehow, in patching up the bug that allowed nested folders in the earliest versions of iOS 7, Apple has allowed the trick to be pulled off with remarkable ease in iOS 8. Start with a folder you'd like to nest (or, place within another folder, if you're not a fan of brevity) and two additional apps. Highlight one of the loose apps so that you can create a folder by merging it with the other unfoldered app. This next part needs to be done quickly, so make sure you've had your morning coffee before attempting it: place the app you're already holding over the top of the other to prompt the creation of a new folder. As soon as the folder icon begins to form, drop the app you're holding and grab the folder you wish to nest. If you do this correctly, you'll be pushed into the new folder while still holding the folder you wish to nest. Simply drop the folder you're holding to place it within the newly-created folder. That's it! The icon badge will even carry through to the higher-level folder so you don't have to worry about missed notifications. Hiding Apps This trick had been around on iOS 7 in a variety of forms and it returns in iOS 8. It's useful for hiding apps you don't want someone to find on your phone, or simply to get rid of annoying and un-deletable system apps like Stocks and iBooks. Our friend, YouTuber Videosdebarraquito, demonstrates this trick in a handy video tutorial, and while it's fairly self-explanatory, I'll lay down the steps for you below. To start, you'll need a home screen full of apps, with least one folder on the home screen, and the app you wish to hide on a separate page. Highlight the app you want to hide and move it to a folder on the home screen, but don't let it go. Instead, move it back out of the folder and down near the dock. Once the folder screen disappears, the home screen will once again be full and if you drop the icon in the dock it will disappear entirely. Apps that you've hidden in this way are still on your phone and can be found by using the Spotlight search, but other than that, there's no way to stumble across them. Apps return to their former location after you've performed a restart, so keep that in mind.

How to patch OS X for the bash/Shellshock vulnerability
There's a big bad bash bug out in the Unix world called Shellshock, and it is pretty serious. Bash is a ubiquitous bit of software; a command interpreter, or "shell," that provides a basic text-on-a-green-screen interface to POSIX/UNIX and Unix-like systems. Bash is present on every Linux distribution, almost every UNIX system, many Android phones, thousands upon thousands of embedded OS versions on hardware devices -- and on every version of Mac OS X ever shipped. Like the recent Heartbleed vulnerability in OpenSSH, Shellshock has the potential to be calamitous; in fact, it could be quite a bit worse than Heartbleed, because in theory Shellshock could allow malefactors to run arbitrary commands on lots and lots of UNIX or Linux machines. If that sounds unpleasant, it is. Shellshock attacks could target several points of entry -- Git and Subversion clients, compromised DHCP servers, etc. -- but the most likely vector would be through the wildly popular Apache HTTP server, included on most UNIX or Linux distributions and on OS X. Mac users might breathe a little easier knowing that Apple removed the System Preference control for the Apache web server in the standard Mountain Lion and Mavericks OS X versions. Apache is still there under the hood, however; it's front and center in OS X Server, and you can easily turn it back on with the free Web Sharing control panel. If your Mac shipped with Mountain Lion or Mavericks (i.e. you bought it in the last two years), it's highly unlikely your Apache web server is turned on. It also probably got turned off if you upgraded to a current OS X edition, so if you didn't take steps to reactivate it, your potential attack surface for Shellshock is smaller than it would be otherwise. (Not sure if your Mac's web server is on or off? Try visiting http://localhost/ in your browser. No page available = off, anything else such as "It works!" = on.) The Vulnerability Summary for CVE–2014–6271 rates Shellshock as a "10," and there is no 11. You can read all about it if you want to learn more (I recommend Troy Hunt: Everything you need to know about the Shellshock Bash bug), but here I'm going to share a way to fix it on your Mac running OS X. As mentioned, the vulnerability is most concerning for Macs used as web servers on the Internet, but the security-minded average user may want to go ahead and patch anyway. This solution comes from Ask Different, one of my favorite Mac Q&A sites. Alex Blewitt (@alblue) wrote up a great answer to How do I recompile Bash to avoid Shellshock. He also wrote it up on his website, so full credit to him for the solution. (If the notion of recompiling a system utility is alien to you, breathe easy; we're going to go step by step.) First, you need to make sure that you have Apple's Xcode development environment installed (the command-line tools alone are not sufficient). If you don't have Xcode, you can grab it for free from the Mac App Store -- but be prepared to wait for a while, it's a 2.5 GB download. Once the App Store finishes installing it, you need to enable the command-line tools by agreeing to the licenses; open Terminal.app and type "sudo xcodebuild -license" followed by a return. You'll be prompted to review Xcode's licensing agreement, which you are welcome to read in its entirety if you have the time. Once the license agreement is done, you'll need my bash-fix script which you can download from GitHub, and you'll need to be logged into your Mac as an OS X administrator (if you're the only user of your Mac, your account is the administrator account). Once you have the bash-fix.sh script downloaded, make the script executable -- type chmod 755 and a space, then drag the downloaded script into the Terminal window, and hit return. Next step, run the script -- drag the bash-fix.sh into the Terminal window, and hit Return. The script will download the source to bash, patch it, compile it, install it, and replace the old instances of the bash and sh executables; it will prompt you for your password along the way, so keep an eye out for that. Apple will eventually issue an official fix for this problem (and these steps should not interfere with that in any way), but if you don't want to wait for Apple's fix, you can get started now. Unfortunately there is another bash vulnerability which, as of this writing, has not been patched. But it's better to fix one problem than zero problems, especially if you have a public Mac server somewhere. Michael Rose contributed to this post. Update: (26 Sep, 10:15 a.m.) If you are getting an error, be sure to run sudo xcodebuild -license and agree to the terms and conditions. Then re-run the script. -- Tj

How to easily add secure FileVault passcode to your Keychain
Since I have a terrible habit of losing things, I decided to encrypt my Verbatim "Tuff-N-Tiny" USB drive. This was a simple matter of control-clicking the drive name in Finder, choosing "Encrypt" and then setting an encryption password. I also decided to use 1Password to generate a nice, secure, long, random password: I copied that password from 1Password and pasted it into the password field in Finder, and made a note in the "hint" field that it is stored in 1Password: I clicked "Encrypt Disk" and Boom! done. I considered myself quite clever for being such a good practitioner of security practices... ...until I plugged the USB drive into another computer. As expected, the password prompt appeared. I switched over to 1Password, copied the password to the clipboard, and tried to paste it in to the prompt. OS X would not allow me to paste into the password field. I thought I would solve the problem by using Keyboard Maestro and have it simulate typing into the Secure Input password field, which is how I usually get around the "Can't Paste Here" problem. For some reason, it did not work, despite repeated attempts. Suddenly I felt extremely stupid for making such a long, random, hard-to-type password. I was definitely not looking forward to re-typing it on each Mac that I might want to use with the drive. A less... peculiar ... person would have just changed the password to something simpler. But I wanted to know if there was a way to use the secure, long, random password without having to type it all in manually. The drive can be mounted easily (and without requiring me to enter the password) on the Mac where it was first configured because the information is immediately stored in the Keychain. That gave me the hint I needed to figure out how to configure it on my other Macs. I went to the Keychain Access.app in /Applications/Utilities/ and searched for "Transport" (the name I had given the USB drive) and found this: Aha! Now that I knew the correct information to put in the Keychain, I went to my second Mac (but did not put the USB drive in yet), launched Keychain Access.app and chose File » New Password Item... from the menu. Put the name of the drive into the first two fields, and then put the password into the password field. Click Add. Then find the new entry in Keychain Access, and double-click on it. Change the "Kind" to "encrypted volume password" and copy the drive UUID to the "Where" field. Click Save Changes and quit Keychain Access.app. Pro Tip: If you forgot to copy the volume UUID from the first computer, you can get it from the System Information.app under Hardware » USB and then select the drive. You will see the UUID in the information window. Now you can plug in the USB drive, and when you do, you will see this prompt to allow access to the entry you created in keychain: Be sure to click "Always Allow" unless you want to be prompted every time. Whew! It might seem like a lot of steps, but it's pretty easy, and much easier than trying to type 8vphs/tEUX7FH'w9Td>tO]Qoq7ob6]W0+!BN_9J2o.Uh}jGz98 without making a mistake. Update 2014-10-07: I discovered two additional tidbits today which might come in handy for anyone else who comes across this page later on: If you are using this on OS X 10.7 (Lion), then you need to use "Encrypted Volume Password" instead of "encrypted volume password" The reason that my Keyboard Maestro "insert plain text by typing" macro did not work was because I use Option/Alt+V and if you keep the Option/Alt key held down, it changes the characters which are typed. When doing this via ScreenSharing (which is how I was doing it), it seems impossible to release the Option/Alt key fast enough to avoid corrupting the typed password. However, this can be easily worked-around within Keyboard Maestro itself: I simply added an option to my Keyboard Maestro macro to insert as plain text by typing when I select a Status Bar (aka menu bar) item, and when I use that instead of Option+V it works! Which, of course, means that you do not need to go through the much more complicated process of manually adding this to the Keychain Access.app. Live and learn.

How iOS 8 Safari makes it simple to view the desktop version of a mobile website
Safari in iOS 8 has a nifty -- and dare I say, amazing -- new feature which makes it much easier to a) add a site to your list of favorites and b) more easily access the desktop version of a mobile site. The latter is a godsend for websites whose mobile websites are more clunky and less functional than their desktop counterparts. Here's how it works. When you're on a webpage, simply tap the URL bar once to bring up Safari's "favorites" view. You should now be on a page that looks something like this. Next, simply swipe downwards from anywhere below the URL bar and two new options will appear: "Add to Favorites" and "Request Desktop site." Simple as pie. Thanks to Chris for the tip!

The official Ryder Cup 2014 app delivers live video coverage
The 2014 Ryder Cup gets underway this week with the actual matches scheduled for Friday through Sunday. The PGA of America just released Ryder Cup 2014, the official app of the competition. It is a free universal app that requires iOS 7.0 or later. Earlier I reviewed SportsFusion-the unofficial 2014 Ryder Cup news edition. The two apps offer a lot of similar information but since the PGA of America is the parent organization for the Ryder Cup matches you will find some items in its app not available to the SportsFusion app. Both apps contain photos, videos, scoring updates, news stories, and social media connections. You will find several differences too. For example in SportsFusion, all scoring comes from the official Ryder Cup web site and users are taken there to check scoring. In Ryder Cup 2014 the PGA posts scoring directly to the app so users do not leave. We won't know which system works best until the matches begin. For social media, Ryder Cup 2014 provides a listing of the official team accounts on Twitter and also FanChat from the various social media sites. SportsFusion doesn't deliver those posting to the app but does allow users to easily upload their comments to a variety of social media outlets. Also because of the direct connection to the PGA, Ryder Cup 2014 contains a lot more behind the scenes information on the European and USA team members and the Gleneagles golf course. Users will get bios and stats on the golfers and a hole by hole breakdown of the golf course including fly over videos with narration explaining the features and hazards on each hole. Any similar information on the SportsFusion app will have to come from the news stories included in the app but not from the app directly. I think the course information is especially helpful. Users get an aerial photo of the hole, distance and par information along with the flyover videos. That can add to your enjoyment and knowledge as you watch the matches on TV. That brings up another big advantage to Ryder Cup 2014. Again being the official app, users will find live video and audio once the matches begin. The app features streaming video from the golf course and audio from the radio broadcast of the event. Both are big pluses if you have other things to do on the weekend besides park in front of your TV. The SportsFusion app does have one area that I believe is an advantage. That app offers a compilation of news stories from a variety of web sources. Ryder Cup 2014's news listing come from just PGA.com and the Associated Press. So on the SportsFusion app you will get broader coverage of events leading up to the actual competition and the matches themselves. If live video is important to you I think Ryder Cup 2014 is a clear winner. However, I suggest you get and use both apps so you get the most complete coverage. They are both free and will only be useful through this week. Then you can delete both apps.

The iOS 8 Health app: What can you do with it today?
Note: At the time of this post Apple has acknowledged issues with HealthKit have delayed numerous third-party health apps. One of the big announcements out of WWDC 2014 was the iOS 8 Health app and the entire HealthKit framework. The framework is designed to allow third-party app and hardware vendors feed activity and health data into the Health app, which can then -- at some undetermined future time -- be used to communicate that information to your health care providers. Well, iOS 8 is available and the Health app is too, but there's not a lot you can actually do with it right now. Let's take a quick look at the app and how you can use it today. Health has four buttons at the bottom of the screen that demarcate the functionality of the app. First is Dashboard, which will be the repository for information on weight, activity, standing time, stairs climbed, and whatever else can be tracked by your fitness monitor or Apple Watch. The Dashboard is going to be awfully lonely until third parties actually get to add data to the Health Data repository, the second button on the app. One look at Health Data shows you all of the areas that are currently under consideration for storage on your iPhone -- body measurements (fat percentage, BMI, height, lean body mass, weight), fitness (active calories, cycling distance, flights climbed, NikeFuel, resting calories, steps, walking + running distance), "me" (birthdate, biological sex, and blood type), nutrition (biotin, caffeine, calcium, carbohydrates, chloride, chromium, copper, dietary calories, dietary cholesterol, fiber, folate... this list goes on forever), lab results (everything from Blood Alchohol Content to Peripheral Perfusion Index), sleep (interesting, since it's unknown if the Apple Watch is usable as a sleep monitor), and the ever-popular vital signs (blood pressure, body temperature, heart rate, and respiratory rate). Once you've entered data into any one of those hundreds of categories, you can view the numbers for the day, week, month or year. The third button is Sources, which identifies those apps or devices with associated apps that have actually requested permission to update your data. Finally, the one item that you can actually use right now is Medical ID. This can be a very useful tool for loved ones or emergency responders to use in case of a sudden illness or accident, as they do not need to know your device passcode or use your bloody fingertip on a Touch ID Home button to see the information. Instead, they can punch the Home button, swipe to the right to bring up the passcode screen, then tap Emergency. This function used to do one thing -- let others use your phone to call 911 in an emergency situation. Now there's a tiny red "Medical ID" link in the corner that can be tapped. I entered information into this that I feel comfortable having strangers look at in case of an emergency. This includes my blood type, whether or not I'm an organ donor, my weight, my height, existing medical conditions, allergies and reactions, medications I'm on, and emergency contact information. If you don't want that information to show up when your device is locked -- in other words, you don't want to give first responders a hand in saving your life -- you can tap a Show When Locked button to turn it off of the default. As someone who does a lot of traveling, I am personally looking forward to being able to carry more health data along with me wherever I may go. The Health app is here, let's just hope that developers start taking advantage of it.

iOS 8 is here! Read our complete guide to Apple's new mobile OS
Over the past several weeks, TUAW bloggers have been trying out all of the new features in iOS 8 to see how they work and how they'll make your mobile life easier. Now that iOS 8 is officially available, here's a list of all of our detailed write-ups of the new features. While you're waiting for iOS 8 to download and install on your favorite device, take some time to read through our guide to most of the top new features of the mobile operating system. We felt it was a much better idea to give you bite-sized and palatable chunks rather than a 21,000-word review of everything in the new OS. Feel free to bookmark this page for future reference, and be sure to share it with your iPhone-toting friends. We'll be adding more individual feature reviews shortly. Upgrading A list of which iPhones, iPods, and iPads are eligible to upgrade to iOS 8 PSA: Do not upgrade to iCloud Drive during iOS 8 installation PSA: iOS 8 is going to make your iPhone 4s a good bit slower Warning: Dropbox isn't playing well with iOS 8 Photos iOS 8 Photos app: Smart suggestions and searching iOS 8 Camera app: Smart Composition iOS 8 Camera app: Smart Adjustments iOS 8 Camera app: Time-Lapse iOS 8 Camera app: Photo filters and editing You have to delete your photos twice in iOS 8 Messages A new iOS 8 Messages app feature: Audio messages iOS 8 Messages app feature: Video messages iOS 8 Messages app feature: Sending and sharing your location Mail iOS 8 Mail: Drafts and notifications iOS 8 Mail: New swipe gestures General iOS 8's Favorites & Recents: A fast way to get in touch iOS 8: Hey Siri! Setting up two-step verification for Apple ID and iCloud security A look at iOS 8's new QuickType feature The iOS 8 Health app: What can you do with it today?

Setting up two-step verification for Apple ID and iCloud security
Since you're probably moving to iOS 8 soon -- if not as soon as possible after it goes live -- you might want to start thinking about security as well. In particular, Apple has recently enabled two-step verification for iCloud. What's two-step authentication? As Apple describes it on this web page, "Two-step verification is an additional security feature for your Apple ID that's designed to prevent anyone from accessing or using your account, even if they know your password." Considering the recent issues involving nude celebrity photos that were pulled from iCloud, it's great to see that Apple added one more level of security. Basically, two-step verification requires you to verify your identity using one of your devices before you can sign into My Apple ID to manage your account, sign in to iCloud on a new device or at iCloud.com, make an iTunes, iBooks or App Store purchase from a new device, or get Apple ID related support from Apple. I recently set up two-step verification for my Apple ID, and the process isn't that difficult. To begin with, sign into My Apple ID using your Apple ID and password. Once you're in, go to the Password & Security tab on the left side of the My Apple ID page and click it. Under two-step verification, select Get Started, and then follow the simple onscreen instructions. Note that this doesn't all happen in one day. You'll actually have to wait a few days for an email to arrive: Now what will happen is that each and every time you log in to make changes to your account, make a purchase, or connect from a new device, you'll have to verify your identity from one of your devices. This requires you to receive a 4-digit random code on one of your trusted devices that must be entered in to verify that you're coming in from that trusted device. Just yesterday, Apple sent out an update email to two-step authentication users letting them know that the service also protects iCloud. The email, seen below, also includes information about the requirement for app-specific passwords starting on October 1, 2014. That's a big deal. If you use iCloud to store data from any third party apps and you're using two-step verification, remember that you will need to get an app-specific password in order to make it work starting on October 1, 2014.

Be aware, be careful, be prepared for iCloud Drive
If you use iCloud: you need to be really, very, no-I-am-not-exaggerating, super careful when you upgrade to iOS 8. Otherwise you could break iCloud syncing to all of your Macs. I hope I have your attention. When you are setting up a new iOS 8 device, you will see a screen like this (image courtesy of Realmac Software): If you choose "Upgrade to iCloud Drive", then iCloud document syncing will stop working on your Macs unless you are using the Yosemite beta and the Mac app has been updated to use iCloud Disk. There is no way to "undo" the decision to move to iCloud drive, so you will have to wait until Yosemite is released (or join the beta) and the Mac app is updated. TUAW's advice is that you wait to upgrade to iCloud Drive until Yosemite is officially released. You can always upgrade to iCloud Drive later. You cannot "downgrade" from iCloud Drive back to regular document and data syncing. It is entirely likely that there will be bugs and glitches and problems with iCloud Drive at first. Unless you have a strong desire to be part of the ongoing testing of iCloud Drive, wait. Personally, I think iCloud Drive sounds great, but it is yet another one-point-oh release of syncing software from Apple, who does not have a very good track record in this arena. I'm in no rush to move over to it. Backup your iOS device to iTunes before you install. While I have your attention, let me make another suggestion: make a local backup of your iOS device before upgrading to iOS 8. A local backup or your device is the best chance you have to protect yourself in case something goes wrong. If you have pictures on your iOS device, I highly recommend that you connect it to your Mac, launch Image Capture.app and copy all of your pictures to your Mac hard drive. Yes, even if you use iCloud backup and/or Photo Stream. Why? Because I'd much rather you have two copies than none. Just in case. Belt and suspenders. Import them to a folder on your Desktop named something like "iPhone Pictures 2014–09–17" and if the upgrade goes off without a hitch you can just trash the folder. "But I use iCloud backup!" That's good! iCloud backup is great and convenient. I use it myself. However, the day of a new iOS release is the last day you want to be trying to restore your iOS device from an iCloud backup. Apple's servers are going to be slammed. You want a local, current backup you can use just in case. The good news is that you can easily make a manual backup in iTunes, even if you usually backup to iCloud: Be sure to encrypt the backup, which tells iTunes to include your various passwords in the backup. Note: if you haven't done a backup to iTunes recently, it might take awhile. I did a manual backup a day before iOS 8's arrival, and I'll update it while I'm waiting for iOS 8 to download. Image Credit: Nicolas Raymond created the awesome Crossing Road Grunge Sign - Welsh Dragon above. Used by permission.

iOS 8 Photos app: Smart suggestions and searching
Have you ever been frustrated searching for photos in iOS? It's not a lot of fun to manually flip through all your photos to find a certain one, especially if your device is laden with thousands of pictures. Well, the good folks at Apple have built a few new features into iOS 8 that are going to make your life a lot easier. With the new iOS Photos app searching and smart suggestions additions, you'll be able to find photos much faster and without a lot of flipping through your library. At the top of the latest incarnation of the iOS Photos app -- no matter what view you're currently in -- you'll see the familiar Spotlight magnifying glass button (circled in red in the screenshot above). Tap on that, and the first thing you'll see is what Apple calls "smart suggestions." This pulls your images into four primary collections right off the bat; Nearby, One Year Ago, Favorites, and Home. Tap on "Nearby", and Photos serves up a list of photos that were taken at nearby locations. One Year Ago gives you a range of photos from the year ago week, while Favorites displays all of those images that you've tagged as a favorite (by the way, that can now be done by tapping a heart button that appears below a photo you're viewing -- see image below). Home? Well, it shows a collection of all of the images that you've taken at the location that you call home. In that respect, it's going to have a bit of overlap with the images in "Nearby". Searching is really useful as well. Tap the search button and start typing in the name of a location, and immediately you'll start seeing results. The more you type, the more focused the search becomes. For example, I typed in the letters "Las" and immediately saw a bunch of entries for photos that were taken on a recent trip to Las Vegas: There are a lot more tips we've dug up on the new features in iOS 8, so be sure to take a look at our other feature breakouts and try out the time-saving and power tips once you've loaded the new operating system on Wednesday.

iOS 8's Favorites & Recents: A fast way to get in touch
In our countdown to September 17 -- the day iOS 8 will be released to the public -- we've been covering a lot of the features of the new mobile operating system. One of my personal favorites so far is "Favorites and Recents", a fast and easy way to get in touch with your friends and family from your iOS device. Let's take a look! Say you're in the midst of doing something on your iPhone or iPad, like creating a song or editing a photo. You decide that it would be a good idea to contact a friend to get some details on an upcoming party. Rather than dump all the way out of the app to get into Messages or maybe jump into Contacts to get an email address, all you need to do is double-tap your home button and you'll see all of those people you've recently contacted peering at you from the top of your screen in small circular buttons. If those people have a photo associated with their name, you'll see their actual face -- a great way of recognizing a person's button at a glance. Tap that button, and a myriad of little white buttons appear, providing one tap access to phone numbers (indicated by phone icons with the type of phone number -- home, work, etc... below them), messages (a voice balloon icon), FaceTime Video (a video camera icon) and FaceTime Audio (a phone icon with the word FaceTime beneath). But where are your favorites, those people who you've tagged by opening the Contacts app and tapping "Add to Favorites"? They're just a swipe to the right away. As with the Recents, tapping the image of one of your buddies will display all of those little white buttons for instant contact. Favorites and Recents in iOS 8 are just two ways that iOS 8 can save you time and make you more efficient. Be sure to check out our other iOS 8 feature articles before Wednesday.

iOS 8 Mail: Drafts and notifications
Here are a couple more cool new features that you can expect to see in iOS 8 Mail. iOS 8 will be available for download on Wednesday, September 17, so checking our series of iOS 8 new feature articles is a good way to get up to speed on what to expect. Have you ever been part way through writing an email and suddenly realized that you need to copy some text from another email? This happens to me all the time, and with iOS 7 and earlier versions, that meant that I had to stop writing, save an email as a draft, find the other email, copy the necessary text, then open the draft and paste it in. iOS 8 speeds up that process a lot. If you're writing an email and suddenly need to go search in the inbox for another email, just grab the top of the email and drag it to the bottom of your screen. The button bar at the bottom will move up just a bit, and the title of your draft appears at the bottom of the display (see image at the top of this post). Now go off and do what you need to do. When you need to get back to your draft, just tap that draft title at the bottom of the page and it takes over the screen again. The next tip is something that I've wanted for a long time -- notification that someone has responded to an email thread. There are a couple of ways to set up notification. First, you can just tap on the "flag" button at the bottom of an email that you're reading. A pop-up menu appears with several choices, one of which is "Notify Me...". Tap that item to select it, and the following button appears: Tapping that button sets up the notification that will arrive in Notification Center whenever someone responds t the thread. The other way to set up notification is to use one of the new swipe gestures covered in another iOS 8 feature post. When you swipe just a little to the left on a message in the Mail inbox, three buttons appear: More, Flag, and Trash. Tap More, and Notify Me... is one of the choices that you can select.

iOS 8 Mail: New swipe gestures
Hopefully you've been keeping track of our iOS 8 feature articles, which provide tips on how to make the most of Apple's latest version of its mobile operating system. iOS 8 will be available on Wednesday, September 17, so it's a good time to start learning about the features of the new OS. In this post, I'm taking a look at iOS 8 Mail and some new swipe gestures that make organization of your emails a lot easier. First up is swipe to right. What this does in your iOS 8 inbox is bring up a button to either mark an email as read (if it hasn't yet been read) or unread (if it has been read previously). You can see this gesture in action in the image at the top of this post. I often find myself reading an email and then marking it as unread so I'm sure I take action on it later. This swipe gesture is a fast way to do that. Next, swiping to the left partway across an email in the inbox is bring up three buttons: More, Flag, and Trash. Tapping More brings up a menu that can contain quite a few entries -- Reply All, Forward, Flag, Mark as Unread/Read, Move to Junk, Move Message..., Show Related Messages, and Notify Me.... That last selection on the menu is quite useful, as it will provide a notification whenever someone replies to that specific mail thread. Tapping the Flag button is similar to reading a message and tapping on the Flag button to set a flag on an email. The Trash button will show the number of messages you'll be throwing away if you tap on it, as you might be tossing all of the entries in an email thread into the trash. Finally, if you happen to swipe an email all the way to the left, it will be deleted immediately. While this can speed up deletion of emails in iOS 8, I found that I accidentally deleted some messages when I meant to flag them, so be careful.

Adam Christianson's great tip on how to type an Apple symbol in iOS
TUAW bloggers love writing up things that we know make life easier for our readers. Every once in a while, we see a tip on another site that makes us say "Why didn't I think of that?" That's the case with this wonderful tip posted yesterday by Adam Christianson (@maccast) over on The Mac Observer. For those of us who need the ability to type the Apple symbol -- -- on an iOS device, this tip is pure gold. I'm not going through all of the steps in the details that Adam did; you'll need to pop over to MacObserver.com to do that. But when you want to send your buddies some love or do some iPhone blogging about the watch, here's the condensed version of his tip: From a device with a real keyboard, send yourself an email or message with the Apple symbol in it. That's Option-Shift-K. If you're reading this post on your iOS device, just copy the . Open that email or message on the device you want to add to, then copy the symbol. On the device, open Settings > General > Keyboard > Shortcuts. Tap the + to add a new shortcut, paste the into the "Phrase" field, then type a shortcut into the "shortcut" field. Adam used a comma followed by the letters apl as his shortcut, and I found it worked really well since it's not something you'll ordinarily type. Now, whenever you type the shortcut, the will appear in its place. What was interesting is that the shortcut quickly appeared on my Macs, apparently through iCloud syncing. However, that syncing did not happen between my various iOS devices, so I had to physically add the shortcut to each device. All of those iOS devices are running iOS 8 betas, so it might be a bug. I'm looking forward to using Adam's shortcut on that new iPhone 6 Plus that should be showing up next Friday...

iPhone 6 or iPhone 6 Plus? That is the question. Here's an answer.
Remember those days when we were all trying to get the smallest possible cell phone? If you don't, you're probably young. That all went out the window with the introduction of the iPhone and its competitors, since fairly quickly we started seeing a trend towards larger screens. Now Apple has kept the screen size growth relatively slow in the past, but the two newest iPhones have suddenly undergone a growth spurt that rivals a teenager during puberty. If you decide to go with one of Apple's new phones, how do you know if it's going to fit your hands, your pants pockets, and your lifestyle? Never fear, TUAW's here with some answers. The best way to do this is to carry around a mock iPhone 6 or 6 Plus. The folks at WonderHowTo have made a pair of exact size templates that you can download (it's a PDF file), print, and then use as your pretend play-pal iPhone 6. Almost immediately after printing out the templates, I realized just how big these new phones really are compared to the iPhone 5s I carry around now: These templates have one problem -- they're thin. So I started the search for cardboard that would approximate the thickness of the iPhone 6 and 6 Plus (the 6 Plus is the thickest of the two at .28 inches). Turns out that's pretty hard to do, since most of the cardboard boxes I have were 1/8-inch thick at the most. Two layers would be required. With the help of Pippin the kitten (who inadvertently lent some of his sleek black fur to the "iPhone 6"), scissors, and tape, I quickly assembled my faux phones. The only problem was that they didn't have enough heft to feel like real iPhones. For the iPhone 6 , I needed to add about 5.47 ounces. This is where a box of coins I have sitting around came in handy ... until I realized that even quarters are pretty lightweight. 23 of them and a penny made the mock iPhone 6 Plus feel pretty real. My mockup ended up weighing about 6.2 ounces (an iPhone 6 Plus is 6.07 ounces) and was a bit thicker due to the quarters taped to the back, but I figured this would give me a better feel for the weight and size of the unit anyway. Since I'm probably going to go for the iPhone 6 Plus, I decided to stop digging through my stash of quarters and didn't add weight to the iPhone 6 mockup. My verdict? I think I can put up with the weight and size of the iPhone 6 Plus. It fits the pocket of my shorts (real men don't wear pants, amirite @jgamet?) nicely. My iPhone 5s currently wears a Mophie Juice Pack Helium that brings its weight up to 6.3 ounces -- a full .23 ounces more than an iPhone 6 Plus -- so the weight isn't going to be bad. How about holding the device? To be honest, although it looks much larger, I tend to use my iPhone two-handed anyway, except for making phone calls. Did I feel like I was holding a brick up to my head with the mockup? No -- I have fairly small hands and it fit nicely, and I think that the extra length of the iPhone 6 Plus is going to end up bringing the microphone closer to the mouth for better clarity. There are a lot of other factors to consider when deciding which of these phones to get. First, the iPhone 6 Plus is $100 more in each capacity than its smaller brethren. Next, if you're considering doing a lot of photography with the new device, you might want to opt for the optical image stabilization in the 6 Plus. Finally, if you're an old guy like me and your eyes aren't the best, I think you're going to love having the biggest screen possible. To end this post, I thought it would an interesting juxtaposition to take a photo of my mockup next to my Newton MessagePad 2100 and Mophie-enhanced iPhone 5s. Now there's a device that didn't even make phone calls, and it's much thicker and heavier. In the end, what iPhone you buy (or don't buy) is all your decision, but if the size and weight of the new phones has you concerned, I think making a similar mockup will set your mind at ease. Let me know what you made a mockup and what your feelings are about the bigger size and heavier weight. The comments are below.

How to tell if you're eligible for an iPhone 6 and how much you'll pay
For those of us in the tech blogging business, yesterday started up yet another round of the "should I or shouldn't I?" questions -- as in "Should I get a new iPhone 6 to replace my iPhone 5s that I bought last year, or wait?" The answer is that everyone can pretty much get a new phone if they really want one, it's just how much you'll have to pay for it or how long you'll have to wait to get it at the best price. With my particular case as an example, let's find out how to see just how much you'll have to pay or how long you'll need to wait. Here's my situation: I have a 32GB iPhone 5s (gold) in really good condition that I purchased last year at the launch. It's running on the AT&T network. Now I've already committed to Gazelle to sell them the phone for at least $275, so I have that "rebate" to consider. Shawn "Doc Rock" Boyd sent out a tweet yesterday with the codes that subscribers on the AT&T, Sprint, T-Mobile and Verizon networks can dial to get an immediate idea of their eligibility. Those codes are: AT&T: *639# Sprint: 1311 T-Mobile: #874 Verizon: #874 So, I dialed the AT&T number and within a few seconds received this text response: Great. So, they want me to switch to one of the AT&T Next 12 plans, which means that I pay an installment every month for my new phone... I needed more information, so the next thing to do was go to Apple's website, naturally. You'll want to go to the iPhone 6 "Buy" page. Down under section 3 "Choose A Carrier" you'll find a link for checking your eligibility with your carrier: Click that link, and you'll be asked to select your current wireless carrier. Note that T-Mobile isn't on the list since they provide unlocked phones at "full price" instead of at a carrier-subsidized price. So, upon clicking the AT&T button, I was asked to enter my wireless number, billing zip code, and the last four digits of my Social Security Number before clicking the big blue Check Eligibility button. While the results showed all available iPhones, I was just interested in the iPhone 6 and 6 Plus. Here's what they offered: Now, since I need to start writing reviews of iPhone cases and other accessories as soon as possible, I will be sitting at my computer in my underwear at 1 AM MDT on Friday morning anxiously trying to get my device ordered. That means that the nice $250 "discount" I could get for waiting until October 5, 2015 is not an option. If I decide to get the 64GB version of the iPhone 6 Plus for $649, that means I'll be getting the phone for essentially about $374 after my Gazelle rebate. That's painful, but not too bad. Alternatively, I supposed I could see what that AT&T Next 12 package is all about... That $42.45 per month price tag apparently also activates a discount of about $25 per month on certain wireless plans, which means I'd be spending about $17.45 per month for the phone. That honestly does look like the best possible deal since it essentially drops the cost of the phone down to a bit over $200 for one year, but I'm just not sure I want to change plans. This is just my case, and I'm sure that every TUAW reader out there has a slightly different set of circumstances that they'll need to take into account. How about you? Are you going to wait until your two-year contract is officially over, or get a new phone now and start a new contract? Will the iPhone 6 make you think about one of those AT&T Next or Verizon Edge plans? Tell us about your plans in the comments below.

Kill no-close-em Safari pages with AppleScript
I hate those pop-ups that hijack Safari even when I've enabled Settings > Security > Block Pop-up windows. Sure, I've edited my hosts file with Someonewhocare's updates to avoid them in the first place but even so, bad pages still happen. With a simple web search, you'll find a variety of conventional solutions for these situations. I prefer to close them automatically without interacting with pop-ups directly or force-quitting Safari. Here's where a simple AppleScript application can help. I use AppleScript to tell Safari to "close window 1", i.e. the frontmost window. This dismisses the problematic window on my behalf. I have this script saved to an application (File > Export > File Format > Application) and have docked it for easy access. When bad windows open, my solution is just a click away. Got another fix or an improvement to this one? Drop a note in the comments and share.

How to make a magnetic iPhone Gorillapod for $25
Ever been inspired to mount your Gorillapod tripod on a metal surface, but can't find a suitable grip? If you are a creative photographer, then you should check out this Instructable that shows you how to modify an existing Gorillapod by adding some magnetic feet. The detailed directions were created for the standard Gorillapod model that's compatible with a camera, but you can use the same steps to modify the iPhone version. The process is not too difficult, requiring you to drill a small hole in the bottom of the tripod feet, fill the hole with a magnet and use epoxy to hold everything in place. A final coating of sugru helps to give the feet a smooth, professional-looking finish. If you are a savvy shopper, the cost of each magnetic Gorillapod can be quite reasonable with each unit requiring about $25, though you may have to shell out $40 to get everything you need. You will need a $16 Gorillapod, a $12 pack of ten rare earth magnets (1/2" x 3/8) and about $12 in sugru. After using three magnets and a touch of the sugru, there will be plenty of supplies leftover for future projects. It's a clever and relatively inexpensive modification that'll provide a novel way to hold your iPhone while you position it to get a unique angle shot. [Via PetaPixel]

How to make OS X Mavericks re-run the Setup Assistant
I recently loaded OS X Mavericks on an old (2007) 20" iMac, and to check that everything was fine I ran the machine through the full Setup Assistant -- setting up a user with my name in the process. Rather than reloading Mavericks on the iMac to clean it off, I did a quick Google search on how to get Mavericks to re-run the Setup Assistant, and I was lucky to find this post by Mark Boszko where he referenced an earlier Mac OS X Hints post on the same topic. If you're command-line averse, you may wish to just reload OS X, but if you know your way around the CLI, here's how you clean up a Mac and get it to re-run the Setup Assistant: Boot into single-user mode by holding down Command-S on the keyboard during startup At the command-line prompt, type mount -uw / rm -R /Library/Preferences rm -R /Users/YOURUSERNAME/ <-- replace YOURUSERNAME with whatever your user name is cd /var/db/dslocal/nodes/Default ls (to list the files) Delete the file that is named after your user account with a .plist extension. For example, for user name "stevesande" you'd type rm stevesande.plist rm /private/var/db/.AppleSetupDone reboot At this point, OS X restarts and the Setup Assistant launches automatically, initially asking you what language you want to set up the Mac in. Since you're going through this entire dog-and-pony show to set up the Mac for a new user, you don't want to run Setup Assistant again, so just press Command-Q at the language screen, then click the Shut Down button. When the new owner boots up their shiny "new to them" Mac, they're greeted with the Setup Assistant just as if they'd picked up the device at their local Apple Store.


